Dill is truly a remarkable plant, bringing a distinctive and vibrant flavor to your culinary creations. With its delicate, feathery leaves and sturdy stems, it offers a unique taste that lies somewhere between celery and fennel, all encapsulated within a single herb.
When you encounter dill, you’ll be pleasantly surprised by its feathery leaves, which pack a powerful punch of flavor that complements various dishes, from sauces and salads to poultry-based recipes.
Growing dill at home is a delightful gardening endeavor, allowing you to experience the joy of cultivating this herb right in your own backyard. So, let’s delve into the world of dill by exploring the wonders of soil and planting.
Dill Varieties
Before embarking on the journey of planting dill, it’s beneficial to familiarize yourself with the various dill varieties available. Each variety possesses its own unique characteristics and qualities.
Let’s explore some of the commonly used dill varieties that are favored by culinary enthusiasts for their distinctive attributes.
1. Dukat and Superdukat Dill
If you’re considering growing dill in containers, the Dukat variety is an excellent choice. It is a compact dill plant that adapts well to container gardening. Dukat dill is particularly renowned for its versatility and is often used in various salad recipes, adding a delightful touch of flavor.
Another noteworthy dill variety is Superdukat. This cultivar is known for its high concentration of essential oils, which contribute to its aromatic and flavorful nature. The Superdukat variety is sought after for its potent qualities, making it a favorite among those seeking to enhance the taste of their dishes.
2. Mammoth and Long Island Mammoth Dill
When it comes to commercial use, two prominent dill varieties stand out: Mammoth and Long Island Mammoth. These varieties are highly favored due to their robust flavor profiles, whether it’s from their seeds or leaves.
Mammoth and Long Island Mammoth dills are known for their impressive size, surpassing the average dill plants in both height and overall stature. They can reach heights of up to five feet or 1.5 meters. These larger and taller dill varieties are particularly popular for pickling purposes, as they provide an excellent infusion of flavor and contribute to creating delicious pickled delights.
3. Fernleaf Dill
If you’re seeking a compact dill variety that thrives in indoor container gardens, look no further than Fernleaf. This delightful dill plant reaches a height of approximately 18 inches, making it an ideal choice for indoor cultivation.
Notably, Fernleaf dill offers versatility beyond its culinary applications. Its delicate and attractive appearance makes it a popular choice for floral arrangements and decorative purposes, adding a touch of charm to any setting. So, whether you’re looking to enhance your culinary creations or add a touch of natural beauty to your space, Fernleaf dill is a wonderful option to consider.
4. Bouquet Dill
Introducing the bouquet dill, another esteemed member of the commonly used dill varieties. This delightful dill variety is beloved for its distinct aroma, which emanates from both its leaves and seeds, making it a sought-after choice in the culinary world.
Bouquet dill is highly regarded for its fragrance, which adds a delightful touch to a wide range of culinary creations. Its leaves and seeds are often incorporated into various dishes, infusing them with a unique and captivating flavor. Whether you’re looking to elevate the taste of soups, stews, or even baked goods, bouquet dill is a fantastic option that will enhance your culinary endeavors with its aromatic charm.
Dill Cultivation
-
Soil Requirements
Dill thrives in soil that is well-draining and enriched with organic matter. When planting dill, it’s important to ensure that the soil has an optimal pH level, ranging from slightly acidic to neutral. Additionally, keep in mind that dill prefers temperatures between 60 and 70 degrees Fahrenheit for successful growth.
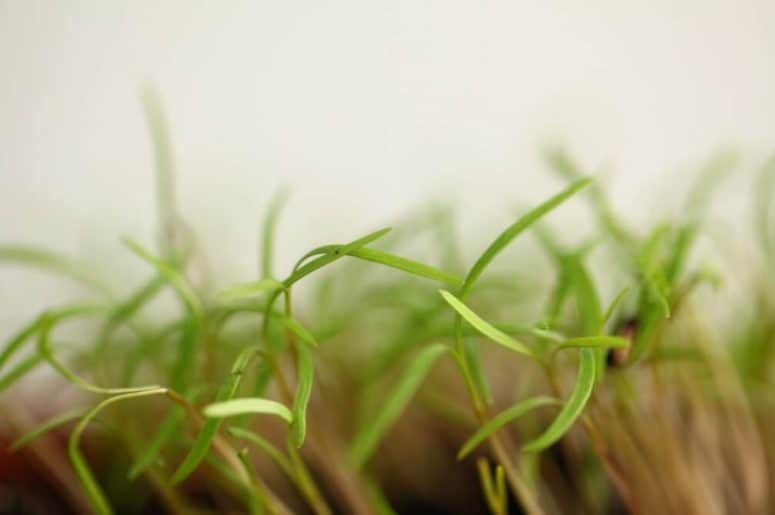
If you choose to start dill from seeds, maintaining the recommended temperature range will facilitate optimal germination. With the right conditions, you can expect to see the emergence of dill seedlings within 10 to 14 days.
-
Sun Requirements
Dill thrives when it receives ample sunlight, making full sun exposure the ideal condition for its growth. Providing your dill plant with 6 to 8 hours of morning sunlight is highly recommended.
While dill can tolerate partial shade, it’s important to note that the stems may not grow as sturdy in such conditions. To support the plant’s growth, you may need to use stakes or other means of providing additional support.
When growing dill in containers indoors, it becomes essential to regulate the amount of sunlight the plant receives. Ensure that the room where you place the dill pot allows for controlled sunlight exposure, allowing the plant to flourish while avoiding excessive or insufficient light conditions.
-
Hardiness
-
Water
Once dill seeds or plants are well-established, they exhibit good tolerance to drought conditions. It is crucial to provide appropriate watering, ensuring that your dill receives around one inch of water per week.
To water your dill, it is recommended to use a watering wand or drip irrigation lines to deliver water directly to the soil. It’s important to avoid overwatering, as with most herbs. Following the watering guidelines mentioned earlier will help prevent excessive moisture, which can lead to fungal diseases in your dill. Remember to refrain from overhead watering, as it increases the risk of fungal infections.
-
Fertilizer
Dill is known for its ability to thrive in less-than-ideal soil conditions. However, enriching the soil with well-composted manure can enhance the fragrance and flavor of both the dill seeds and leaves. This is due to the rich concentration of essential oils in dill.
Here’s a pro-tip: if you have access to comfrey tea, using it as an organic fertilizer can greatly benefit the growth of your dill. Applying comfrey tea to the soil provides additional nutrients and promotes the overall health of your dill plants.
-
Mulch
While not essential, mulching dill can be a beneficial practice. Applying mulch around your dill plants helps prevent the formation of a crust on the soil surface, which can repel water and hinder proper moisture absorption.
To ensure the best results, ensure that an adequate amount of mulch is applied to the soil. This will help maintain soil moisture levels, regulate temperature, and suppress weed growth, creating a more favorable environment for your dill plants to thrive.
-
Pruning
Pruning dill is a beneficial practice that can stimulate further growth in the plant. However, it’s important to be mindful of the specific dill variety you are growing and your desired harvest.
To prune dill, you can easily pinch back the flowers before they fully bloom. This prevents the risk of cross-pollination with other plants, such as cilantro, which could negatively affect the flavor and quality of both plants.
By practicing selective pruning, you can maintain the integrity of your dill plant and ensure a bountiful and flavorful harvest.
-
Division
One interesting method of cultivating dill at home is through root division. Dill plants have delicate and feathery leaves that sprout from their roots.
To propagate dill through root division, you can start with a cutting from an existing plant. Allow the cutting to develop roots over a period of two to three weeks, and then transplant it into its new growing location.
By utilizing root division, you can easily expand your dill garden and enjoy a continuous supply of fresh and flavorful dill leaves.
Best Methods to Grow Dill
Let me share with you a few effective techniques for growing dill in your home garden. These methods have been widely used and proven successful by many gardening enthusiasts.
Stem Cutting
Let me introduce you to one of the most popular and effective methods for growing dill – stem cutting. This method involves taking a cutting from an existing dill plant and using it to propagate a new plant.
Contrary to what some may believe, growing dill from cuttings is not as challenging as it seems. In fact, it’s a simple and straightforward process that anyone can do!
To start, carefully cut a portion of the dill plant and place it in water. The cutting will quickly develop roots, and once they have established, you can transplant it into a container or directly into the soil, similar to the process of division.
For the best results, ensure you select a high-quality dill plant for the cutting, as this will increase your chances of success in growing a healthy and thriving dill plant.
Growing from Seed
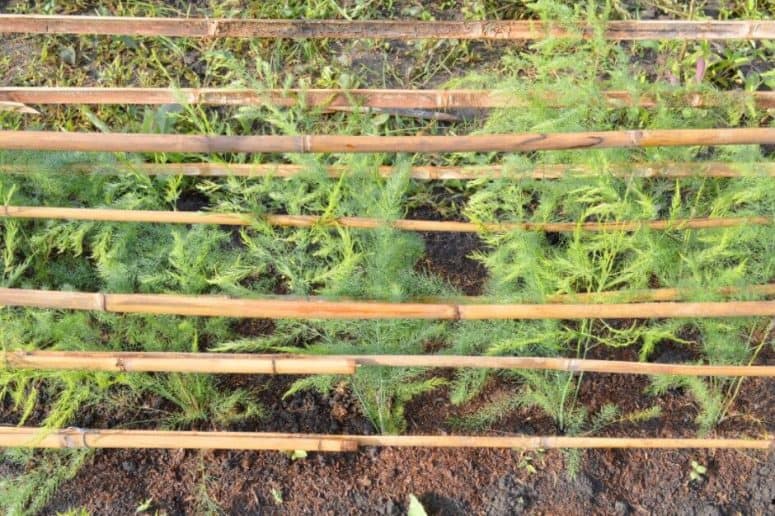
Absolutely, growing dill from seeds is a great option. When it comes to sowing the seeds, it’s best to do so in the garden during the months of April to May, once the risk of frost has passed.
When handling the seeds, keep in mind that they typically take about two weeks to germinate. It’s recommended to plant the seedlings at a depth of about 3/4 to an inch in the soil, and provide them with ample space by placing them 12 to 15 inches apart.
By following these guidelines, you’ll give your dill seeds the optimal conditions to sprout and grow into healthy and vibrant plants.
How to Care for Dill

Pests/Disease
Dill is generally a resilient herb that is not prone to serious diseases. By ensuring proper watering, soil conditions, and providing adequate light, you can maintain a healthy dill plant.
However, like any plant, dill may occasionally face insect-related challenges. Common pests that can affect dill include tomato hornworms and parsley caterpillars. If you notice these pests on your dill, there are options to address the issue.
One approach is to use targeted chemical sprays or insecticides that are safe for edible plants. Applying these treatments can help eliminate the pests and protect your dill. It’s important to carefully follow the instructions provided by the manufacturer when using any chemical products.
In some cases, certain caterpillars may not pose a significant threat and might move on naturally. Nonetheless, it’s crucial to maintain a vigilant approach to caring for your dill and promptly address any issues that arise to ensure its overall well-being.
Propagating Dill
Dill is a wonderfully low-maintenance herb to grow because it readily self-sows. As an annual plant, it completes its life cycle within a year, and if you plant dill in early spring, you can expect to obtain seeds during the first year.
The self-sowing nature of dill means that once it begins to flower and produce seeds, it will scatter them around its growing area. These seeds can then germinate and grow into new dill plants in subsequent seasons, allowing for a continuous cycle of growth and harvest.
By allowing dill to go to seed and self-sow, you can ensure a fresh supply of dill in your garden year after year. This process adds a sense of natural sustainability to dill cultivation and makes it an even more rewarding herb to grow.
Harvesting Dill
It’s time to embark on a delightful dill harvesting adventure! When your dill plants have grown to a height of at least 8 inches, it’s the perfect moment to harvest them. Grab a pair of scissors or snips and carefully cut the dill stems just above the soil level. Remember to harvest your dill before it bolts, which typically occurs around 70 days after sowing the seeds.
If you’re interested in harvesting dill seeds for future use, look for mature flowers on some of your plants. Once these flowers have fully developed, gently pluck them and hang them upside down. Place a plastic or container beneath them to catch the falling seeds. Over time, the seeds will naturally detach from the flowers and collect in the container, ready for you to enjoy or save for future planting or culinary use. Happy harvesting!
Storing Dill
It’s time to store and preserve our precious dill! There are various methods you can choose from to keep your dill fresh and flavorful. If you prefer refrigeration, take the dill leaves or stems and fold them gently in a damp towel. Place them in a plastic bag to maintain their crispness and store them in the refrigerator.
Another option is freezing your dill. For the best flavor, freeze the dill immediately after harvesting. You can freeze it as whole sprigs or chop it finely before placing it in a freezer-safe container or bag. Alternatively, you can infuse the dill in butter or vinegar and freeze it for added flavor variations.
Drying dill seeds is also a popular choice. Simply hang the harvested seed heads upside down in a paper bag to allow them to dry naturally. Once dried, transfer the seeds to an airtight container for long-term storage.
Choose the storage method that suits your preferences and culinary needs. Whether refrigerated, frozen, or dried, your well-preserved dill will continue to bring delightful flavors to your dishes for months to come.