Owning a backyard can be a true blessing, and for many, it serves as the ideal spot for hosting gatherings. If you often extend invitations to friends and guests, why not transform this outdoor space into an even more captivating haven?
A fantastic addition to consider is a fire pit. As summer approaches, picture yourself and your guests seated comfortably in your backyard, basking in the warm and inviting glow of your very own fire pit.
If you find yourself eager to create one but are in need of inspiration, fret not! Here, we present some of the finest DIY fire pit ideas for your backyard.
DIY Gas Fire Pit
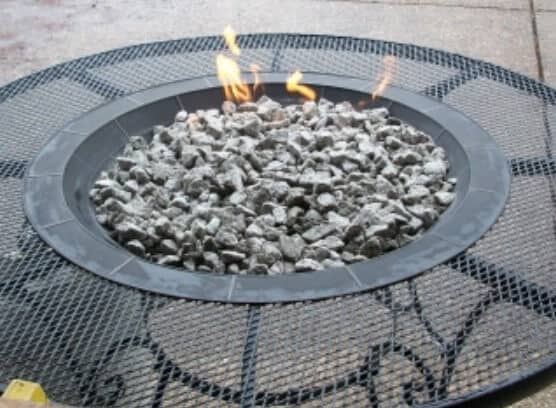
If you happen to own a circular patio table, consider the convenience of a gas fire pit to transform it into an ideal gathering spot for your family. The process of creating this inviting space is surprisingly straightforward.
To begin, simply bore a hole in the center of the table. Next, fashion a flat bar into a circular shape and give it a coat of paint. Lastly, assemble the necessary supplies, including brass, copper, and propane.
Enhance the appeal of this fire pit by encircling it with petite benches. Just two or three of them will suffice to complete the cozy setup.
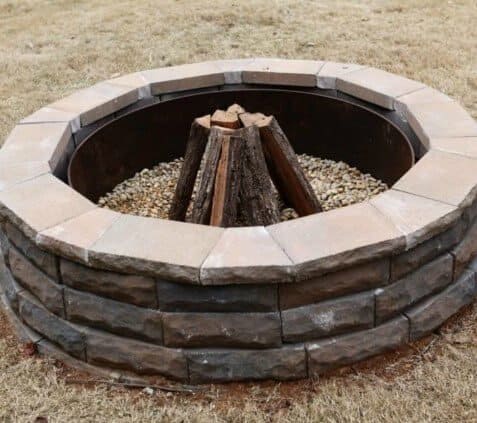
DIY Concrete Table Fire Pit
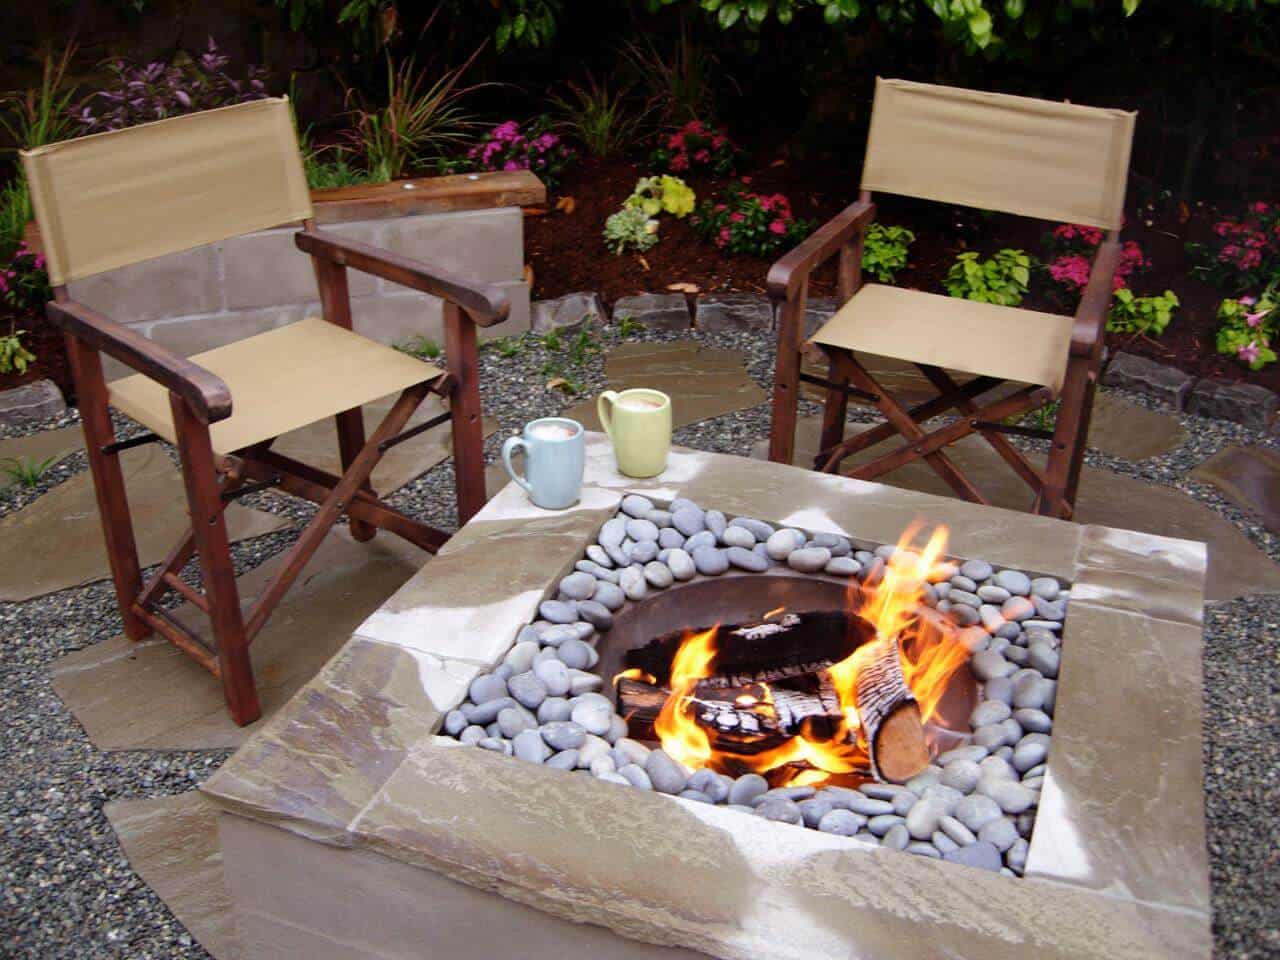
Opting for a long-lasting fire pit is a wise choice, as it ensures extended enjoyment. In this regard, a concrete fire pit emerges as the optimal solution. However, establishing a solid foundation is imperative for its longevity.
To commence construction, it’s essential to verify that you’ve added sand or gravel to achieve a level surface. Following this, you can craft an internal form with your preferred shape before pouring the concrete.
Once the concrete has set, you can introduce gravel and place a substantial bowl in the center. To enhance its aesthetic appeal, consider adorning the surroundings with a selection of exquisite rocks, completing your durable and enduring fire pit.
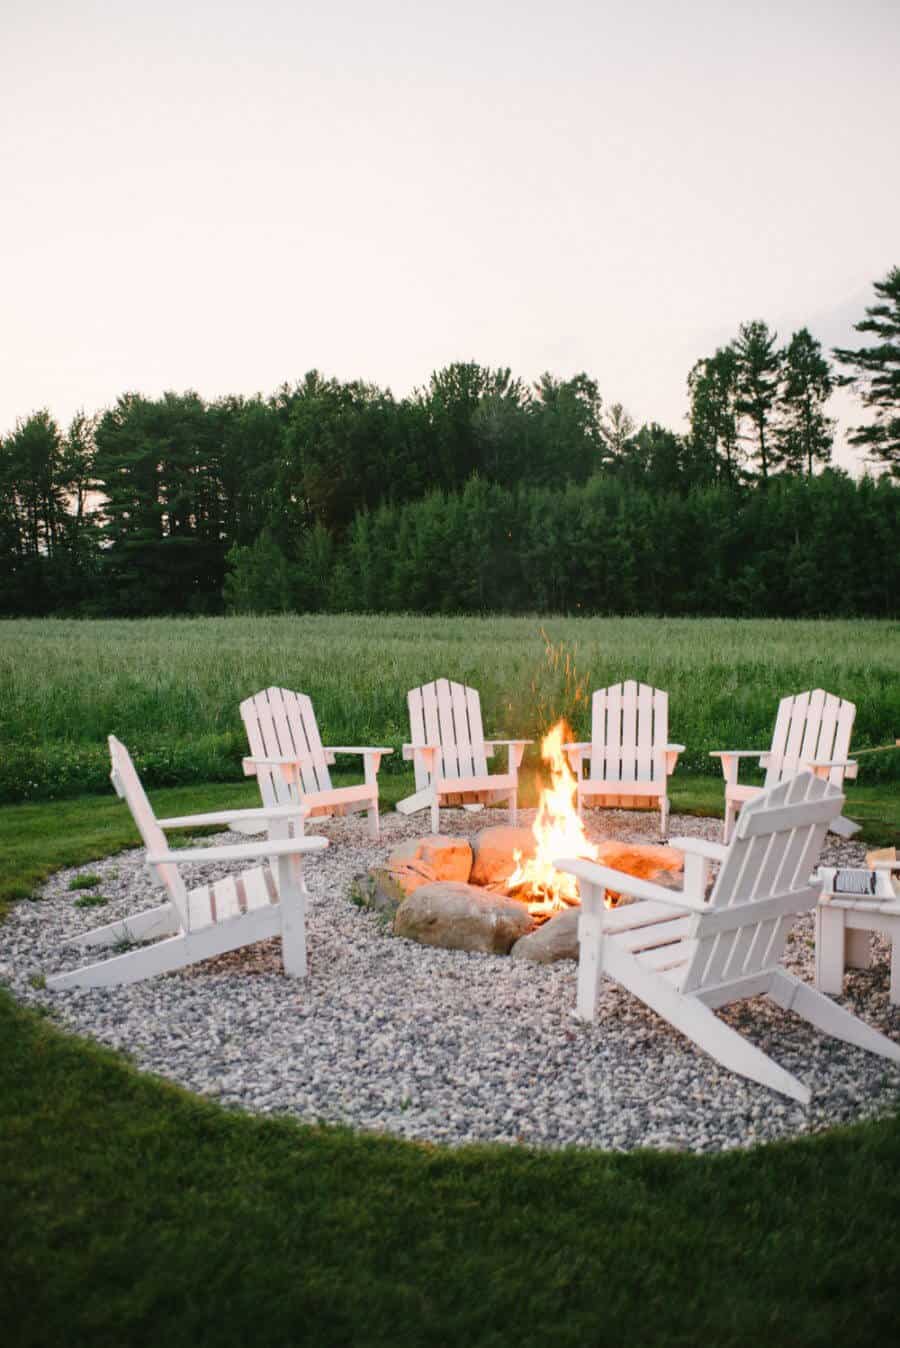
DIY Family Fire Pit
Gathering with your family in the backyard at night, particularly when you have young children, can create some of the most cherished moments. It’s an opportunity for campfires and all sorts of adventurous activities, and a fire pit can be the centerpiece of these gatherings.
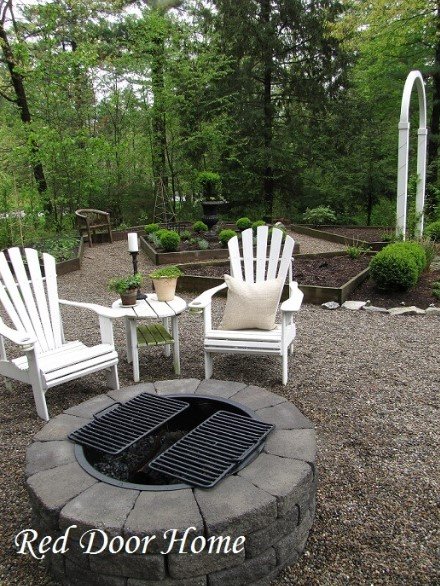
For those inclined towards a permanent fixture, a brick-built fire pit is an ideal choice. The construction process is similar to that of a conventional fire pit, with the key being a robust foundation.
When it comes to igniting the flames, you can opt for charcoal, wood, or any preferred fuel source. To complete the family-friendly atmosphere, consider adding comfortable benches where your loved ones can gather around the fire pit and create lasting memories.
DIY Fire Pit with Grill
A fire pit serves a dual purpose, extending beyond providing warmth. It can also double as a barbecue station, allowing you to sizzle up delectable meats and your favorite foods.
Crafting this multifunctional fire pit requires either bricks or substantial stones. The specific shape and size can be tailored to your preferences, but it’s crucial to ensure it’s capacious enough for your grilling needs.
For added convenience, consider making the grill a permanent fixture by welding it securely onto one of the fire pit’s corners. This way, whenever you’re ready to grill up a savory feast, you can effortlessly place your food directly on the grill without any hassle.
Fire Pit with Swing Set
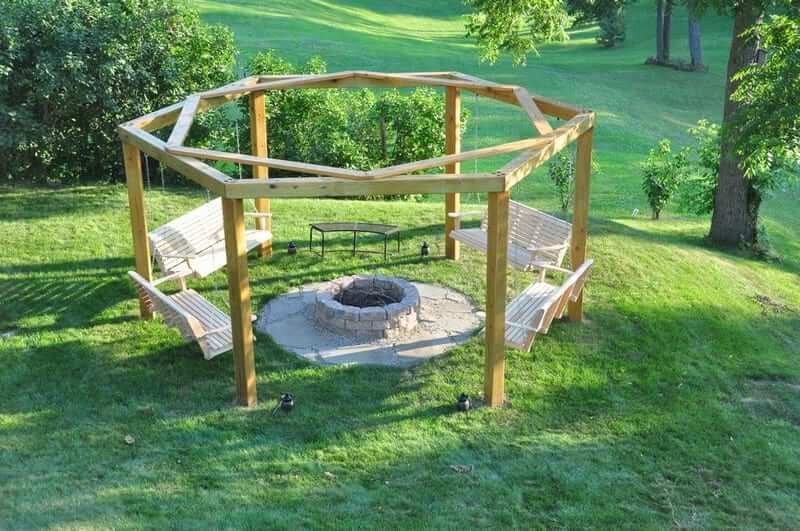
If you’ve already got a fire pit nestled in your backyard but yearn to elevate its ambiance, consider enhancing the surrounding area. One fantastic addition is a swing set positioned near your fire pit.
No need for a complete overhaul; you merely have to construct the swing set. Start by forming a sturdy hexagonal frame for the top and erect six robust pillars around it.
Ensure these supports are robust and dependable. For the swings themselves, opt for legless benches that you can suspend from the frame. You have the creative liberty to either paint them in vibrant hues or let their natural wood color shine through, adding a touch of rustic charm to your outdoor space.
DIY Stacked Stone Fire Pit
Have you been yearning for those cherished bonfire moments with your friends? Well, you can recreate those memories right in your backyard by crafting a stacked stone fire pit. To get started, the first step is to determine the size of the fire pit you desire.
As long as it doesn’t engulf more than half of your backyard space, you’re good to go. Next, construct the fire pit in a circular shape using stacked stones, but make sure to leave the outer side open.
This vacant space is reserved for the firewood, allowing you to relish the atmosphere reminiscent of a classic bonfire gathering.
DIY Mini Fire Pit

Don’t fret if your backyard space is limited. You can create a petite fire pit using everyday items found around your home, such as a terracotta pot and a flower pot.
Additionally, you’ll need a wick and a small bottle filled with oil to serve as the source of the flame. Ensure the bottle isn’t larger than the pot but has enough space for the wick.
For added charm, consider embellishing it with attractive stones or glass. This project is incredibly straightforward, unique, and space-saving. You can easily stow it away when it’s not in use.
DIY Tabletop Fire Pit
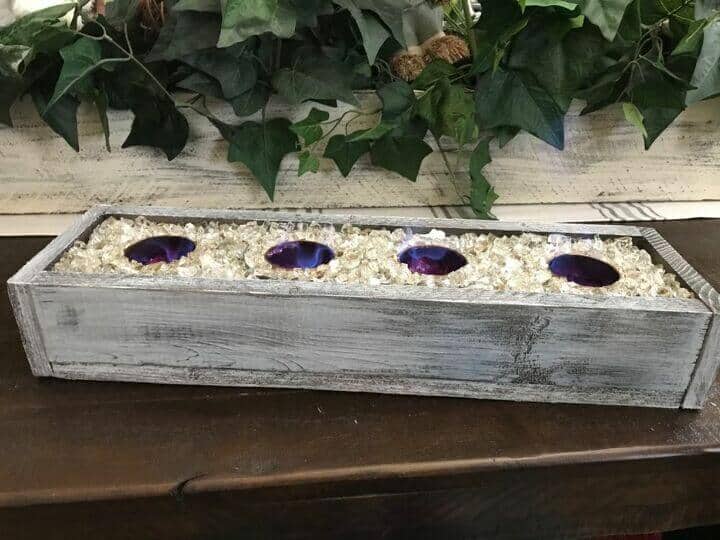
Having no backyard and limited space should never deter you from fulfilling your dream of having a fire pit.
Consider a tabletop fire pit as the perfect solution for those seeking a super compact fire pit that won’t occupy too much room. Gather some fire glass, wood, nails, and gel fuel.
Begin by cutting the wood into four pieces and securely nailing them together. To enhance its appeal, give it a coat of paint and ensure it dries completely.
Place the gel fuel inside, leaving some space between them. Finally, break the glass into pieces and scatter it around the gel fuel inside the box. Your miniature fire pit is ready to illuminate your space.
DIY Square Stone Fire Pit
Constructing a long-lasting fire pit typically involves using cement and jackstones to ensure its durability.
But, what if you want to build one without these materials? It’s entirely possible using sturdy stones, stacked neatly. In the absence of cement, ensure you opt for square-shaped stones.
All you need are two stacks of stones, topped with another stack of different stones. Voila! Your fire pit is now ready to be filled with firewood.
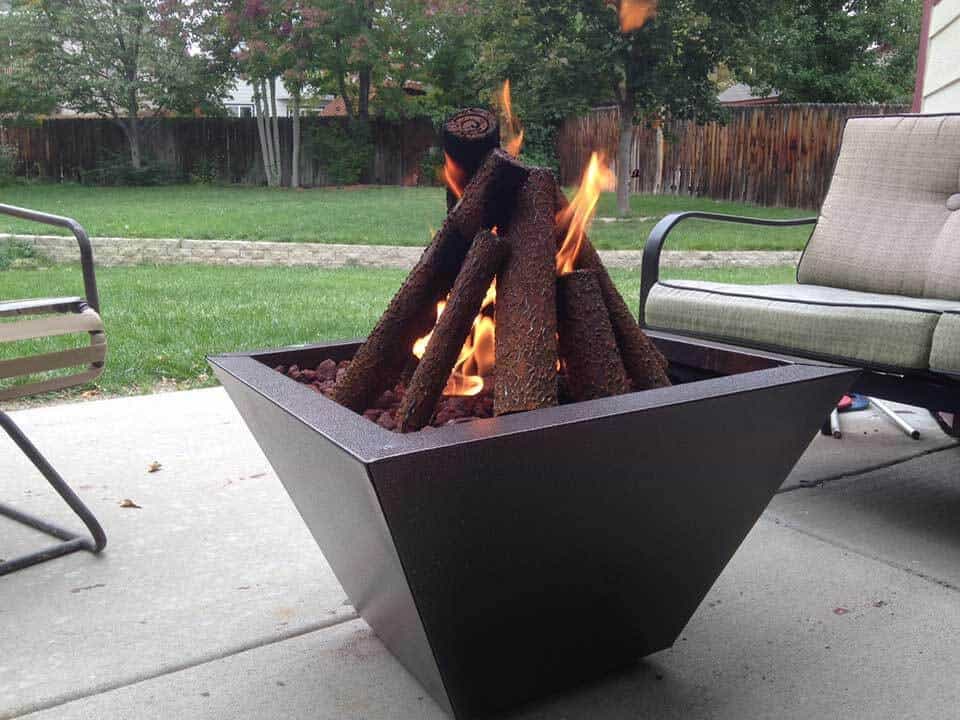
DIY Metal Sheet Fire Pit
If you’re looking for the easiest way to create a fire pit without the hassle of a permanent structure, consider making one from a metal sheet.
Obtaining a metal sheet and molding it into a square, circle, or even a hexagon shape is all it takes.
Since it doesn’t come with a built-in base, ensure it’s not placed directly on the grass. A quick solution is to dig a shallow pit and position the fire pit inside.
Now, add some firewood, and you’re all set! Your nighttime stargazing experience just got cozier with this simple setup.
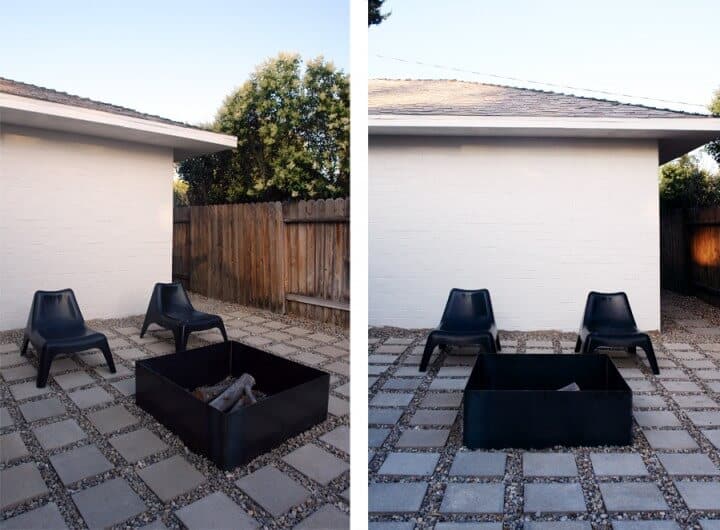
DIY Fire Pit from Cinderblocks
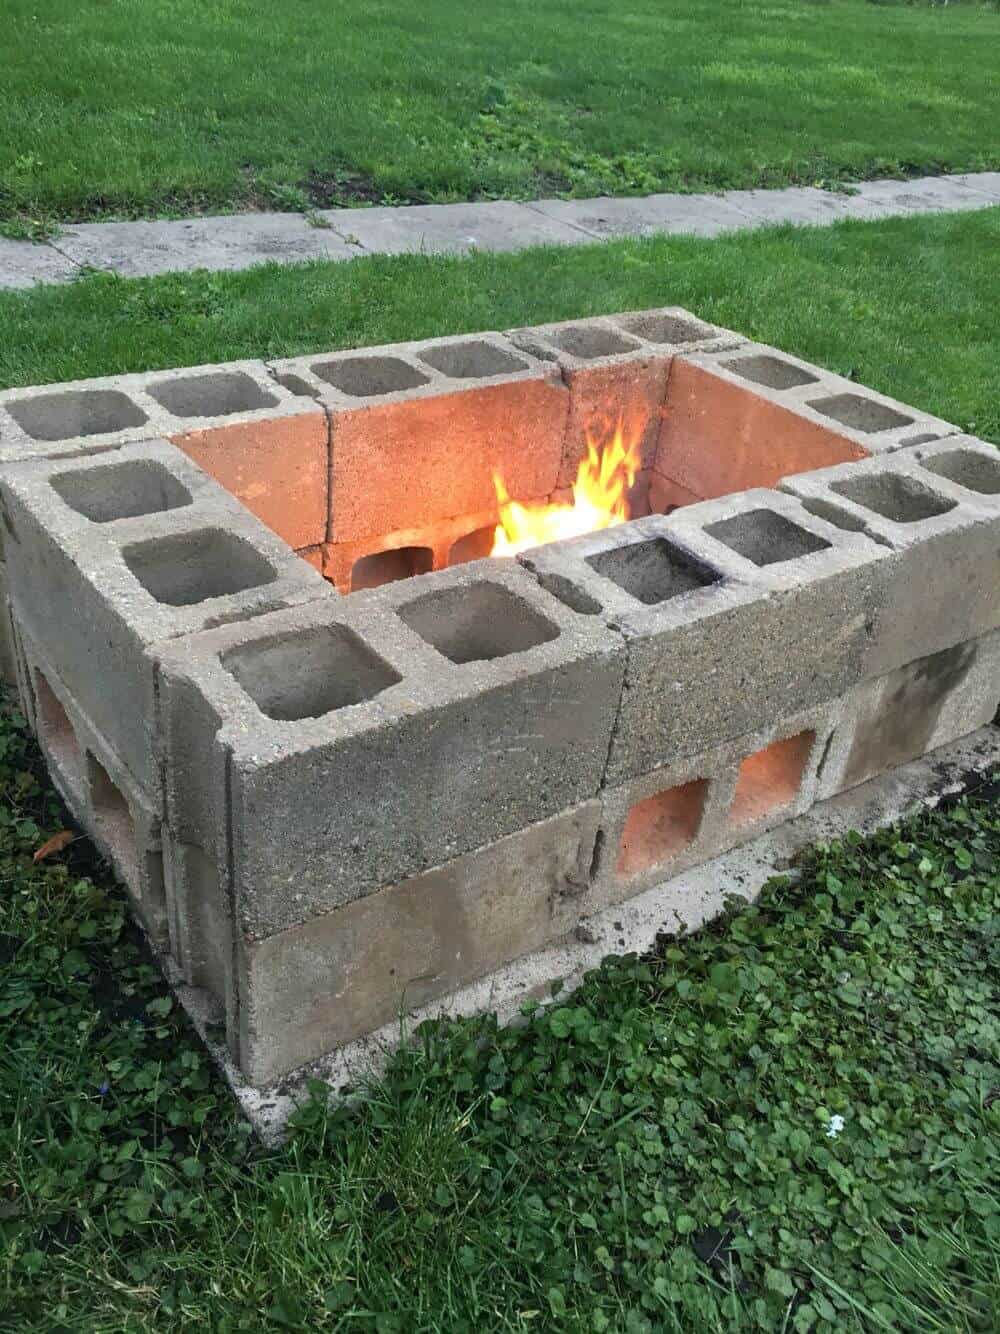
Do you happen to have any old cinder blocks lying around your property?
Hold on to them! They can be repurposed into a functional fire pit.
There’s no need to invest in new materials for this project. Simply select the used cinder blocks that are still in good condition and arrange them in a circular or square shape.
However, ensure that the fire pit’s base is free of grass. If you prefer, you can create a separate base and then stack the cinder blocks on top. The result will be quite impressive even without additional embellishments.
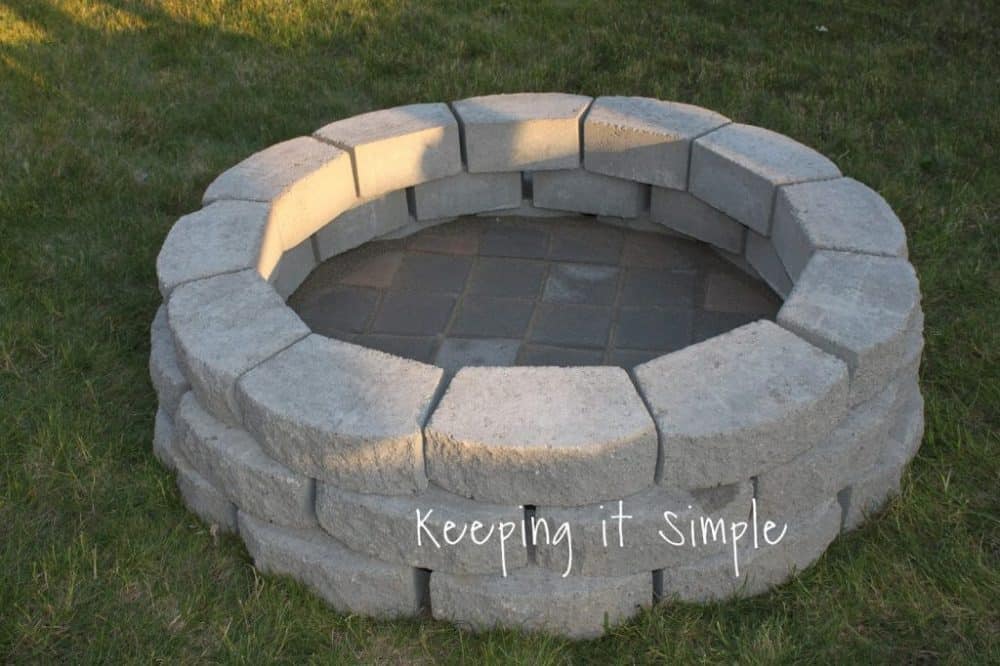
DIY In-Ground Fire Pit from Stacked Bricks
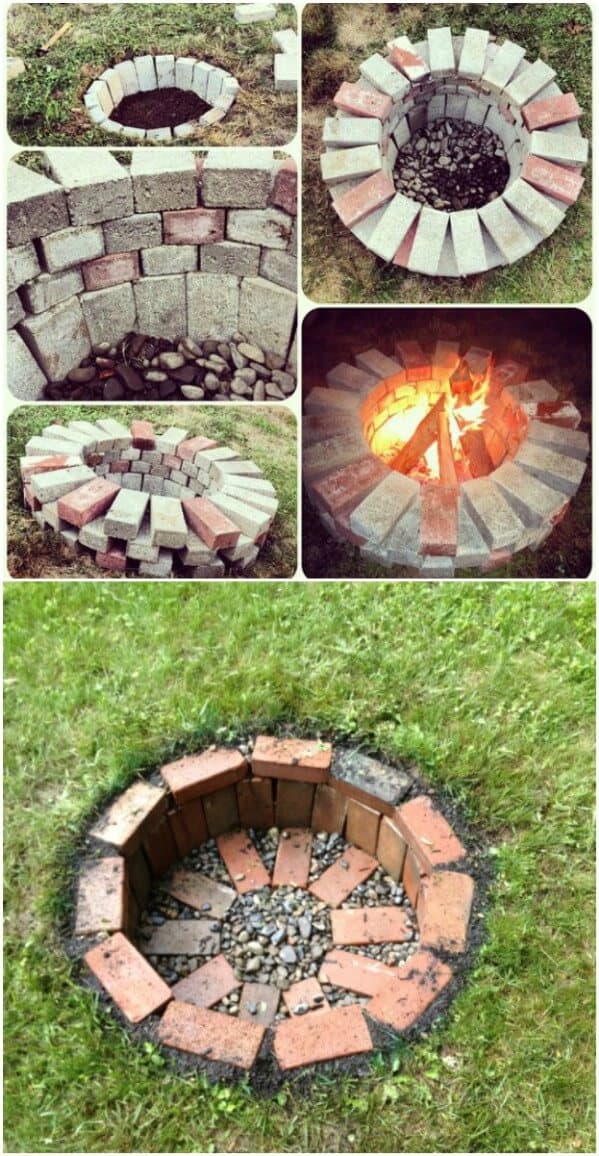
In addition to using cinder blocks, bricks can also serve as an excellent material for constructing a fire pit. To get started, prepare the ground by digging a circle or square area to a depth of 10 to 20 cm.
Next, arrange the bricks vertically in a standing position and encircle the designated area with these bricks, creating the sides of your fire pit.
For added aesthetics, consider incorporating small stones into the design. This will enhance the overall appearance of your fire pit.
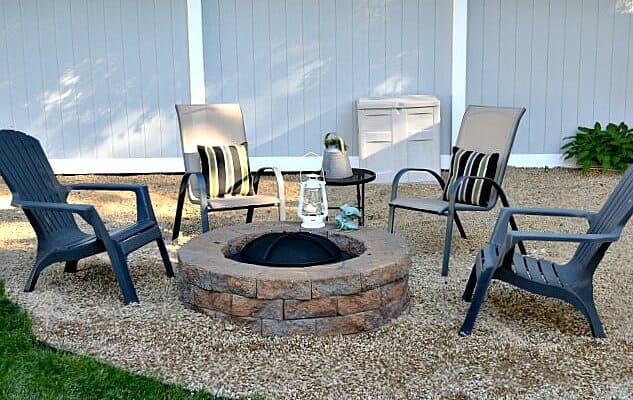
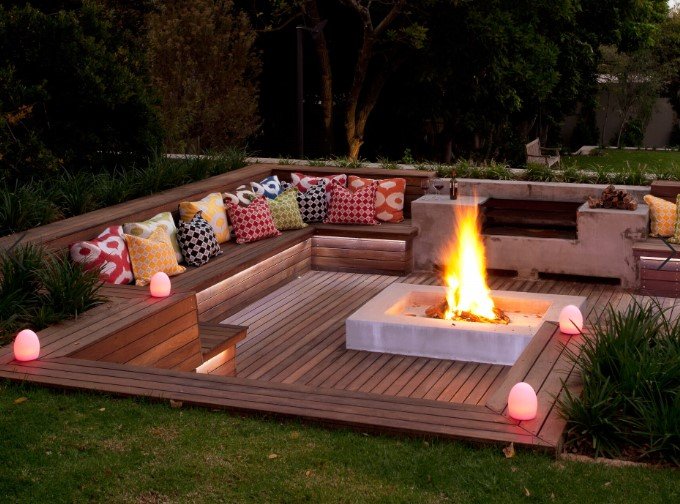
Backyard Fire Pit with Bench

Creating the ideal fire pit for your home offers various possibilities. Preferences differ, with some favoring the versatility of a portable fire pit, while others opt for a more permanent installation.
If you have ample backyard space and frequently engage in outdoor activities, a permanent fire pit accompanied by a semicircular bench makes for an excellent choice.
Begin by selecting a corner in your backyard to construct the semicircular bench.
For the foundation, employ stones that will be arranged to form the perimeter of both the bench and the fire pit. The bench takes on a semicircular shape, while the fire pit occupies a full circular arrangement at its center.
Remember to reserve a central space within the larger circle to serve as a dedicated area for storing firewood.
Furthermore, you can utilize the area beneath the bench as a convenient storage space for your wood supply.
DIY Concrete Fire Pit
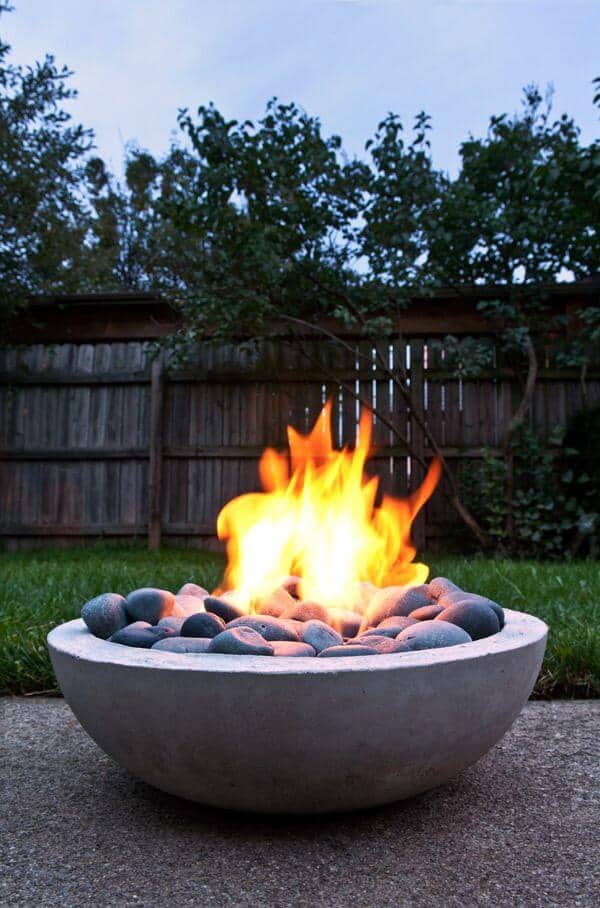
Gather your materials, which include mixing concrete, a large bowl, a smaller bowl, a grill grate, vegetable oil, small decorative rocks, and gel fuel.
Begin by applying a generous coating of vegetable oil to the interior of the large bowl.
Next, carefully introduce the mixing concrete into the oiled bowl, ensuring you shape it to your desired form.
While the concrete is still in its drying phase, gently nestle the smaller bowl (with its outer surface also oiled) into the larger one.
To keep it securely in place, you can add some weight by positioning a few rocks on top of it. Once the concrete has fully dried, carefully break the larger bowl to release the smaller one.
Now, you can place the gel fuel for the fire pit within the concrete structure, and top it with the grill grate and decorative rocks. Your DIY fire pit is ready for use.
DIY Fire Pit from Old Washing Machine Tub
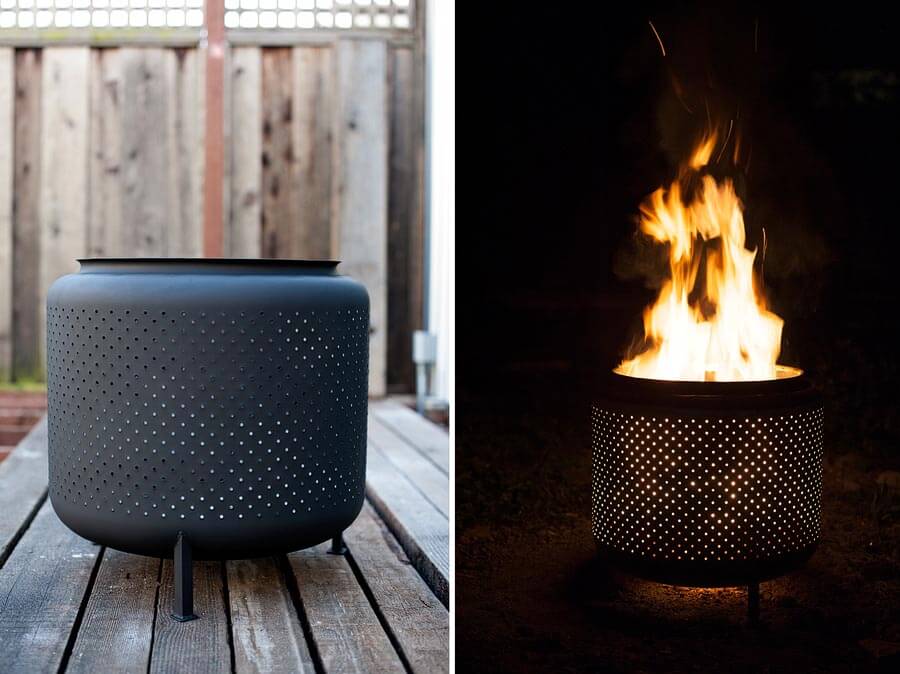
Have you ever wondered what to do with a malfunctioning washing machine? Naturally, most people would dispose of it, given that it no longer serves its intended purpose.
But wait—before you consider it entirely useless, think again! You don’t have to toss out all of its components. Specifically, the tube inside can be repurposed into a stunning fire pit. If the tube’s appearance isn’t quite up to par, a fresh coat of paint can work wonders.
Prior to transforming it, be sure to give the tube a thorough cleaning, leaving no trace of dust or stains. Once prepared, position the tube in your backyard and ignite a fire within it. This repurposed washing machine part can add a unique touch to your next bonfire gathering.
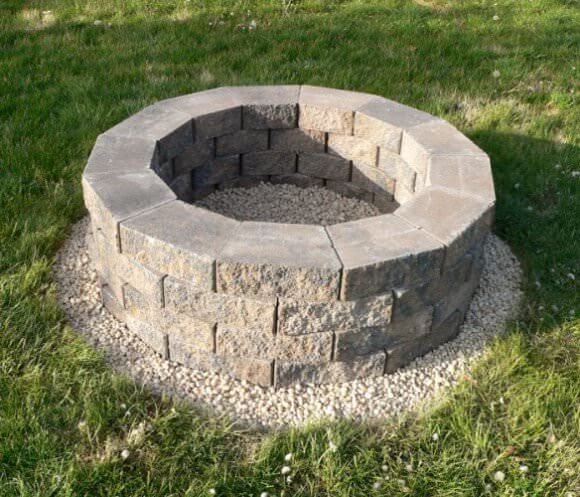
Simple DIY Fire Pit Idea
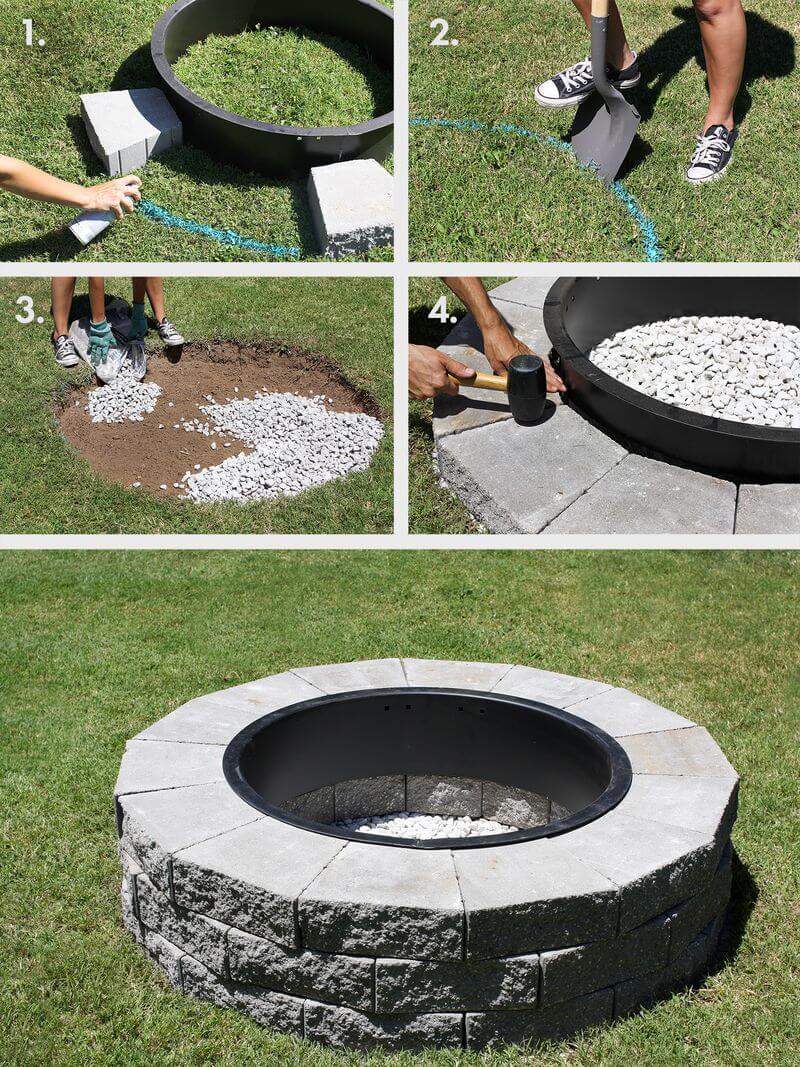
Creating a fire pit is surprisingly straightforward. You’ll require a few essential materials, such as a metal ring, concrete stones, adhesive, colored spray paint, and excavation tools.
Begin by measuring the dimensions of the area designated for your fire pit within your landscape.
With all the necessary items ready, position the metal ring atop the prepared ground.
Arrange three to four concrete stones on each side of the metal ring and outline their placement using colored spray paint.
Once marked, proceed to stack the concrete stones around the perimeter, employing adhesive for a secure bond. As a final touch, fill the fire pit with small stones, and it’s now prepared for your bonfire gatherings.
DIY Fire Pit from Earthenware
Small Homemade Fire Pit
In-Ground Fire Pit
Begin by excavating the ground, creating a deeper recess in the landscape. Proceed to construct a sturdy foundation using durable materials, enclosing it with wooden boards.
Following this, craft a concrete fire pit in your desired shape and position it at the center. While this undertaking demands more time, space, and expense, the end result is exceptionally gratifying. You’ll have a supremely comfortable nook within your home, and moments spent with friends will become even more unforgettable.
Outdoor Cozy Fire Pit
In essence, constructing a fireplace doesn’t require an extensive array of materials. Start by excavating the location where you intend to create it, and gather whatever supplies you have on hand.
For decorative touches, small stones can be employed, while large rocks serve as the core of your fire pit. Arrange some cozy benches for seating.
Once the designated area has been dug out, spread a layer of pebbles evenly to ensure a level surface. Next, position the substantial stones at the center to form the fire pit.
Finally, arrange your comfiest benches around it, completing your DIY fireplace setup.
Don’t forget to prepare the firewoods and get your bonfire tonight!
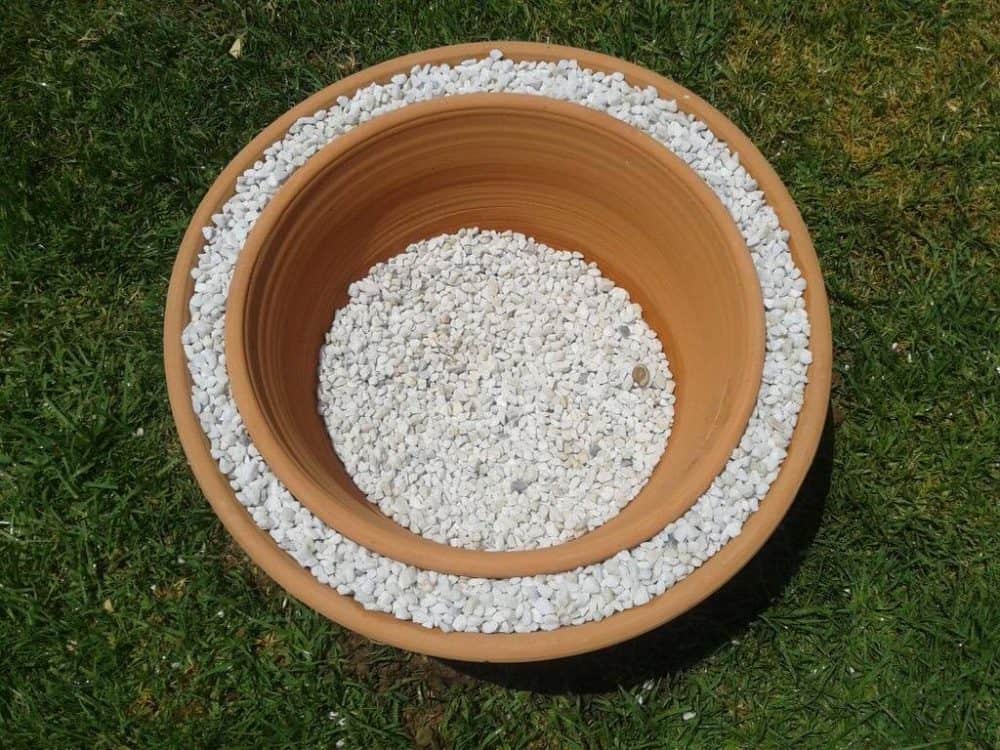
Build A Fire Pit Using An Unused Pot
Repurposing an unused pot can serve as a fantastic foundation for your DIY fire pit. All it takes is a bit of modification. Start by filling the pot with soil, much like planting flowers, and ensure it’s positioned in the perfect corner.
Next, gather your firewood and neatly arrange it within the pot.
Voilà! It’s as straightforward as that. Crafting this fire pit won’t eat up much of your time, yet it retains an understated elegance.
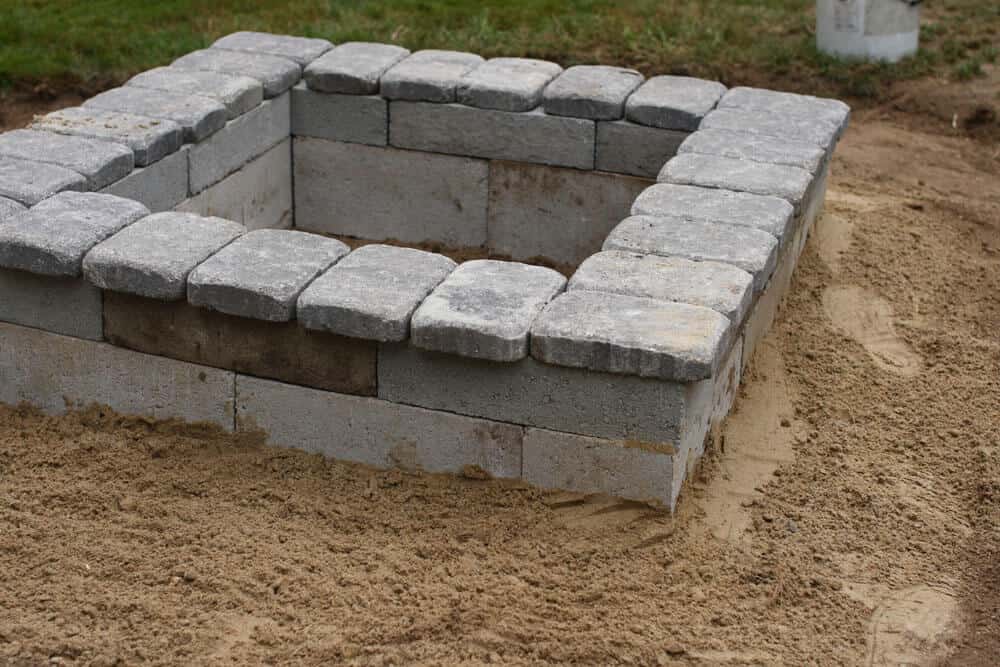
Cheap DIY Fire Pit
Don’t fret if you’re working with a tight budget for your fire pit project. Head over to your local home depot and scout for some wallet-friendly materials.
One highly recommended option is the gray paver, priced at a mere $0.68 to $0.77 each. To build the base, grab some square pavers, which are even more budget-friendly, and some paver sand.
Here’s the trick: stack those large gray pavers in a circular formation, creating two levels. Then, use the smaller ones as the base for your fire pit.
Once you’ve laid the first base, sprinkle the paver sand generously and set the second base layer in place.
There you have it—a cost-effective yet sturdy paver pit, all for under $70.
DIY Portable Fire Pit from Old Shopping Cart
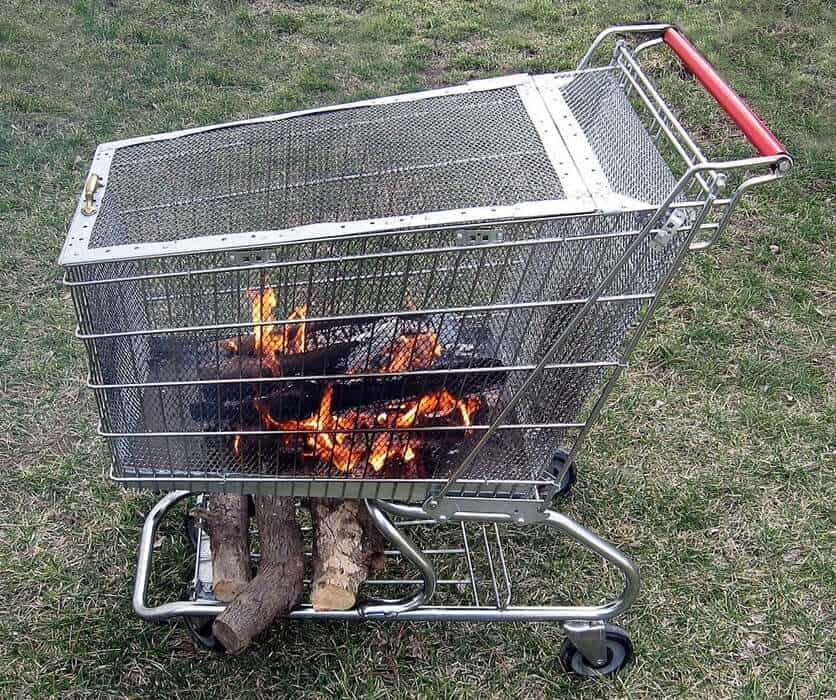
Are you in the mood for something unique? How about using a shopping cart? It might seem a tad unconventional, but trust us, it’s an absolutely fantastic idea.
All you have to do is load up the cart with wood and give it a good spray of oil, and voilà, you’ve got yourself a fire pit!
Now, to ensure it’s safe and hygienic, be sure to sterilize the cart thoroughly and make sure it’s in excellent condition.
The beauty of this fire pit is its portability. You can move it around effortlessly. Just stack some logs in the bottom of the cart, and you’re free to roll it to any spot you desire.