Within every individual resides a wellspring of creativity and boundless imagination. While surveying the various objects and tools scattered about the home, a plethora of innovative ideas and imaginative musings often flood one’s consciousness.
Among the numerous examples of creative endeavors that one can embark upon is the construction of a hat rack. As you may well grasp, a hat rack serves as a practical means of organizing your collection of headwear.
Moreover, the creation of a DIY hat rack affords you several advantages. In comparison to a store-bought counterpart, your handmade creation can be tailored with precision to align perfectly with the imaginative vision you hold.
This encompasses considerations of size, design, shape, and any supplementary features your creative faculties may conjure.
With an array of more than 50 ideas at your disposal, we invite you to peruse the possibilities, in hopes that you will discover the one that resonates most profoundly with your creative spirit!
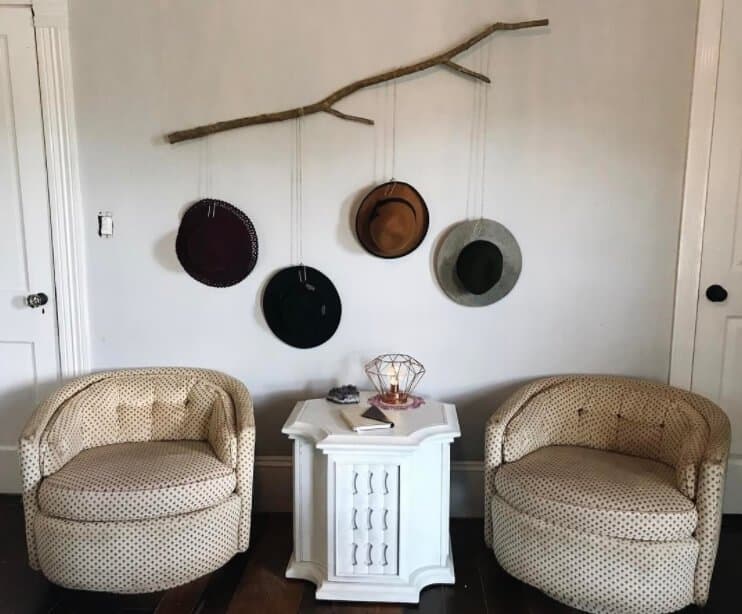
DIY Hat Rack Ideas Inspired by Tree Branches
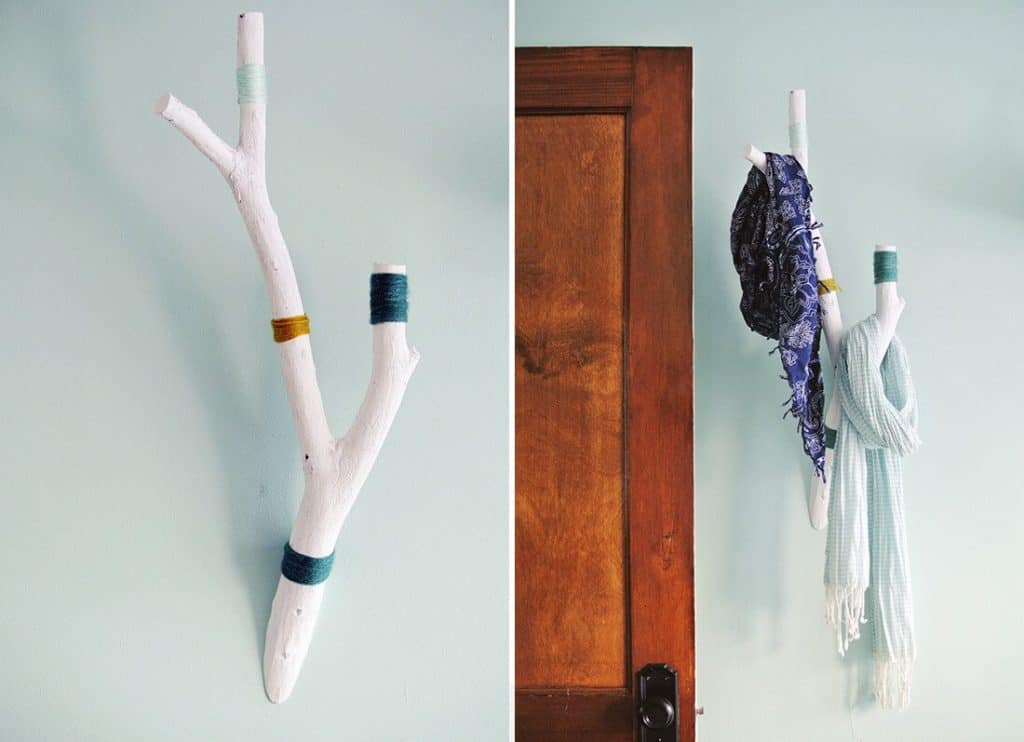
This ingenious concept proves cost-effective, as it necessitates only the procurement of suitable wood, the application of desired paint colors, and the installation of hooks for affixing the wooden rack to the wall.
In addition to accommodating hats, this versatile rack lends itself well to the storage of scarves. Doesn’t it strike your fancy? The process is rather straightforward, wouldn’t you agree?
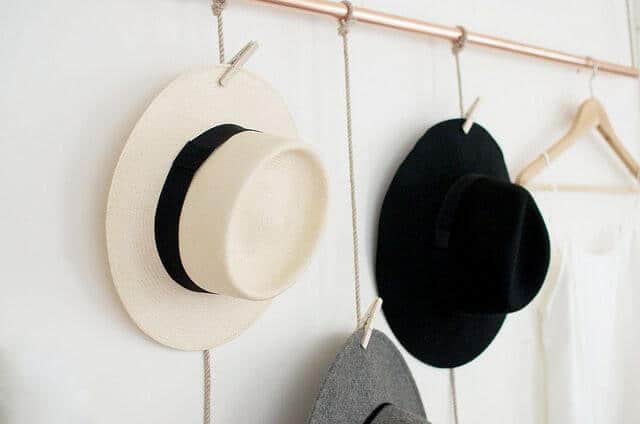
Industrial DIY Hat Rack
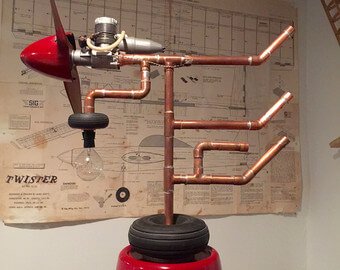
Here’s an innovative concept that demonstrates how pipelines can be repurposed to fashion hat racks. Taps can serve as hooks, or you can even manipulate the angles of the pipes to hang your hats without the need for taps.
The underlying idea here is to maintain a pristine and minimalist appearance. You have the flexibility to modify the color scheme using spray paint or embellish the pipes with elements like taps or other pipe-related paraphernalia to imbue a natural ambiance.
We are confident that you can tackle this project with enthusiasm. It promises both enjoyment and a touch of challenge!
DIY Pallet-Inspired Hat Rack
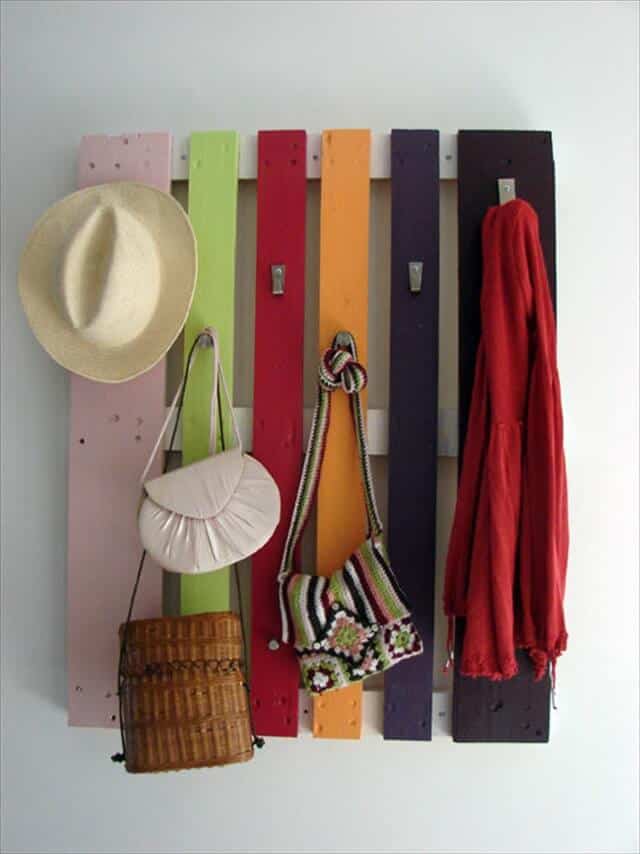
This particular hat rack was crafted from a sturdy wooden pallet, robust enough to accommodate coats and hats alike. The beauty of using a wooden pallet lies in its versatility. You have the creative freedom to paint each pallet in a unique hue, making for an eye-catching display.
The infusion of various colors into the pallets will lend your room an air of cheerfulness. What’s more, the wooden pallet hat rack can be conveniently placed wherever it best suits your needs.
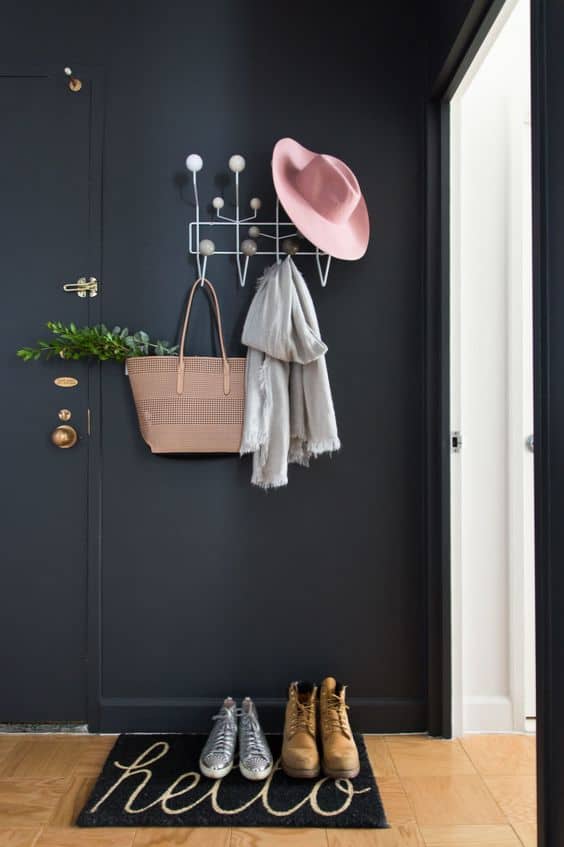
DIY Hat Rack Wall Mount

To embark on this DIY project, you’ll require a wooden board of your preferred thickness. To complete the design, integrate hooks or hangers meant for accommodating your hats.
These hooks or hangers should be affixed to the frontal section of the wooden board. Once they are securely in place, mount the wooden board onto the wall. You have the freedom to position it above the doorway if that appeals to your aesthetic sensibilities.
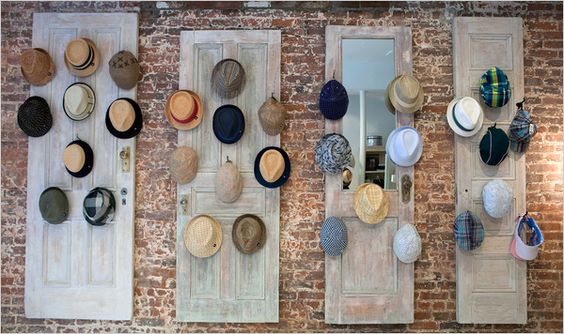
DIY Wood Repurposed Hat Rack
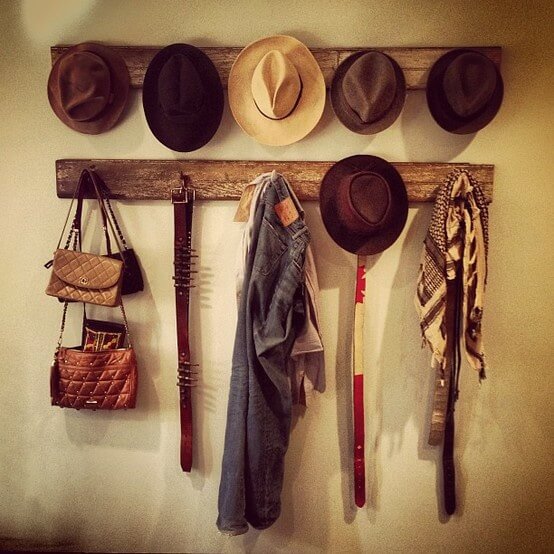
Typically, these items carry the charm of age, exuding a rustic, antique, or vintage allure.
Embrace this notion, for a hat rack fashioned in a vintage style can significantly enhance the room’s ambiance.
To craft this distinctive piece:
- Seek out an old window panel as your primary material.
- Subsequently, affix the window panel securely to the wall, utilizing nails or hooks for stability.
- Additionally, attach hooks onto the wooden surface to serve as designated resting places for your collection of hats.
- Finally, unleash your artistic flair, adorning the wood with paint or decorations of your choosing to harmonize with your room’s thematic motif.
DIY Contemporary Hat Rack
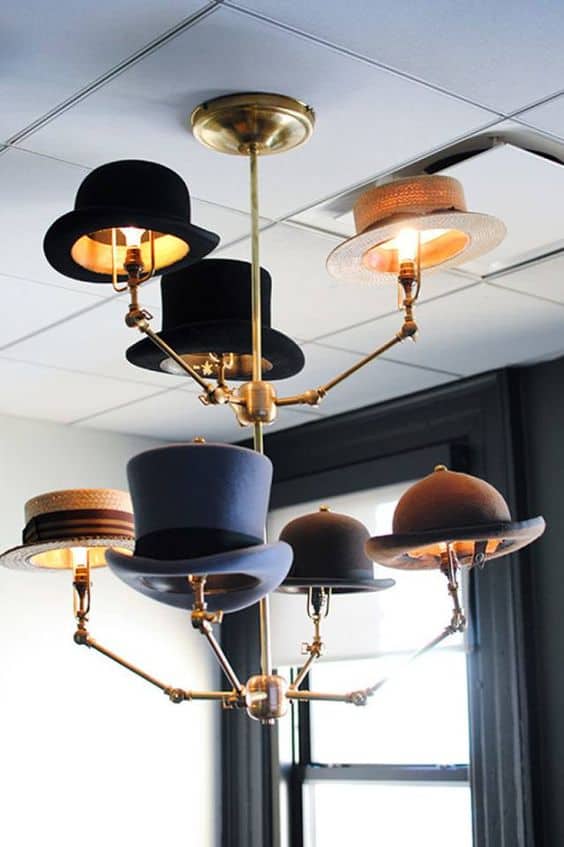
What sets this concept apart is its inherent uniqueness; it doesn’t align with the antique or overly modern aesthetics but rather falls into the contemporary category.
Adding an extra layer of sophistication, each of these fixtures can accommodate a light bulb, contributing to an elegant ambiance. Diverging from conventional hat rack arrangements, this particular design is suspended from the ceiling rather than resting on the floor.
DIY Ruler Coat Hat Rack
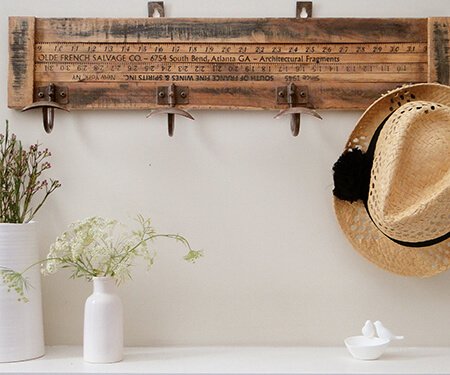
Suppose you happen to stumble upon an old wooden beam or a forgotten wood pallet within your household or a storage space. In that case, there’s a creative opportunity to transform it into a distinctive hat rack with a vintage allure.
Here’s a step-by-step guide:
- Begin by measuring the dimensions of the intended installation location for the rack.
- Next, acquire iron hooks suitable for hanging hats, adjusting the quantity according to your preference.
- Before affixing the hooks, carefully measure the spacing between each hook to accommodate your hats adequately.
- Once the hooks are securely in place, you can proceed to enhance the wood’s appearance by incorporating designs or applying a fresh coat of paint.
The image above illustrates a ruler-inspired design etched onto the wood, which might spark your creativity as you embark on this DIY endeavor. The end result promises to be both functional and visually appealing, sure to captivate your admiration.
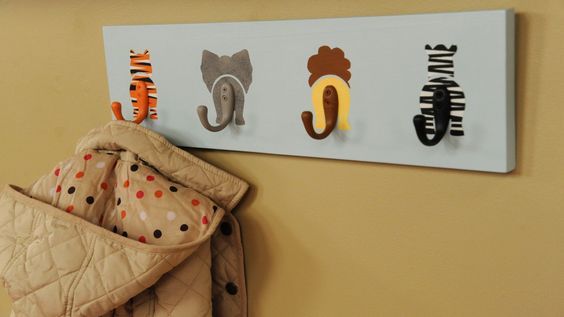
DIY Animal-Themed Hat Rack
Here’s what you’ll need: toy animals (the choice is yours), saw, adhesive, hooks (if you opt for hooks, a drill will be necessary), scrap wood, and paint.
Now, let’s embark on this creative journey:
- Begin by painting the scrap wood with your preferred color, ensuring it harmonizes with your room’s aesthetic.
- Gather all the toy animals and proceed to carefully cut them in half, retaining only the front portion of their bodies.
- Next, position each of these whimsical creatures onto a wooden block.
- To securely affix the animals to the scrap wood, you have two options: utilize adhesive for a seamless look or drill holes if you’ve chosen hooks.
- If you’ve opted for adhesive, grant it a full day to set before mounting your delightful animal creations onto the walls. The result promises to be a playful and eye-catching addition to your living space!
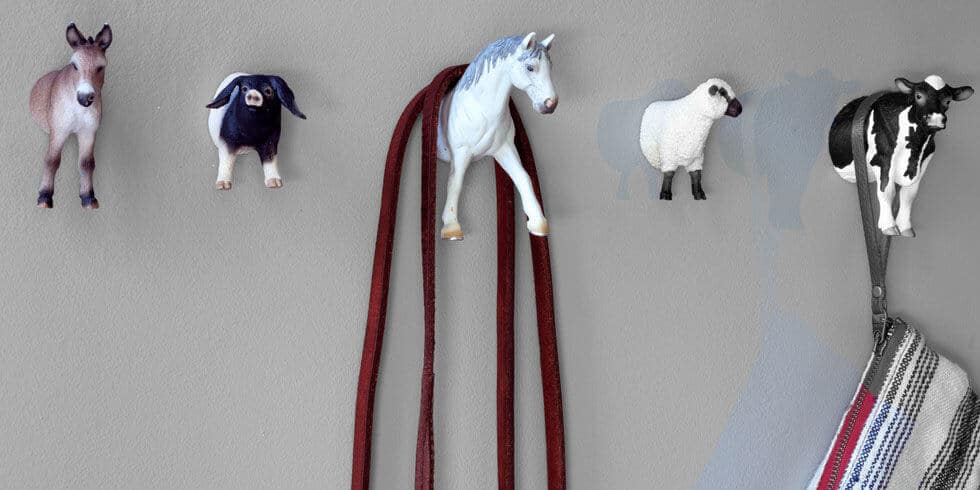
Animal Design Hat Hooks
To bring this delightful concept to life, you’ll require a wooden board, sandpaper, a template, paint, pet silhouettes, adhesive pattern film, pattern tape, hooks, screws, and hanging hardware.
Now, let’s embark on this enchanting project:
- Commence by ensuring that the wooden board is cut to your desired dimensions, perfectly suited to the designated space. Following this, apply a coat of white paint to serve as the canvas for your creation.
- Print out templates featuring endearing animal silhouettes, focusing on the rear part of their bodies. Affix these templates to the board using the adhesive pattern film.
- To add the finishing touches, paint the hooks in colors that harmonize with the animals’ tails, infusing a delightful cohesion into your design.
The result? A charming and child-friendly addition to your living space that’s bound to captivate your little ones!
Insulator Layer Shelf
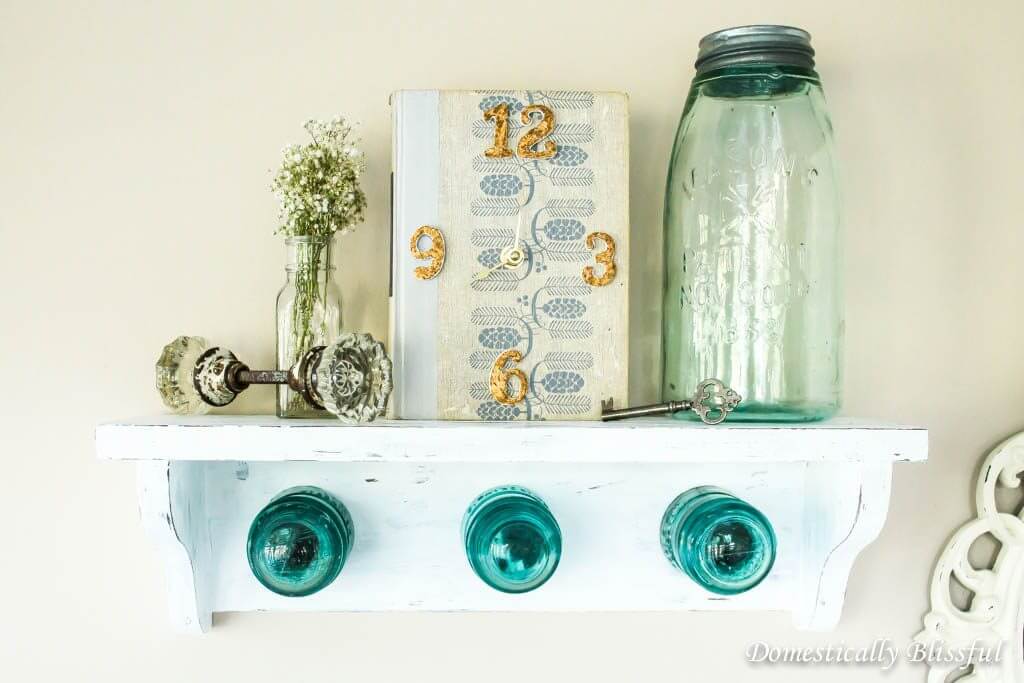
To embark on this creative endeavor, gather the following materials: a wooden board, insulators (the quantity depends on your desired design), and screws or nails to secure them firmly in place.
Now, let’s delve into the process:
- Begin by carefully sizing and cutting the insulators to your preferred dimensions, ensuring they are a perfect fit for your design.
- Next, use appropriate fastening tools to securely affix the insulators to the wooden base.
- Prior to fastening, create openings in each insulator to facilitate attachment to the wooden base, using screws for added stability.
- For an extra layer of reinforcement, consider employing adhesive in conjunction with screws or nails.
- With the assembly completed, you’re ready to choose the perfect location for your rack, whether inside or outside your home.
The result? A unique and functional addition to your living space, seamlessly merging rustic aesthetics with everyday utility.
Coastline Style Inspired Hat Rack
Now, what images come to mind when you think of the coastline?
Apart from the sandy shores and the tranquil beach, consider the humble paddle.
Yes, you heard it right!
Paddles have the potential to be captivating decor pieces for your home. Simply adorning your walls with them can instantly elevate the room’s aesthetic appeal.
But why stop there? Why not transform these paddles into something even more practical, like a handy shelf?
Here’s how you can do it:
First, attach some hooks securely to the paddle. Ensure that you affix them carefully, so as not to damage the paddle in the process.
Once your hooks are in place, mount the paddle shelf onto the wall, creating a functional and visually appealing addition to your coastal living space.
Lego Themed Hat Rack
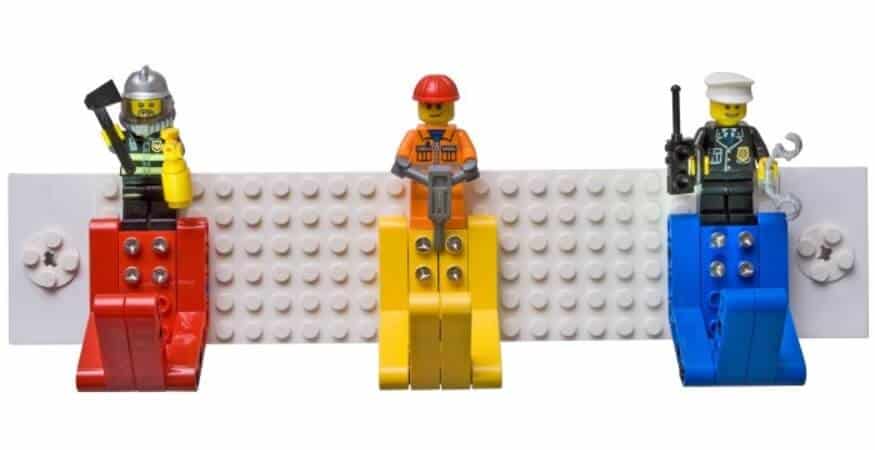
This concept is particularly well-suited for children, as it incorporates the whimsy of Lego toys into the design. To bring this idea to life, you’ll need a complete set of Lego pieces.
Begin by assembling the Lego pieces creatively to craft a hat rack with a distinctive Lego-inspired look.
With the addition of three hooks or more, you can use this rack not only for hats but also for hanging coats, backpacks, and other essentials. You can either construct the Lego block on your own or enlist the help of someone else.
Isn’t this a fun and imaginative way to spruce up your space?
DIY Hat Rack Made of Letters
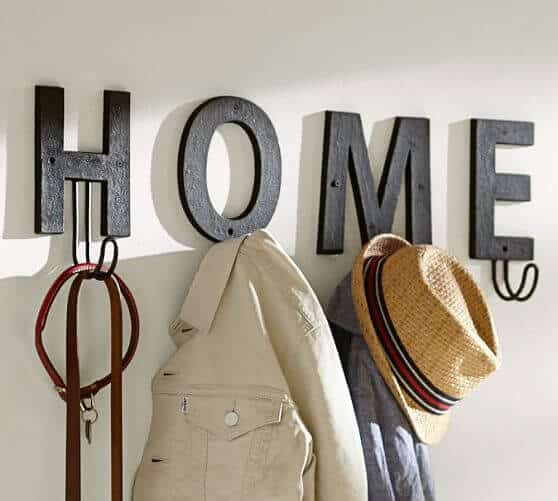
To bring this rack to life, you’ll require some tools, including cable cutters, cord pliers, heavy metal cable, layered telephone angling, tape, and, of course, letters.
Here’s how to create it:
- Start by selecting the letters you want to use.
- Then, tightly wrap each letter in colored cord.
- Determine the number of hooks you’ll need.
- Next, attach the cord from the letters to the cord on one of the layered hooks.
- For an added decorative element, consider using angling cord.
This DIY project is a fantastic way to infuse your space with a personalized touch.
Ski Board Hat Rack
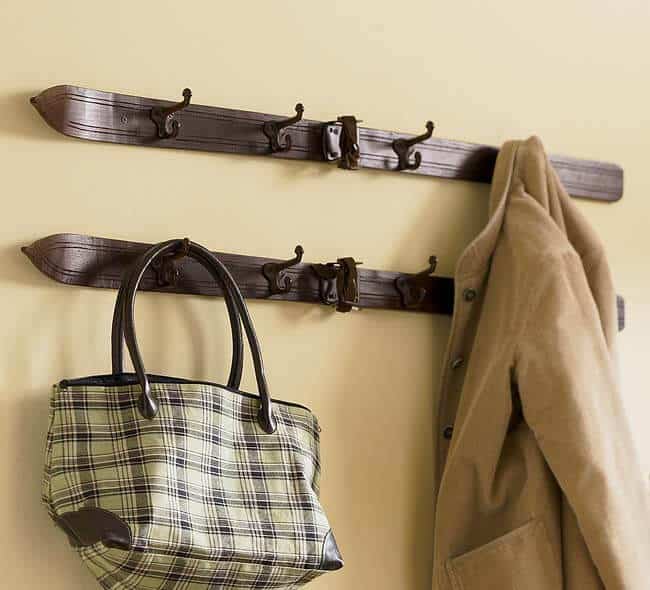
A skiboard isn’t just for skiing; it can also serve as a unique hat rack. With the growing popularity of vintage furniture among today’s youth, this could be an excellent addition to their home decor. To create this hat rack, you’ll need an antique skiboard, which can often be found at affordable prices in thrift shops or flea markets.
Here’s how to turn it into a stylish hat rack:
- Begin by securely attaching antique hooks to the front surface of the skiboard.
- Once the hooks are in place, you can easily mount the skiboard hat rack in any location you prefer.
- However, it’s ideal for spaces like the mudroom or entryway, where people frequently hang their hats and coats.
This creative DIY project not only adds a touch of nostalgia to your decor but also repurposes an old skiboard in an imaginative way.
Autumn-style Hat Rack
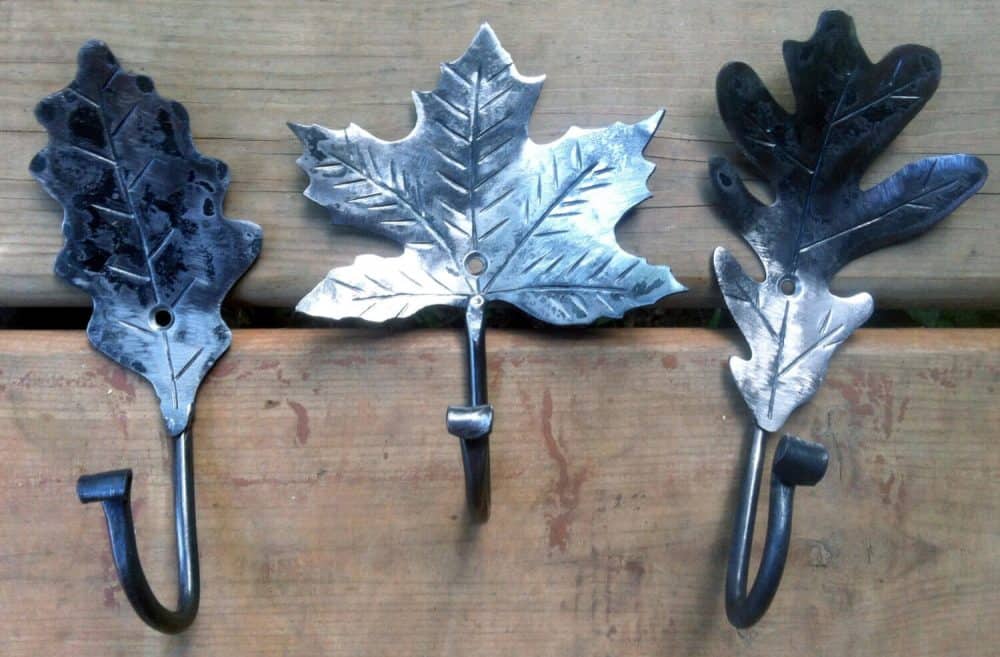
Here’s a quick guide on how to make it:
- Begin by applying a coat of your chosen paint to the wooden board and allow it to dry thoroughly.
- Next, drill a hole into the wooden board, ensuring it’s the right size to accommodate the handles.
- Finally, secure the handles in place by fastening them with screws and then bending them towards the screws.
This straightforward DIY project results in a stylish and functional rack for your home.
Key Holder Hook
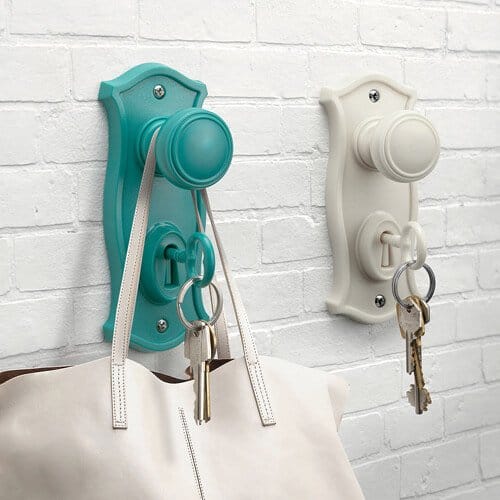
While this concept may be unconventional, it infuses a modern vibe into your room. The use of bright and vibrant colors adds a lively touch to your living space.
To put this idea into action, simply attach the door locks onto a wooden board, and then secure the board to the wall using adhesive.
Hat Hooks Made of Faucets
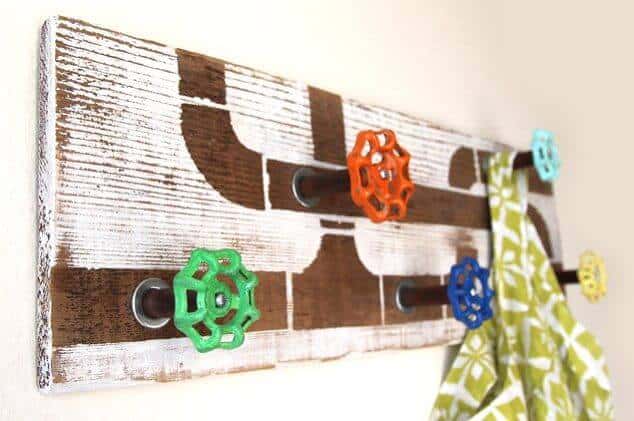
All you need to do is attach the faucets to a large piece of wood or any other material that can support the weight of hats or coats and is sturdy enough to hold them securely in place.
Reclaimed Wood Hat Rack Hooks
- Begin by sourcing four wood pallets of roughly the same size, along with two additional pallets for the back support.
- Use nails and a hammer to securely attach each of the pallets together to form the rack’s base.
- Next, affix hooks onto the surface of the pallets to create hanging spots for your hats or other items.
- Once you’ve completed the assembly, mount the finished pallet rack onto your wall.
There you have it! Your new wall-mounted hooks are ready for use.
Unique Chevron Hooks
At times, simplicity reigns supreme. These racks consist of wooden pieces adorned with hooks securely mounted on their surfaces.
To add an extra touch of charm, consider painting the wood with stylish chevron stripes.
Isn’t this a straightforward and effective approach?
Mounted Wooden Hooks

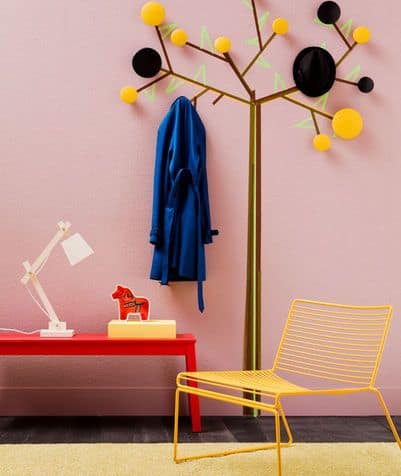
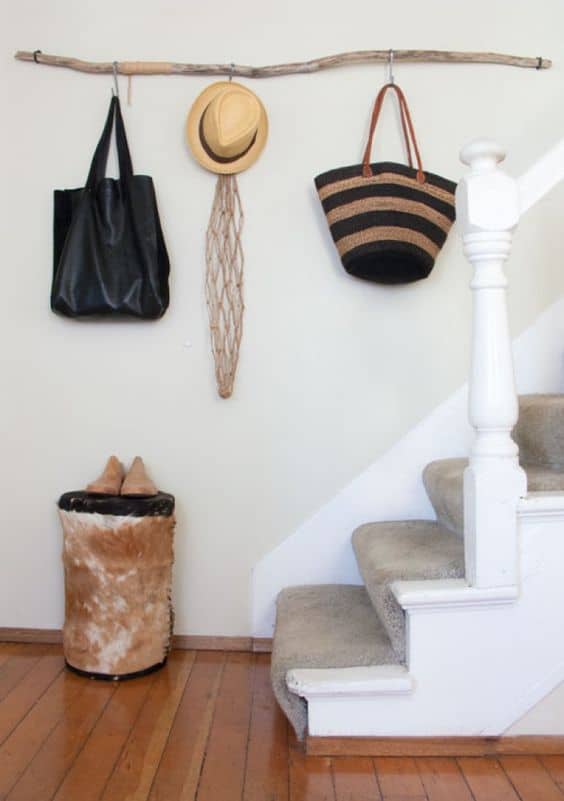
Tree branches Coat and Hat Rack
Tree Design of Hat Hooks
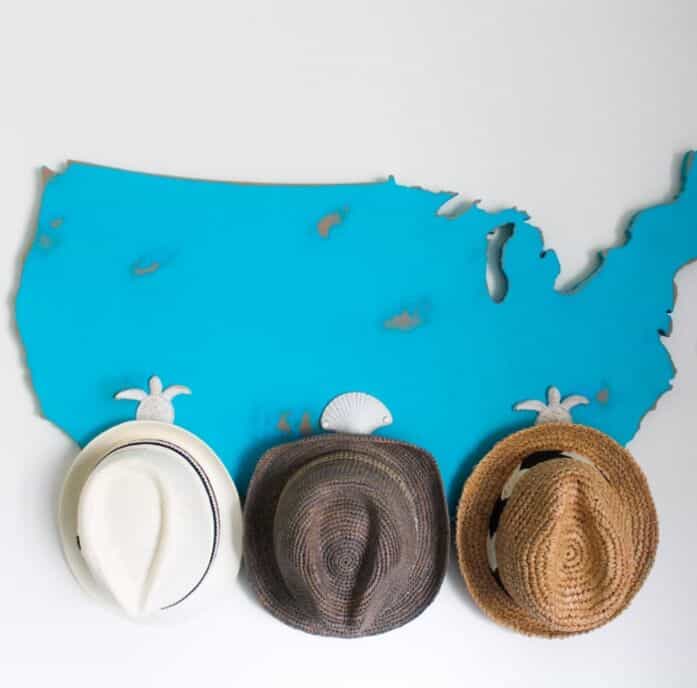
World Map Hat Rack
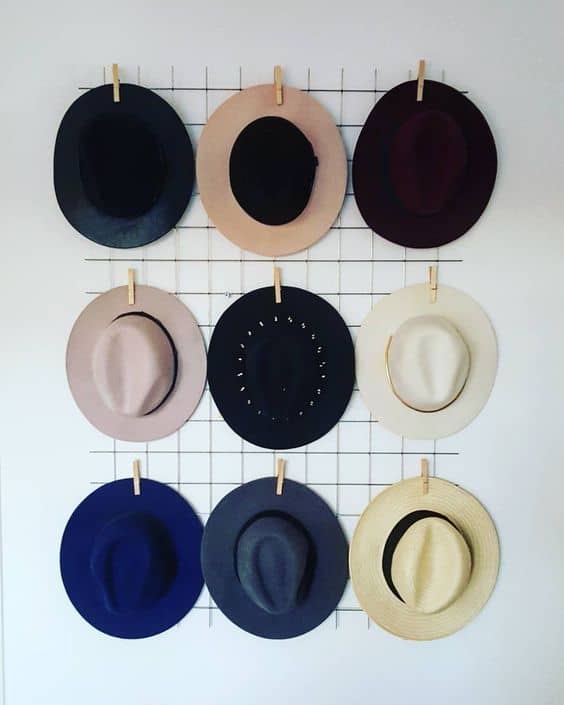
The Clothes Pins Hat Rack
A Simple Twig Hooks Idea
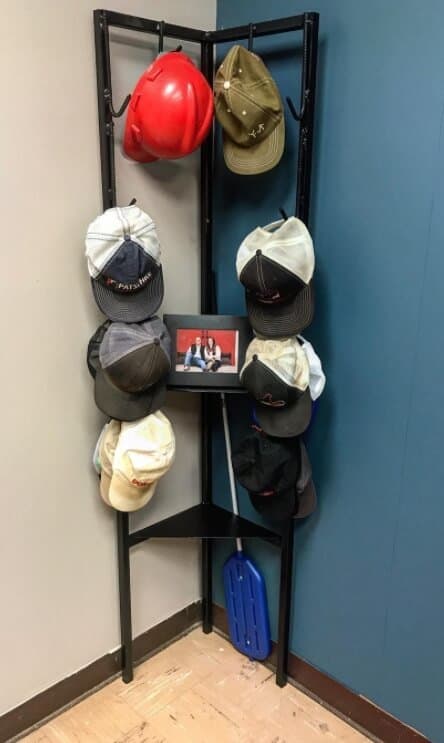
Corner Hat Rack
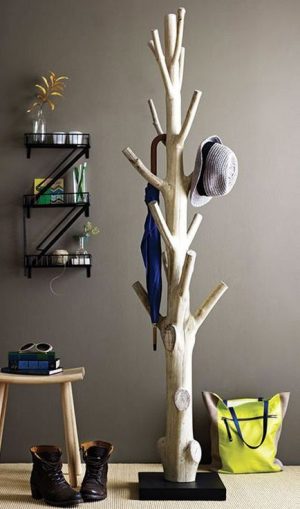
Tree Trunk Standing Hat Rack
Repurposed Photo Strings Hat Rack
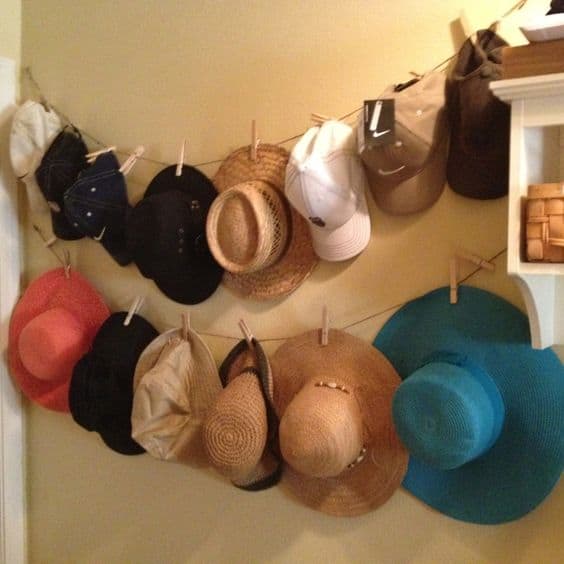
You can easily find photo strings in stores specializing in home supplies.
Typically, these products include photo pins. To recreate this appearance, you can also utilize strings and pins typically used for hanging clothes.
The installation process is straightforward: hammer a few nails onto the wall with evenly spaced intervals, then fasten each end of the strings to the nails.
Hooks on The Wall
Clothes Hanger Tails Hat Rack
Golden Hooks on the Wall Hat Rack

Hanging Hat Rack Hooks
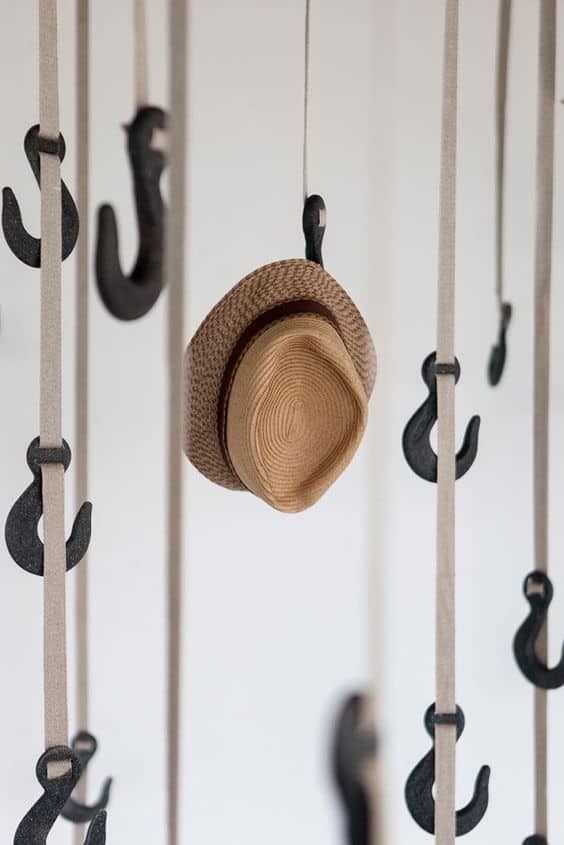
Modern Wooden Pallet Hooks

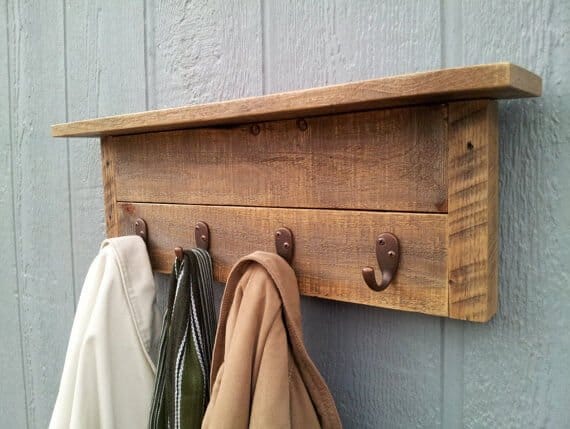
Old-rustic Wood Pallet Hat Rack
If your home features a vintage aesthetic, this hat rack idea might be a perfect fit. You’ll require two lengthy and substantial wooden pallets along with two smaller wooden boards for the sides.
In the example shown, the small boards are intricately carved with an antique-inspired design. You can affix these components together using nails or adhesive, with adhesive being the recommended choice.
White Retro Hat Rack
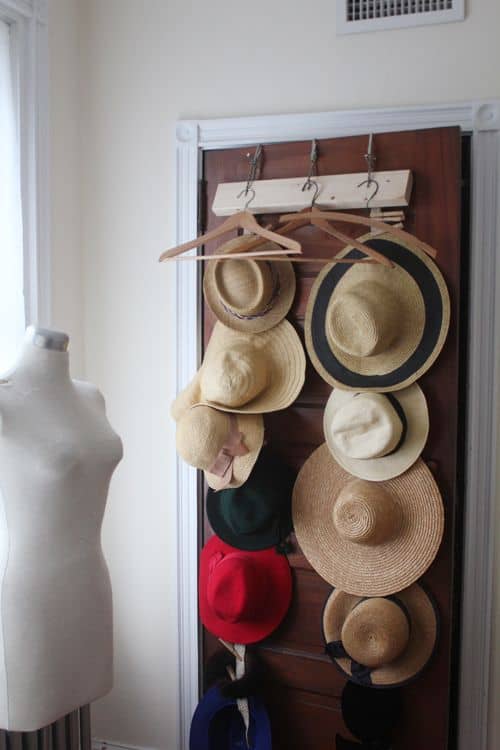
Repurposed Wooden Doors Hat Racks
Simple Wall Display Hat Rack
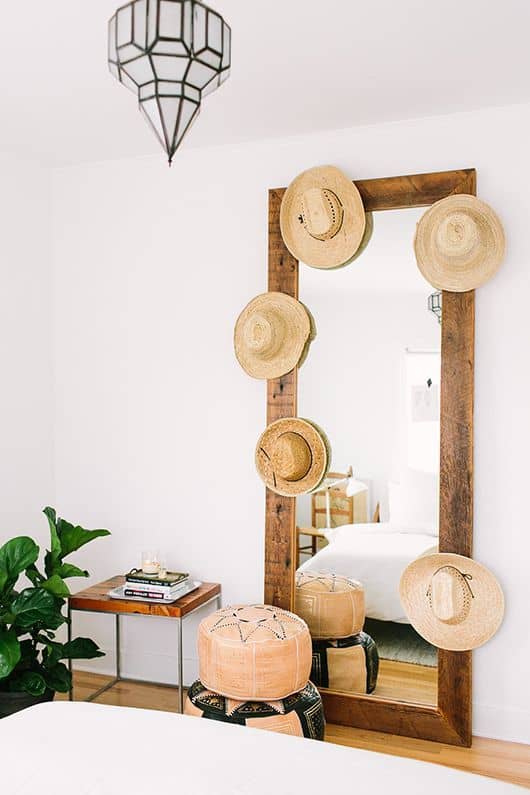
The Mirror Hat Hooks
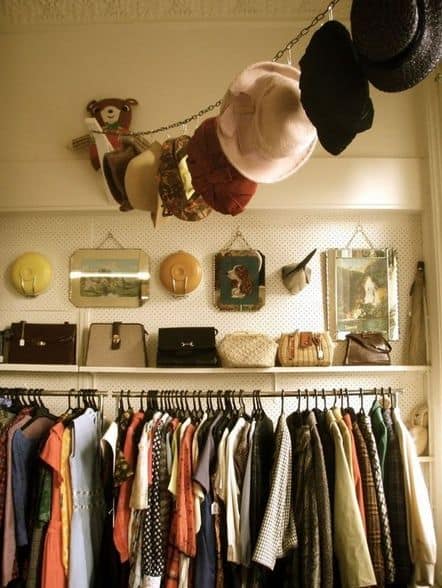
Hanging Chain for Hat Rack
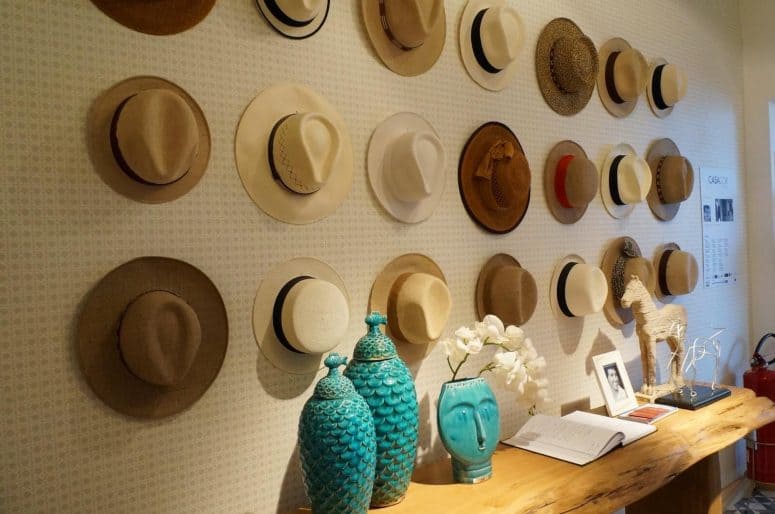
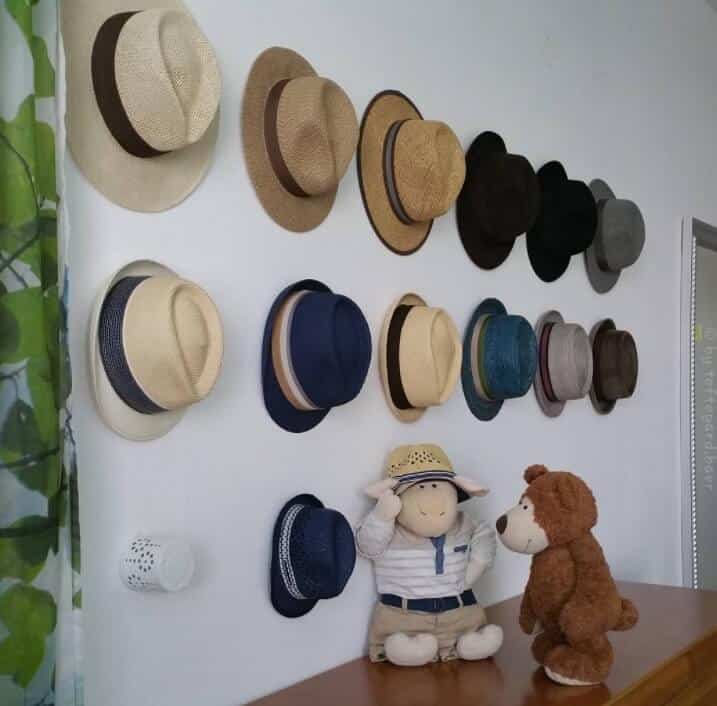
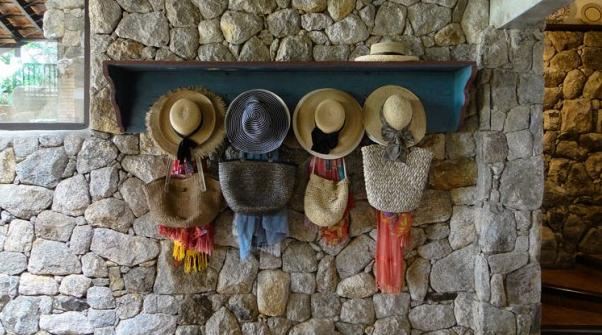
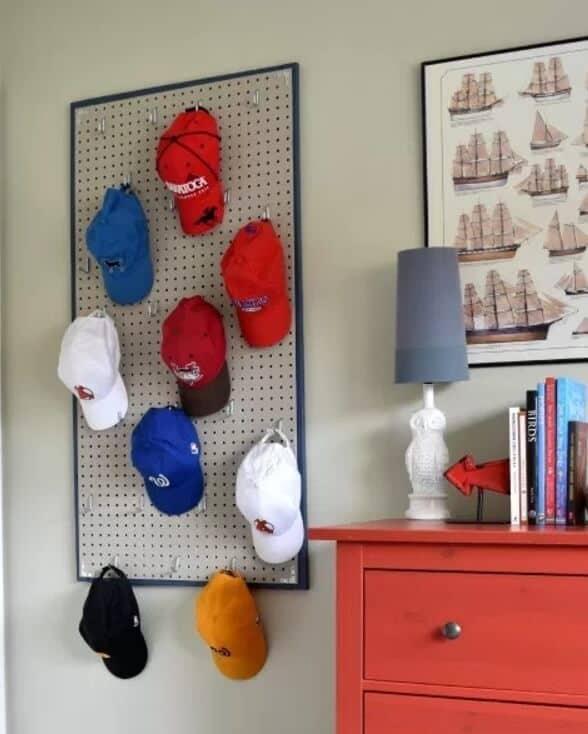
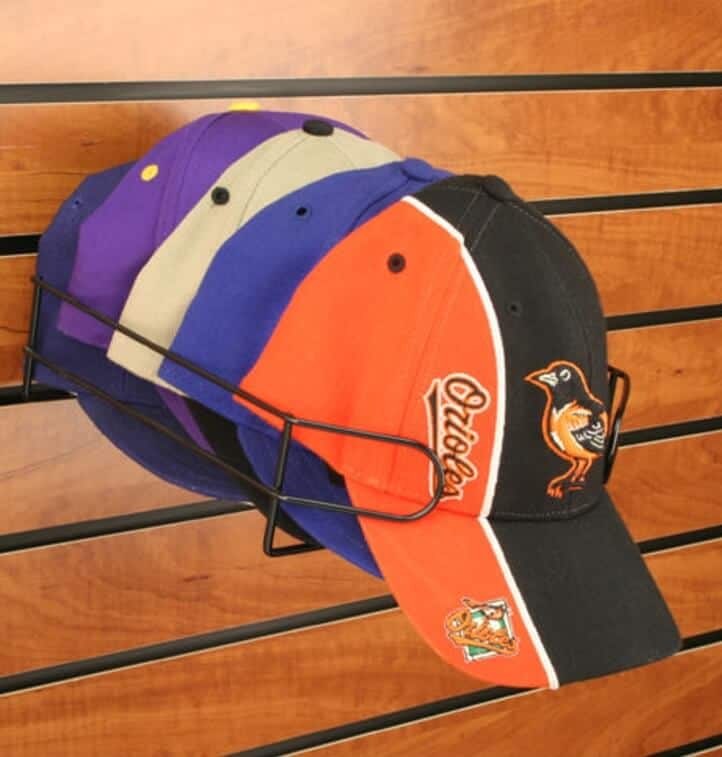
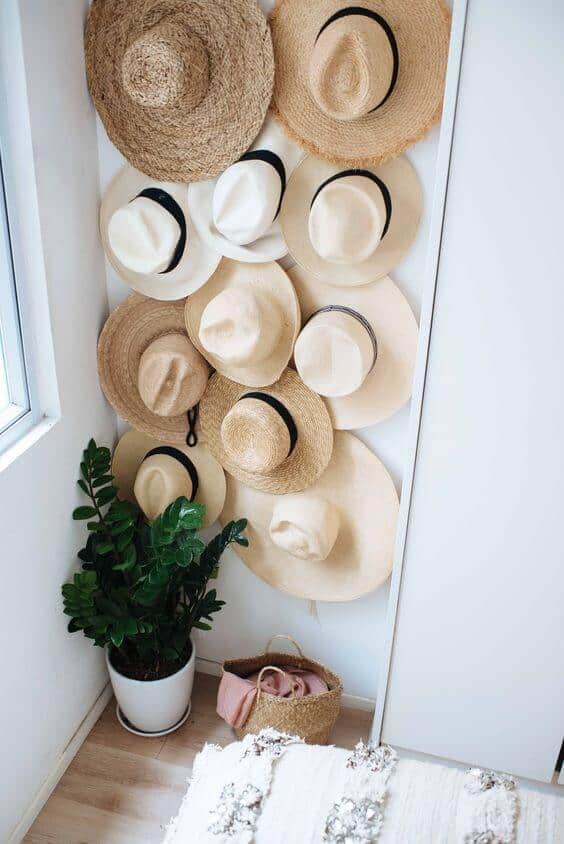
Organizing Hats on the Wall Rack
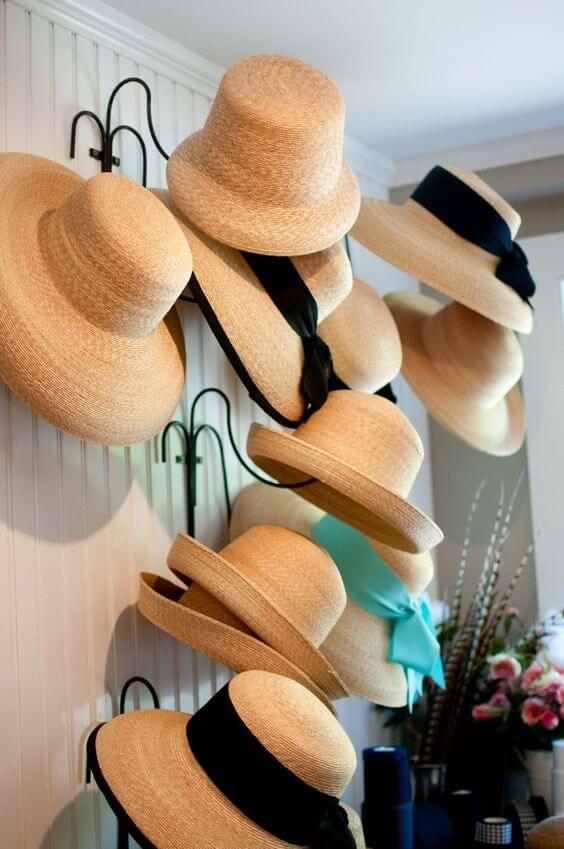
Hipster Style Wall Hooks
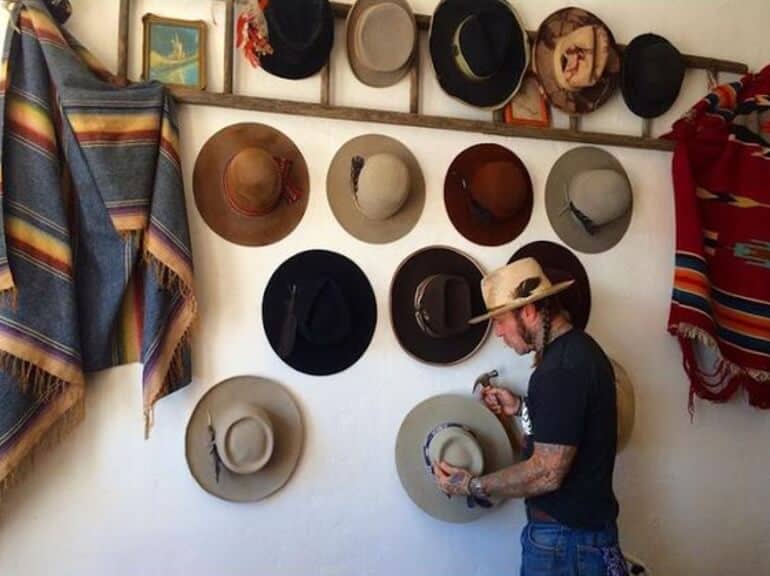
You can take inspiration from the tapestry displayed on each side to create a hipster-style hat rack. It’s as straightforward as it appears, as you only need to attach the hooks to the wall using nails.
Ensure that you arrange the hooks neatly, just like in the picture. Also, measure the gap between each hook precisely to achieve a tidy and organized hat rack.
Old, Rustic, Giant Wheel Hat Rack
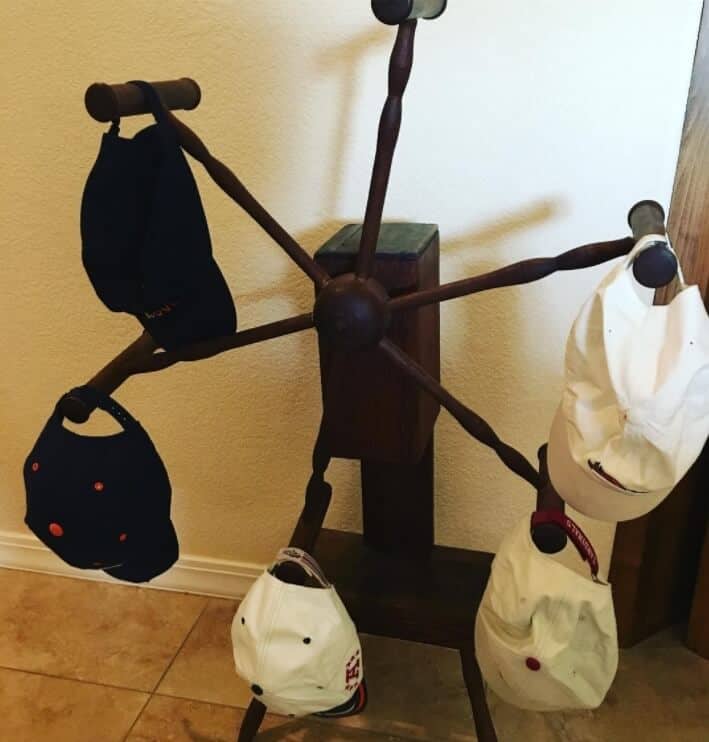
Are you aiming for a timeless and vintage-style hat rack? Give this one a try!
- Begin by visiting a market to locate a weathered and rustic wheel.
- Next, give the wood a good polish to make it appear smoother and more refreshed.
- Finally, drape all your hats onto the wheel.
One drawback of this concept is that it offers a limited capacity, accommodating only up to six hats.
The Corner Mount Hat Rack
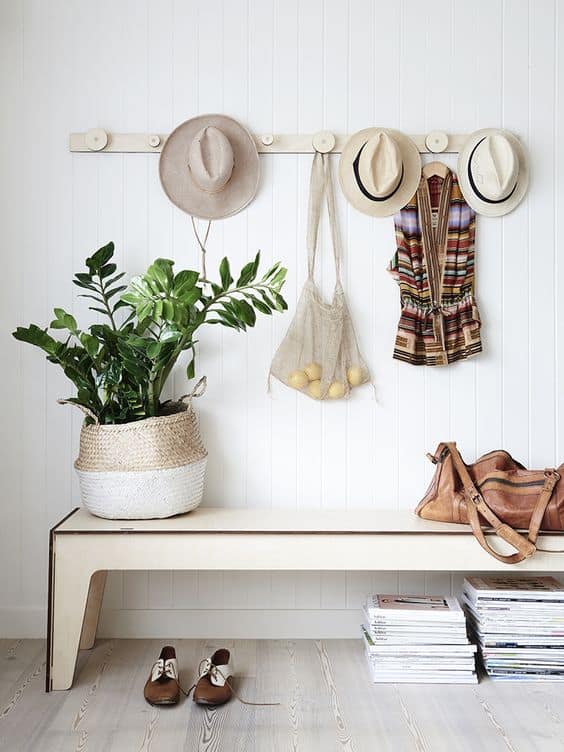
Simple White Horizontal Hat Hooks
Old Rustic Vintage Iron Hat Rack
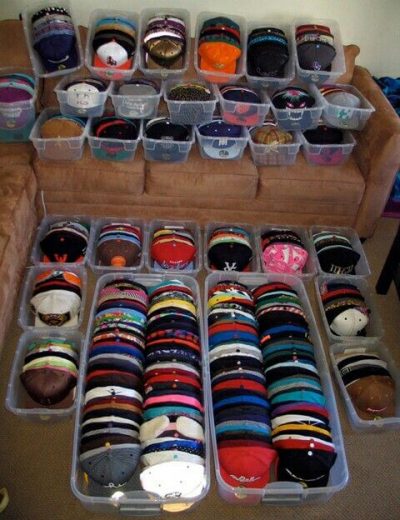
Tupperware Boxes Hat Storage
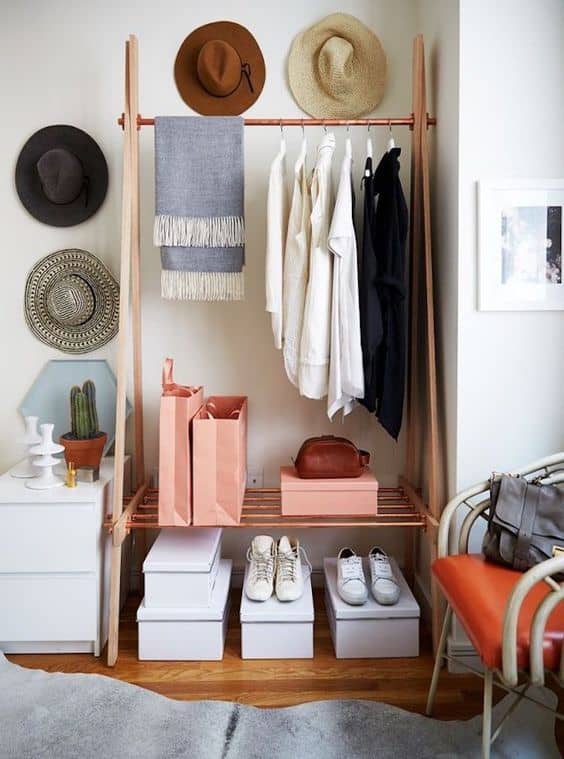
Hidden Hat Rack
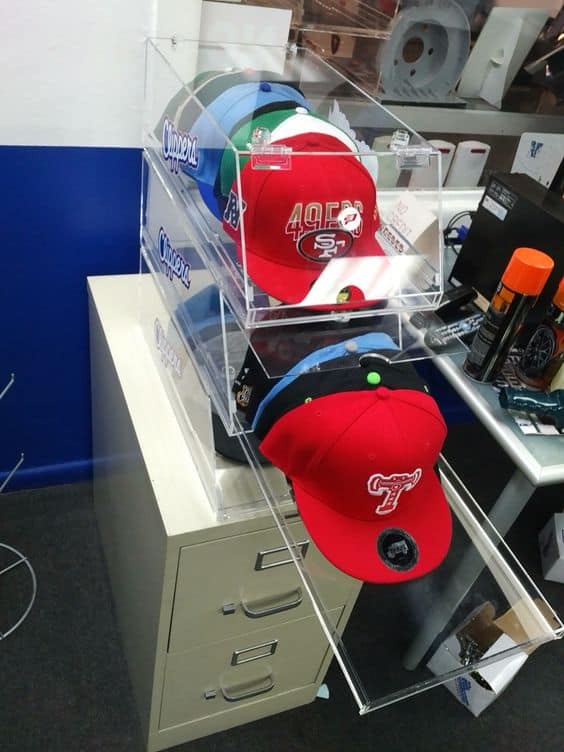
Glass Box Hat Storage Idea
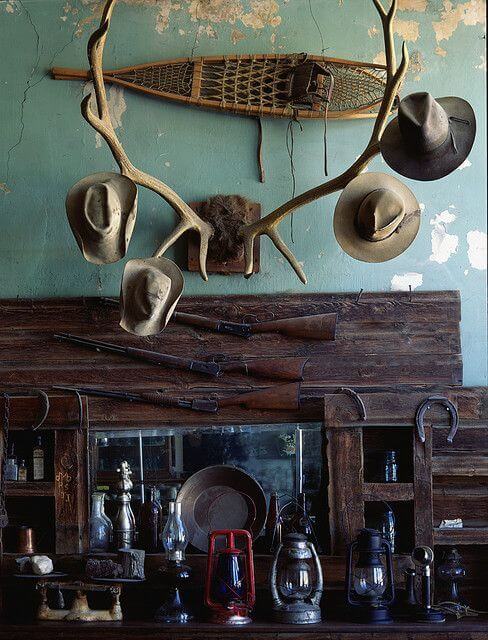
A Giant Elk Horn Hat Rack
Wall Mounted Branch Hat Racks
More Hat Rack Ideas