Creativity and boundless imagination reside within every individual. When one observes various items and tools strewn about the home, a plethora of innovative ideas and imaginative concepts come rushing to mind.
Among the myriad examples of creative projects that can be brought to life is the creation of a personalized hat rack.
As we both recognize, a hat rack bestows a sense of order upon your cherished collection of headwear.
Furthermore, embarking on a DIY hat rack venture confers several advantages upon you.
In contrast to off-the-shelf options, your creation will align perfectly with the unique vision you harbor in your creative mind.
The dimensions, design, shape, and any additional features are all tailored to your exact specifications.
Here, we present over 50 ideas to ignite your inspiration! Peruse through them, and with any luck, you will discover the one that resonates most with you.
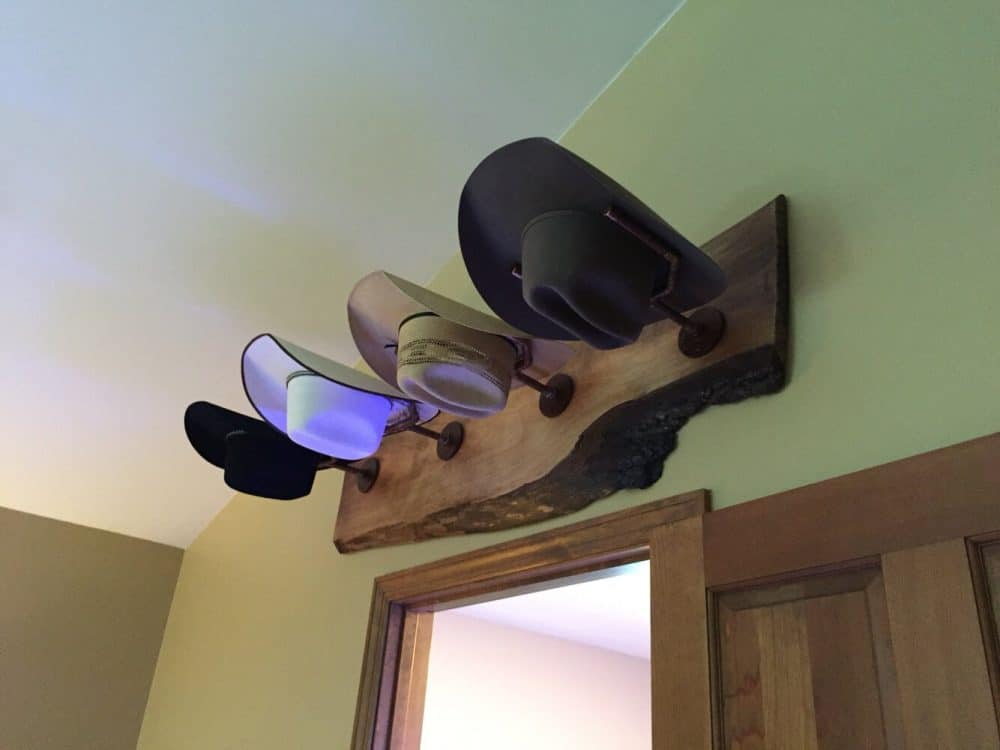
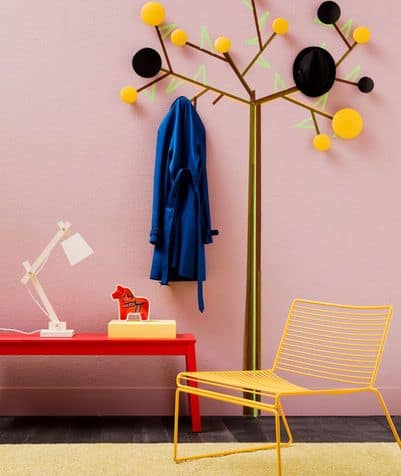
DIY Hat Rack Ideas Inspired by Tree Branches

The hat rack displayed above likely strikes a chord of familiarity.
It derives its inspiration from the organic forms of tree branches. Given that these racks are hewn from genuine wood, variations in size are acceptable. However, it’s imperative to procure robust wood varieties capable of accommodating numerous hats.
This ingenious concept offers a cost-effective solution, necessitating only the acquisition of suitable wood, paint in your preferred hue, and hooks for securely mounting the wood on the wall.
Beyond its utility for hats, this versatile rack readily serves as a convenient storage solution for scarves.
Doesn’t it appeal to you? Its simplicity certainly makes it an accessible and straightforward project, doesn’t it?
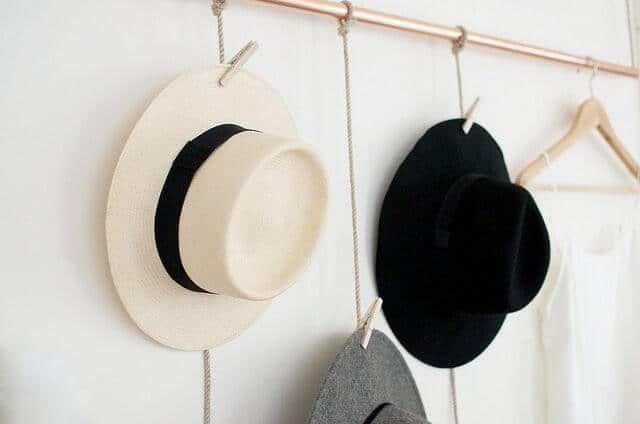
Industrial DIY Hat Rack
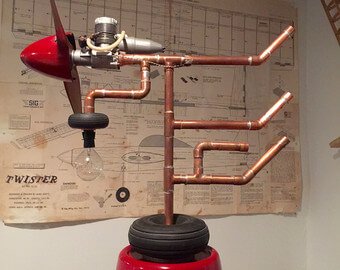
This particular concept demonstrates the versatility of pipelines in crafting hat racks.
For securing your hats, taps can be repurposed as hooks. Alternatively, with the absence of taps, you can manipulate the angles to accommodate hat placement.
The underlying principle of this concept revolves around achieving an immaculate appearance.
To customize the visual aesthetics, consider the application of spray paint for a change in color or the incorporation of decorative elements resembling taps and other pipe-related components. This infusion lends a natural and distinctive quality to the design.
Rest assured, embarking on this project promises both an enjoyable and invigorating creative challenge!
DIY Pallet-Inspired Hat Rack
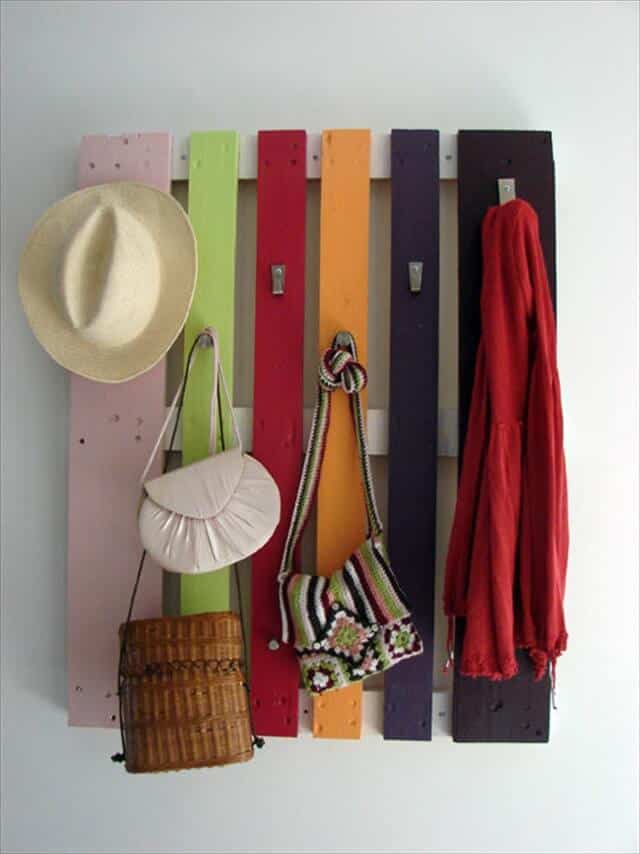
A wooden pallet can effortlessly double as a remarkable coat rack. However, before you proceed with mounting it on the wall and incorporating hooks, the pallet deserves a fresh coat of paint.
In this instance, our inspiration derives from the resilient qualities of a wooden pallet, more than capable of supporting coats, not to mention hats.
By choosing a wooden pallet, you grant yourself the creative freedom to paint each individual pallet with a distinctive hue. This diversity in color will undoubtedly amplify its visual appeal.
The infusion of vibrant and varied shades within the pallets will infuse your room with an uplifting and cheerful ambiance.
Moreover, the versatility of this wooden pallet hat rack enables you to place it in any location that suits your fancy.
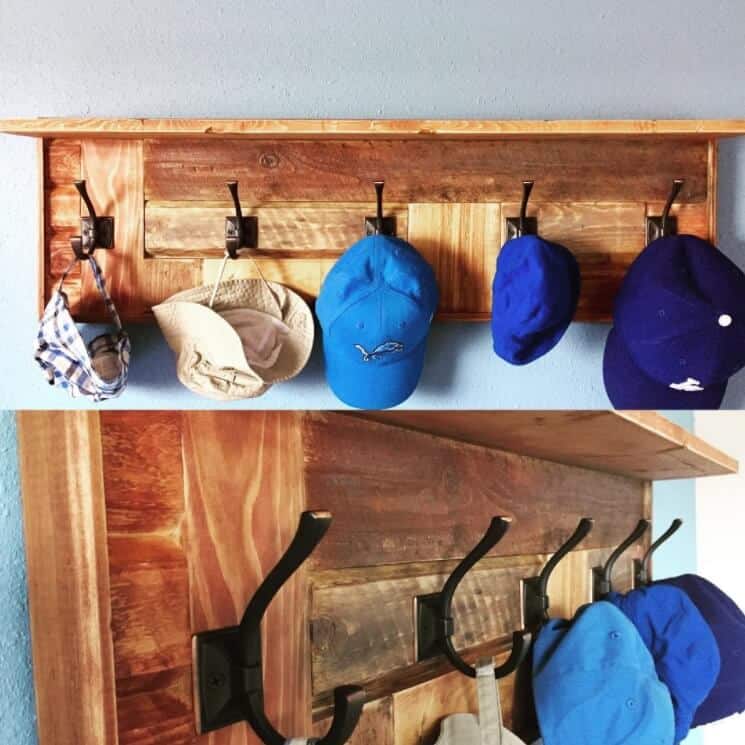
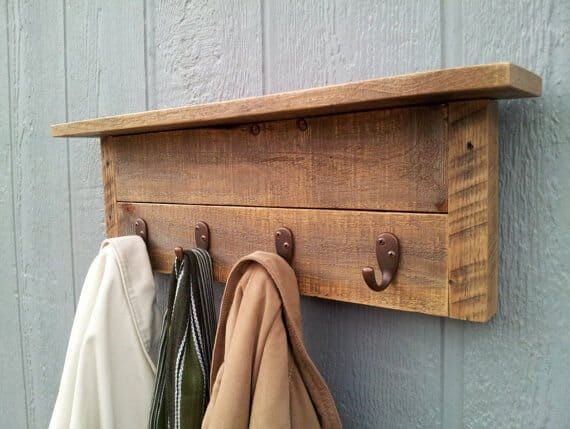
DIY Hat Rack Wall Mount
As apparent in the accompanying image, this hat rack embodies simplicity in its purest form. The expedited process is facilitated by its uncomplicated design.
All that’s necessitated is a wooden board crafted to your preferred thickness, complemented by an array of hooks or hangers designated for the hats.
These hooks or hangers are affixed to the frontal surface of the wooden board.
Once securely installed, mount the wooden board onto the wall, choosing a location that aligns with your preferences. If desired, situating it above a doorway is a viable and aesthetically pleasing option.
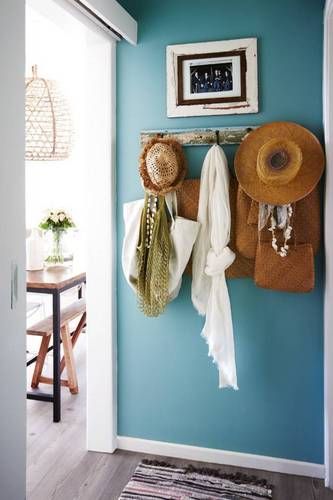
DIY Wood Repurposed Hat Rack

The essence of the do-it-yourself approach lies in resourceful repurposing, a strategy employed to minimize expenditure effectively.
Typically, these items possess characteristics associated with age, rusticity, antiquity, and vintage allure.
And this is perfectly acceptable! A vintage-inspired hat rack can indeed contribute to the ambiance of a room, infusing it with character and charm.
Here’s how you can bring this concept to life:
- Begin with an old window panel as your foundational piece.
- Proceed to affix the window panel onto the wall using either nails or hooks, ensuring secure placement.
- Equally important, attach a series of hooks to the wood’s surface, providing designated spaces for your hats.
- To harmonize with your room’s overall theme, consider painting or embellishing the wood in a manner that resonates with your aesthetic preferences, ultimately crafting a hat rack that adds a unique touch to your space.
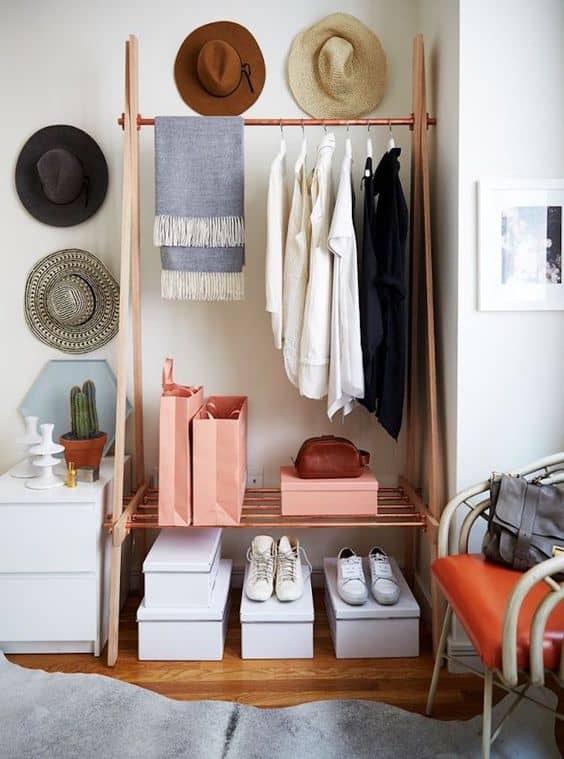
DIY Contemporary Hat Rack
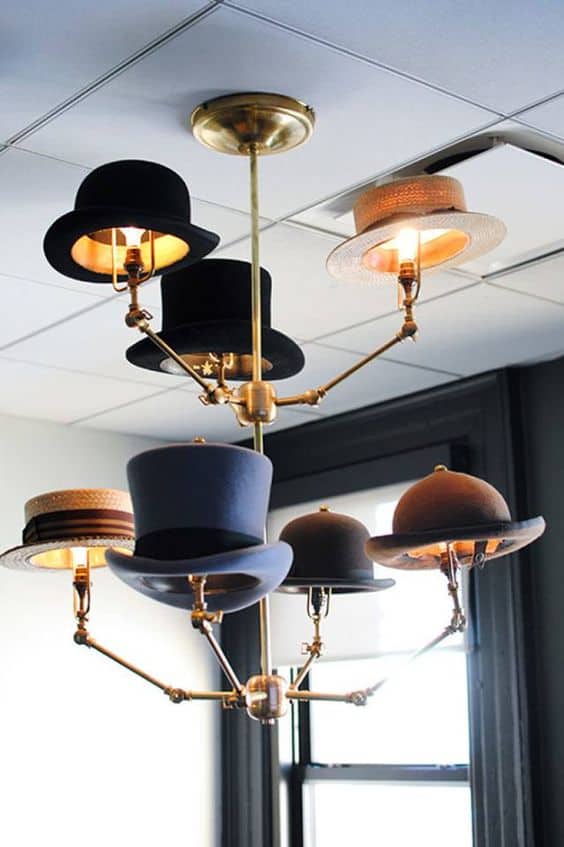
Hat racks need not be exclusively crafted from wood; they can take on alternative forms, like pipes or light fixtures, exemplified in the image above.
What sets this concept apart is its distinctive blend of design elements—it neither veers into the antique realm nor adopts an overly modern aesthetic; rather, it exudes a contemporary charm.
To further enhance its allure, consider integrating a light bulb into each fixture, infusing an elegant ambiance. Diverging from the norm, this creation suspends from the ceiling rather than resting on the floor, adding a touch of uniqueness to your space.
DIY Ruler Coat Hat Rack
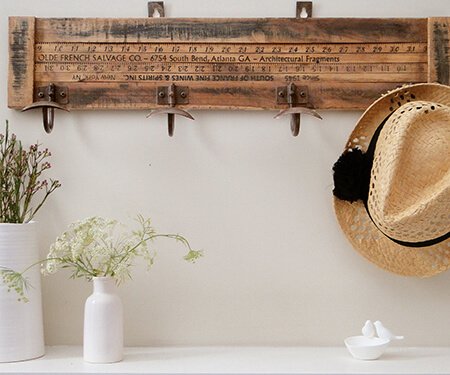
If you happen to have an old workbench or a neglected wooden pallet tucked away in your house or warehouse, it presents an exciting opportunity for transformation into a one-of-a-kind hat rack with an antique aesthetic.
Here’s how to embark on this creative venture:
- To commence, carefully measure the desired size and dimensions of the location where you intend to install the rack.
- Next, procure iron hooks designed for hats, and adjust their quantity to align with your preferences.
- Before proceeding with the hook installation, measure the spacing between each hook to ensure sufficient room for the hats.
- With the technicalities addressed, consider enhancing the aesthetic appeal by incorporating designs or applying a coat of paint to the wood.
The image above showcases an example featuring a ruler-inspired design etched onto the wood, serving as an inspiring template for unleashing your own creative imagination. The end result is bound to captivate your admiration!
DIY Animal-Themed Hat Rack
This unconventional and distinctive decoration promises to elevate the ambiance within your room, appealing not only to your taste but also capturing the hearts of your children.
Here’s what you’ll need for this creative endeavor: toy animals, a saw, adhesive, hooks (if you opt for hooks, a drill will be necessary), scrap wood, and paint.
Let’s delve into the process step by step:
- Kickstart the project by painting the scrap wood in a hue of your choice, one that harmonizes with the base.
- Next, gather all the toy animals and, intriguingly, slice them in half—only the front segments of their bodies will be employed.
- Following this, position each animal on a wooden block.
- For secure adhesion, you can employ either adhesive or, if you opt for hooks, drill holes accordingly.
- If you select adhesive, allow the assembly to set for a day before mounting it on the walls, ensuring a steadfast and captivating addition to your decor.
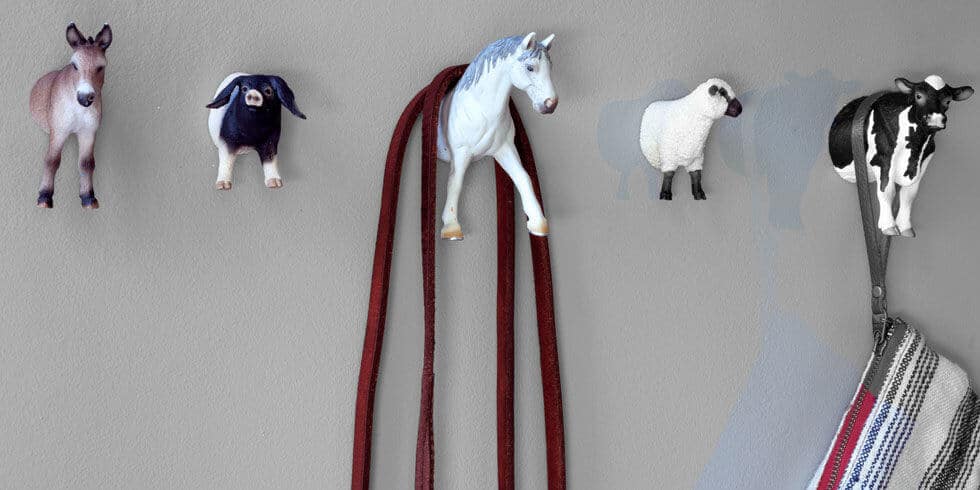
Animal Design Hat Hooks
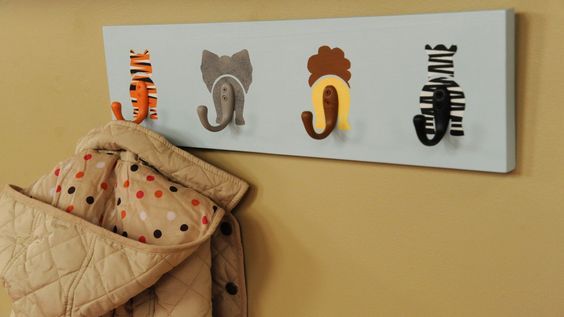
If your children find toy animals a tad too intimidating, this alternative concept might be more appealing. It maintains an animal theme but infuses an irresistibly cute element that is sure to captivate your little ones.
To embark on this project, gather the following essentials: a wooden board, sandpaper, a guide, paint, pet templates, adhesive pattern film, pattern tape, hooks, screws, and hanging hardware.
Here’s how to bring this charming idea to life:
- Commence by ensuring the wooden board is sized to your specifications, fitting perfectly within the designated space. Subsequently, apply a base coat of white paint to the board.
- After printing out templates of the animal figures—focusing solely on the rear portions of their bodies—affix these patterns securely onto the board.
- As a finishing touch, paint the hooks to correspond with the tails of the adorable animal motifs, completing a delightful and kid-friendly hat rack or coat hanger that your children will adore.
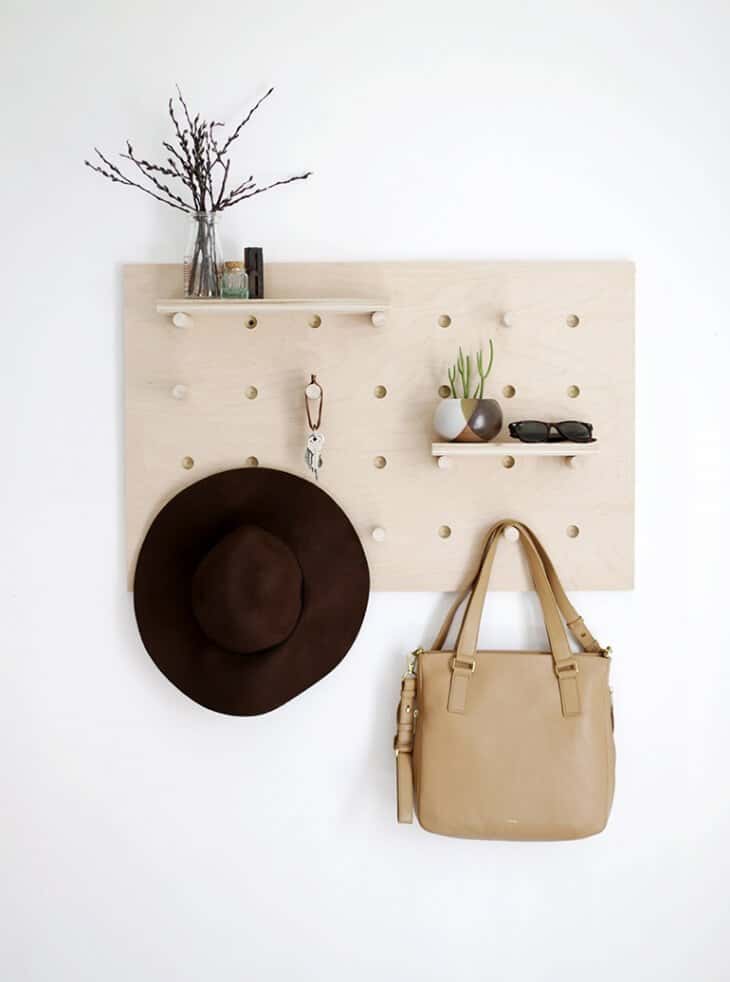
Insulator Layer Shelf
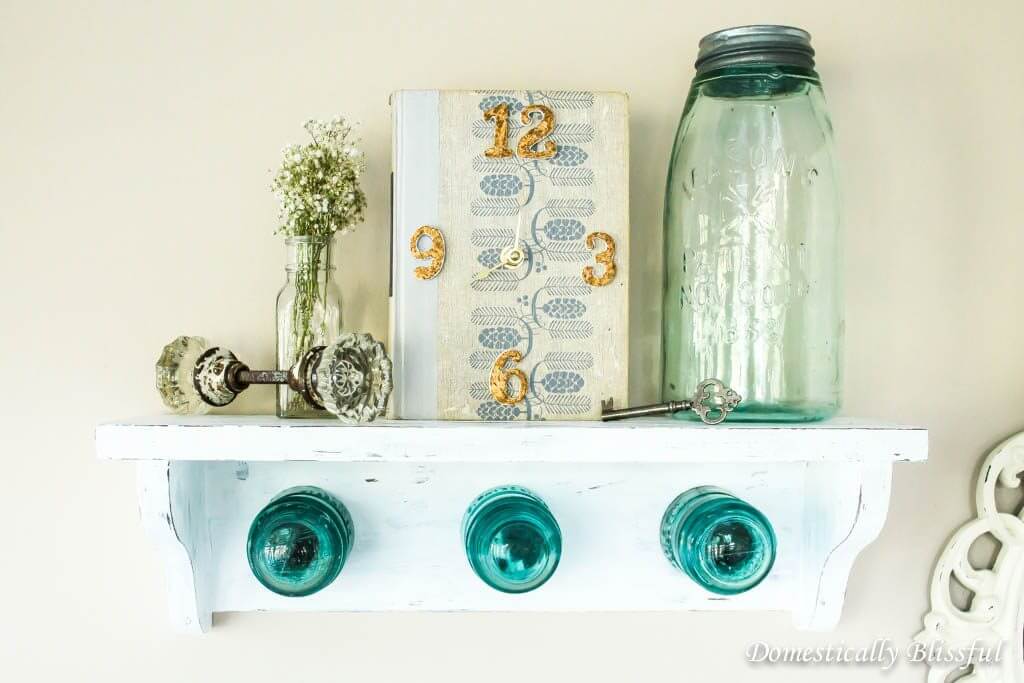
To bring this idea to life, you’ll require a wooden board, insulators (the quantity depends on your preference), and screws or nails to fasten them securely.
Here’s a step-by-step breakdown of the process:
- Begin by securing the insulators firmly in place using the chosen fastening tools.
- Prior to commencing the assembly, trim the insulators to the desired size.
- Additionally, create an opening in each insulator, facilitating attachment to the base with screws.
- For added reinforcement, adhesive can also be employed.
- Once the assembly is complete, you have the flexibility to install the rack either indoors or outdoors, enhancing the functionality and style of your space.
Coastline Style Inspired Hat Rack
When contemplating reminders of the coastline, the mind often conjures images of sandy shores and crashing waves. Yet, there’s another coastal element worthy of consideration: paddles.
Indeed, paddles can serve as captivating embellishments for your home. Their mere presence on a wall can enhance the room’s visual appeal.
However, why stop at decor when you can make them even more functional, such as by transforming them into a handy hat rack?
To execute this, attach hooks securely to the paddle and mount it on the wall. When affixing the hooks to the paddle, exercise caution to prevent any damage to this coastal-inspired piece.
Lego Themed Hat Rack
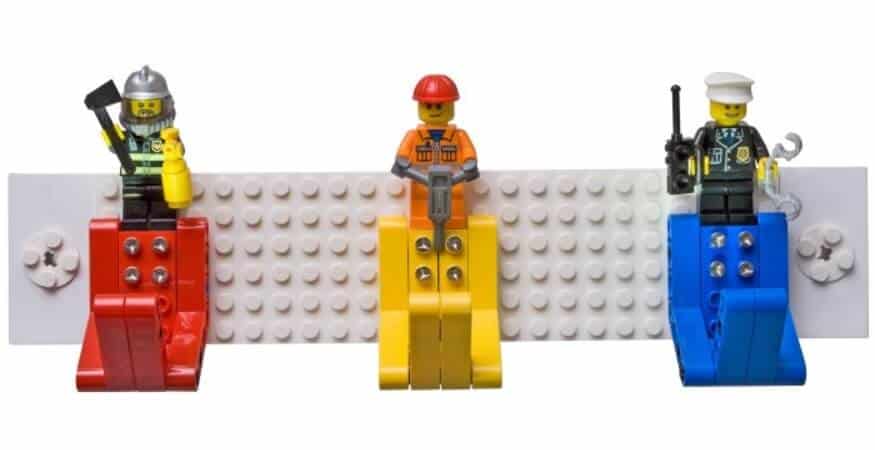
This idea caters particularly well to children, as it harnesses the colorful world of Lego toys as its design foundation. To embark on this project, a complete Lego set is essential.
The process entails assembling the Lego pieces to craft a hat rack inspired by these beloved building blocks. Outfitted with three hooks or more, this creation isn’t limited to just hats; it can also accommodate coats, backpacks, and more. Whether you prefer crafting the block on your own or enlisting the help of another, the result promises to be a delightful and enjoyable addition to your space.
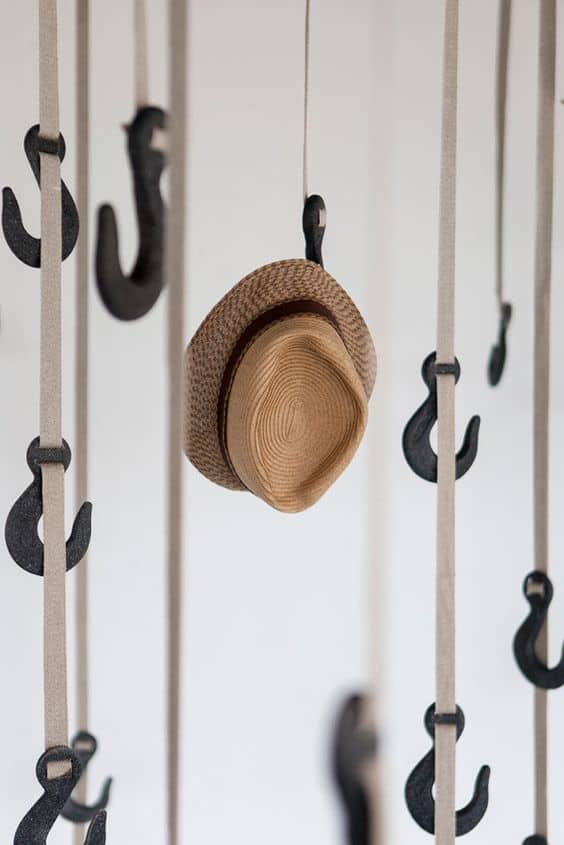
DIY Hat Rack Made of Letters
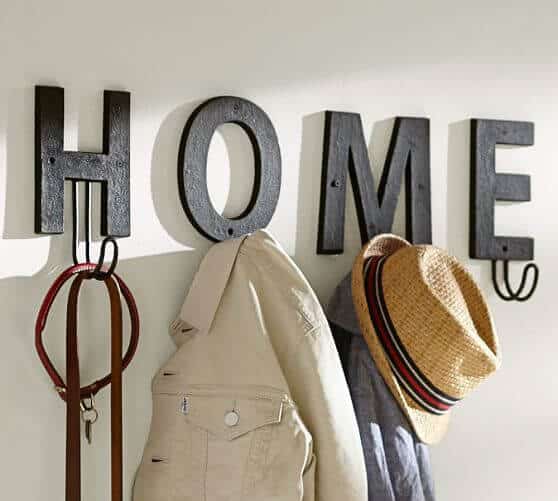
If “L-O-V-E” aligns better with your taste, that’s a splendid choice!
To embark on this project, you’ll need a set of tools, including cable cutters, cord pliers, heavy metal cable, layered telephone angling, tape, and additional cable.
Here’s a step-by-step guide to bring this idea to fruition:
- Begin by selecting the letters you wish to use.
- Proceed to tightly envelop these letters in colored cord.
- Determine the quantity of hooks required for your design.
- Subsequently, extend the cable from the letters to one of the layered hooks and secure it firmly.
- For added embellishment, introduce angling cord into the equation, elevating the visual appeal of your creation.
Ski Board Hat Rack

To embark on this project, you’ll require an antique skiboard, which can potentially be sourced from a thrift market if not readily available at home.
Here’s how to execute this concept:
- Begin by affixing antique hooks onto the front surface of the skiboard.
- Once the antique hooks are in place, you have the flexibility to position the skiboard hat rack wherever you desire.
- Nonetheless, it’s worth noting that the mudroom or entryway, where hats and coats are typically removed, would serve as an ideal location, enhancing both functionality and aesthetics.
Autumn-style Hat Rack
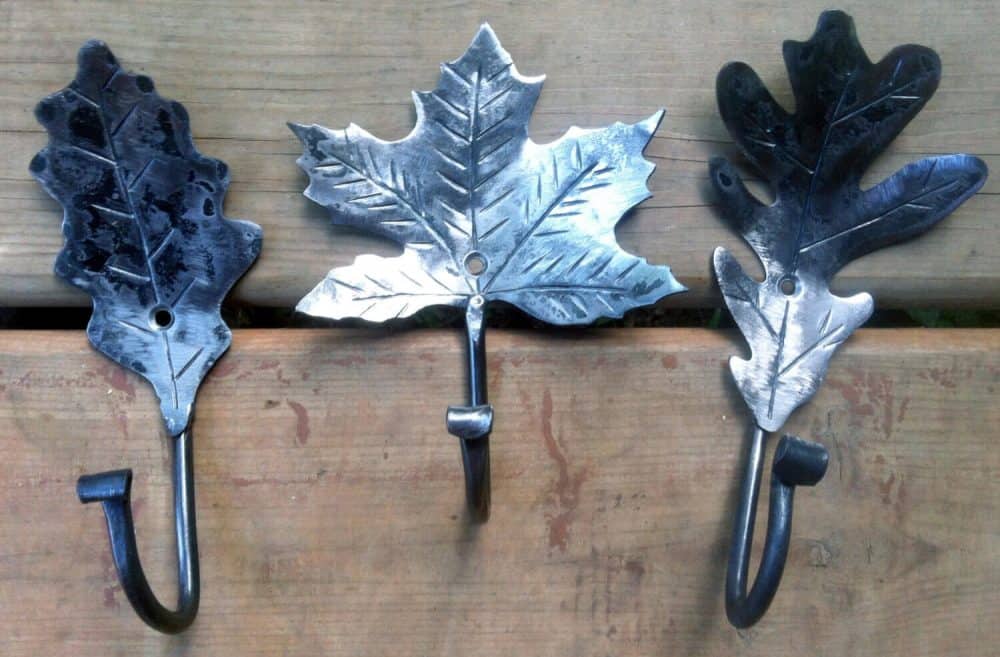
Constructing this rack requires several key components: timber, handles, screws, paint, and a trusty screwdriver.
Here’s a straightforward guide to bring this project to life:
- Initiate the process by applying your chosen shade of paint to the timber, ensuring it dries thoroughly.
- Subsequently, craft a hole in the timber, reserving it for the placement of the handles.
- Finally, conclude the assembly by securing the screws and bending the handles towards them, affording a practical and visually appealing solution.
Key Holder Hook
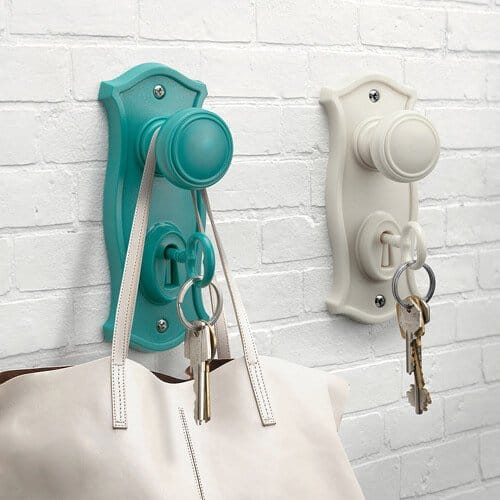
This inventive concept taps into the potential of repurposing old door locks and handles as versatile hangers, accommodating items ranging from bags and coats to, notably, hats.
Unconventional yet brimming with imagination, this concept imparts a modern ambiance to your room. The vibrant and unassuming color palette infuses a sense of vitality into the living space.
Execution involves mounting the locks onto a wooden board, which is subsequently affixed to the wall using adhesive.
Hat Hooks Made of Faucets
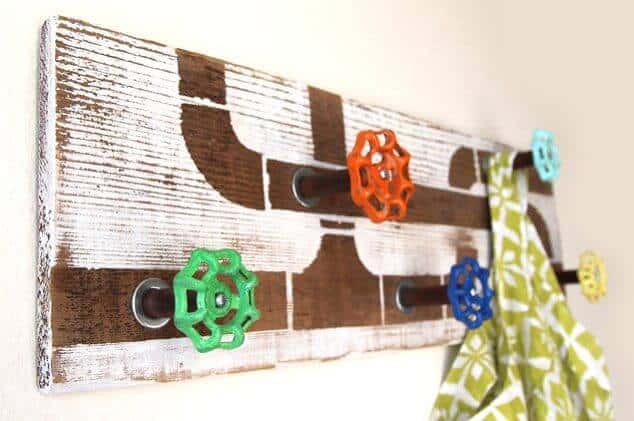
The essential step is to secure them onto a substantial piece of wood or any other material capable of supporting the faucets and withstanding the weight of hats or coats.
Reclaimed Wood Hat Rack Hooks
Here’s the step-by-step guide:
- Hunt down four wood pallets of similar dimensions and acquire an additional two for the back.
- Employ your trusty nails and hammer to seamlessly join these pallets together.
- Proceed to affix hooks securely onto the surface of the pallet.
- Finally, mount the completed pallet onto the wall.
With this straightforward process, your hooks are now ready for utilization! Voila!
Unique Chevron Hooks
There’s no need to rack your brain for extravagant or unconventional ideas. Occasionally, the most straightforward concept proves to be the most effective. These racks consist of wooden pieces adorned with hooks affixed to their surfaces.
To add a captivating twist, consider the finishing touch of painting the wood with eye-catching chevron stripes.
Doesn’t this sound remarkably straightforward
Mounted Wooden Hooks
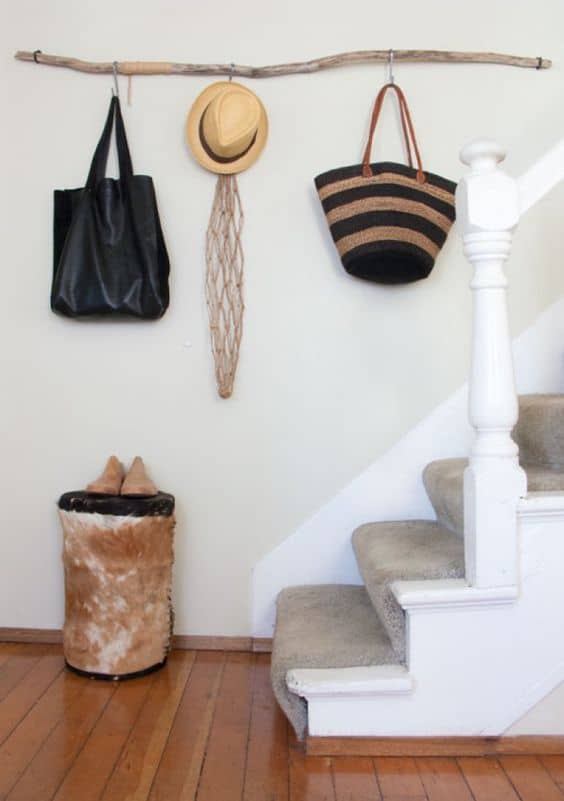
Tree branches Coat and Hat Rack
Tree Design of Hat Hooks
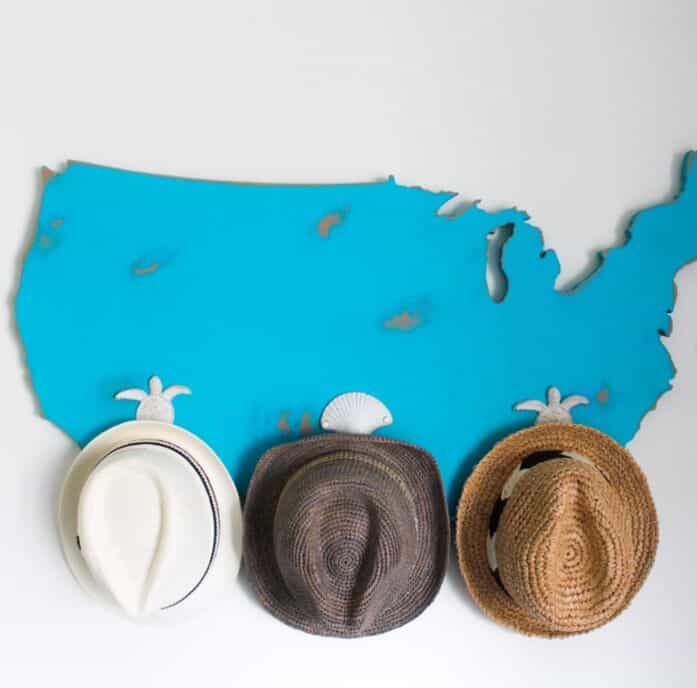
World Map Hat Rack
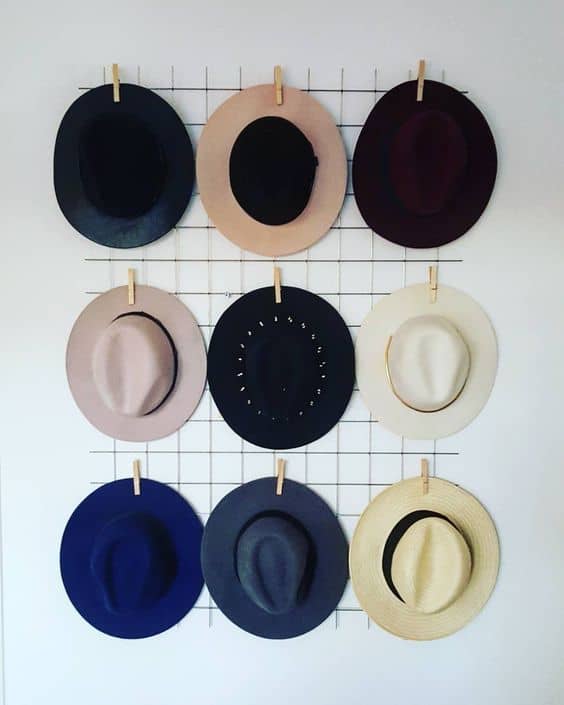
The Clothes Pins Hat Rack
A Simple Twig Hooks Idea
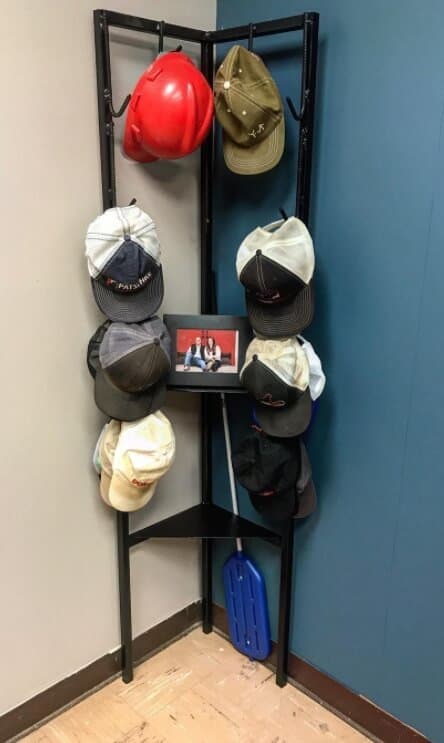
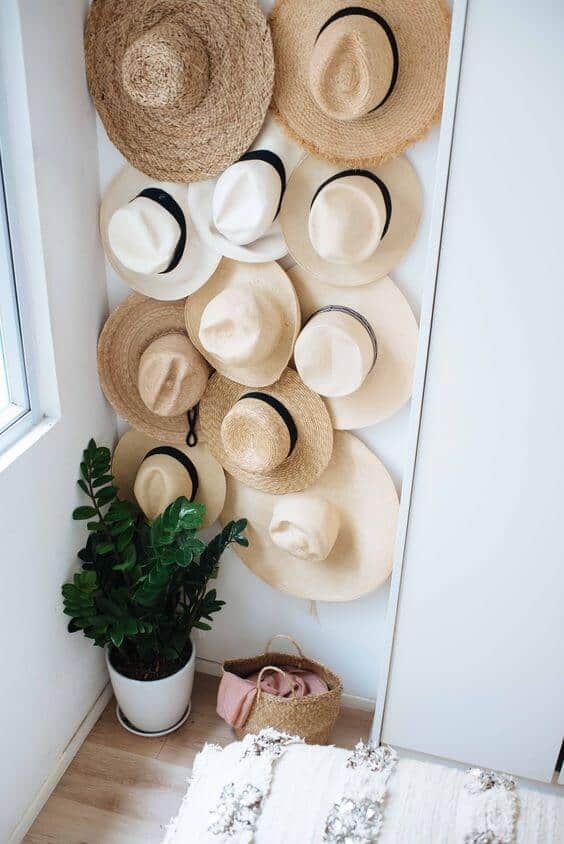
Corner Hat Rack
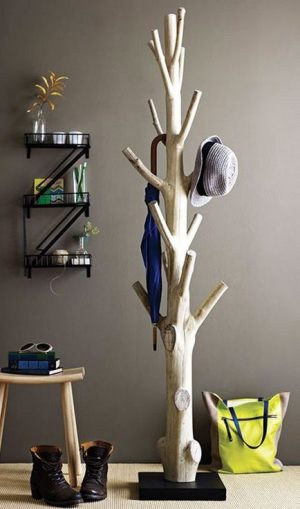
Tree Trunk Standing Hat Rack
Repurposed Photo Strings Hat Rack
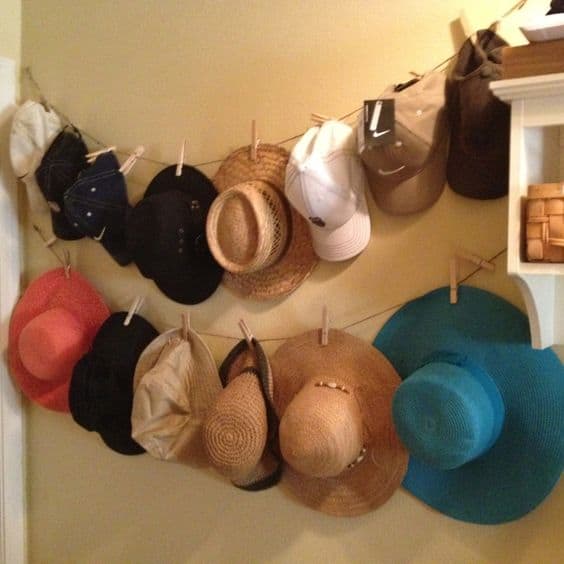
You can typically find photo strings at stores specializing in home supplies. These products often include photo pins for attachment. Alternatively, to recreate this aesthetic, you can employ regular strings and clothespins used for hanging garments.
The installation process is remarkably straightforward. Begin by securely hammering nails into the wall, maintaining a carefully measured spacing between them. Subsequently, fasten each end of the strings to these nails, effortlessly achieving the desired display.
Hooks on The Wall
Clothes Hanger Tails Hat Rack
Golden Hooks on the Wall Hat Rack
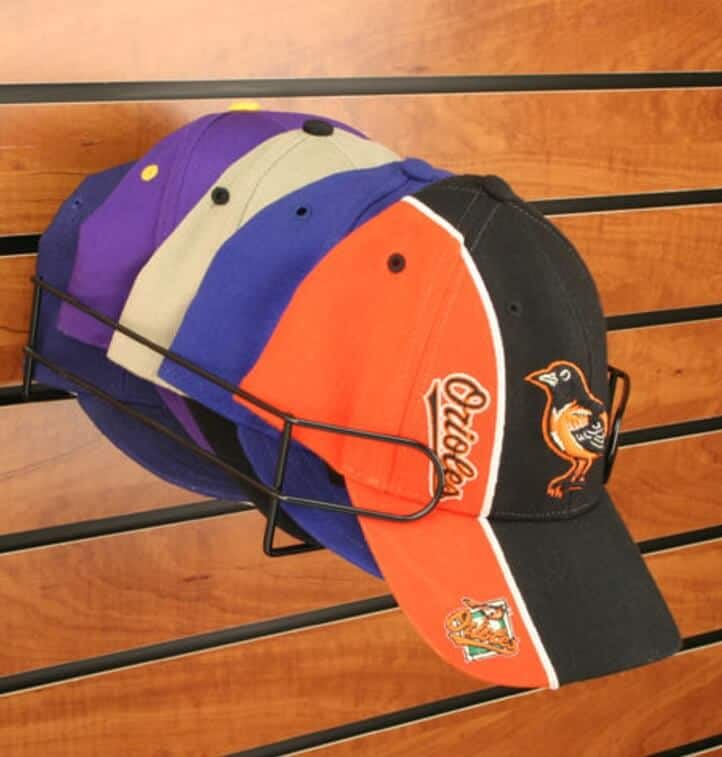
Hanging Hat Rack Hooks
Modern Wooden Pallet Hooks
Old-rustic Wood Pallet Hat Rack
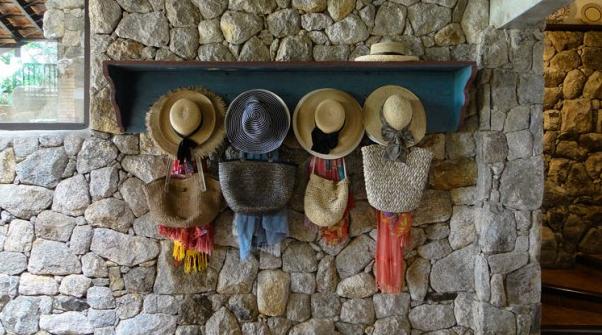
If your abode boasts a vintage aesthetic, this particular concept could align seamlessly with your decor. What you’ll require are two substantial, elongated wooden pallets, as well as a duo of petite wooden boards for the sides.
In the illustration, note the intricate antique carvings adorning the smaller boards. The assembly process involves connecting these elements, and you have the option of using either nails or adhesive, with the latter being recommended for a cleaner finish.
White Retro Hat Rack

Repurposed Wooden Doors Hat Racks

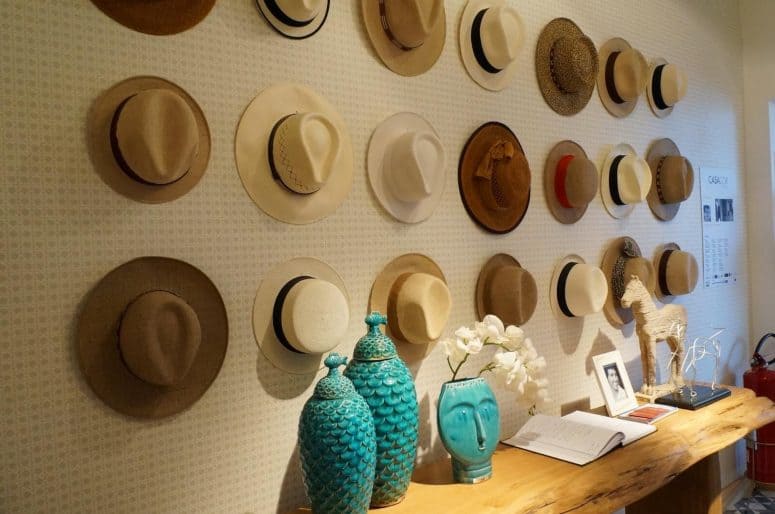
Simple Wall Display Hat Rack
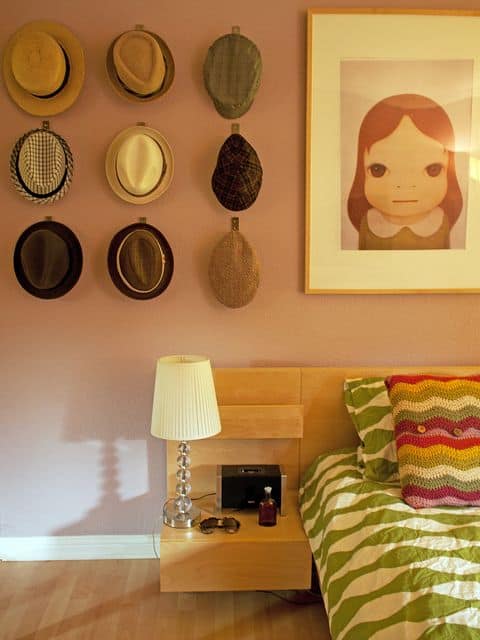
The Mirror Hat Hooks

Hanging Chain for Hat Rack
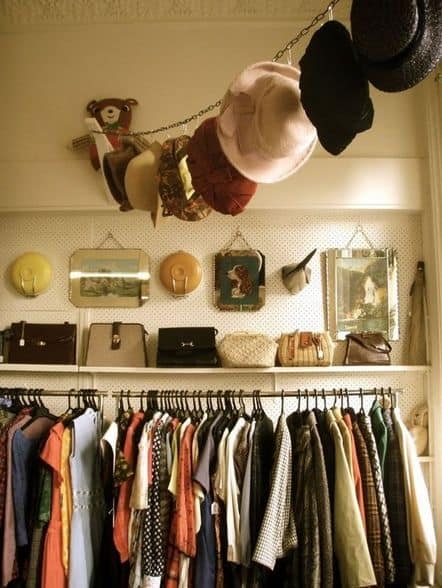
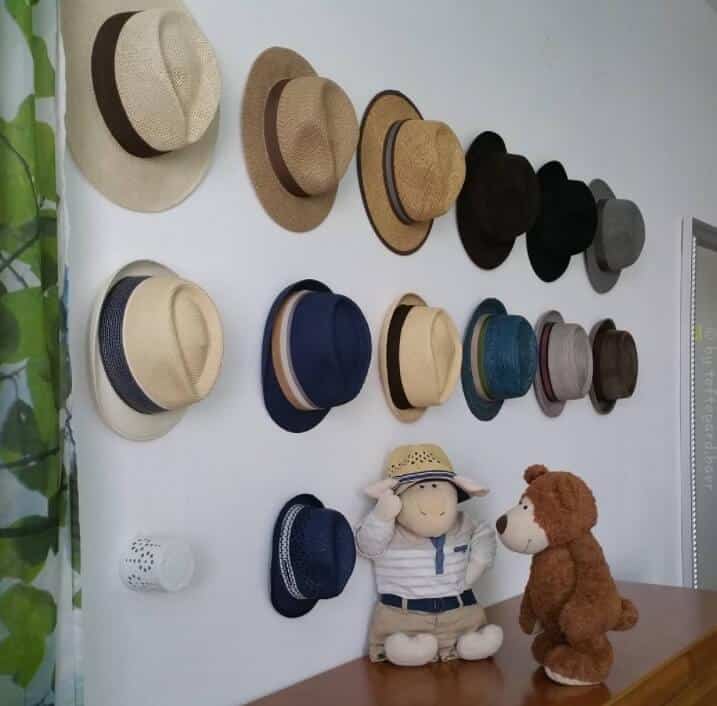
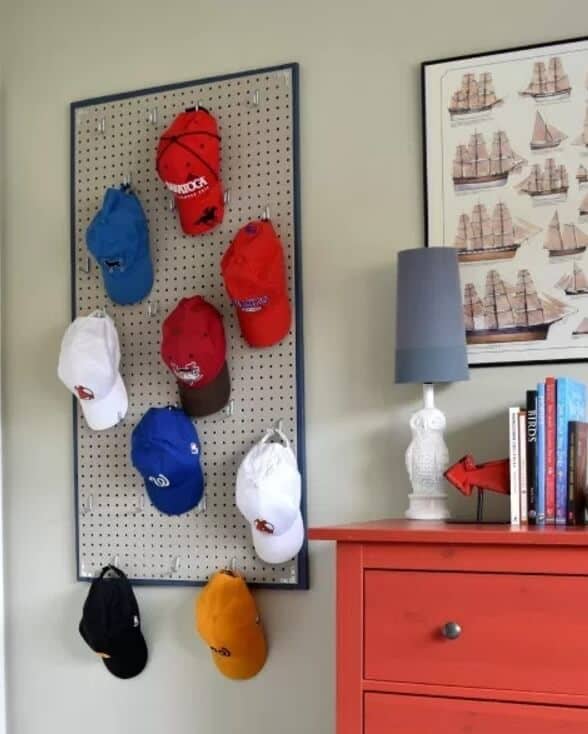
Organizing Hats on the Wall Rack
Hipster Style Wall Hooks
Draw inspiration from the tapestry that adorns both sides, and you can effortlessly embrace this hipster-style approach to hat racks. The simplicity of this design is immediately evident, as all that’s required is affixing hooks to the wall using nails.
Ensure that your hooks are arranged in an orderly fashion, mirroring the picture for reference. Additionally, take precise measurements of the spacing between each hook to craft a hat rack that exudes a sense of tidiness and neatness.
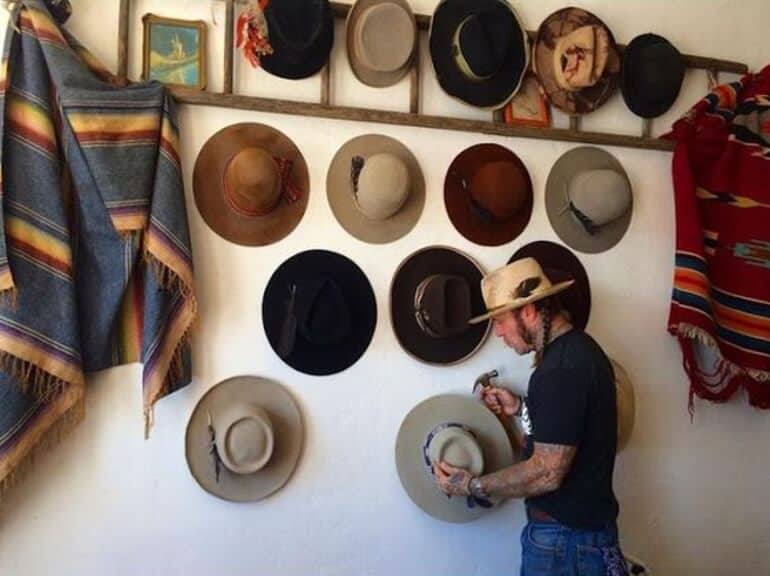
Old, Rustic, Giant Wheel Hat Rack
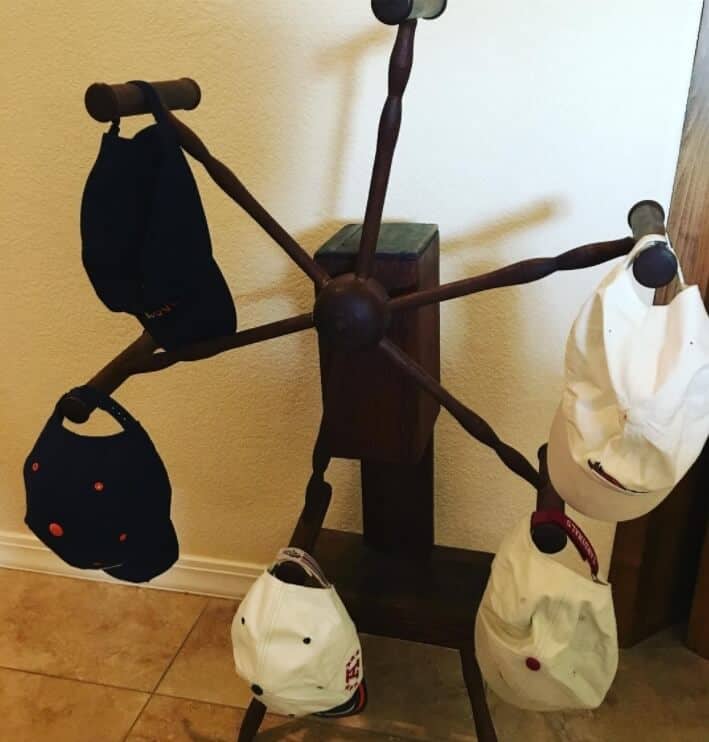
Are you aiming to achieve a timeless, vintage appeal with your hat rack? Give this option a whirl!
- Begin your quest by venturing to a marketplace in search of a weathered, antique wheel with rustic charm.
- Subsequently, invest some time in refinishing the wood to grant it a sleeker and rejuvenated appearance.
- Finally, adorn the wheel with an ensemble of your cherished hats.
However, it’s worth noting that this approach comes with a limitation — it can only accommodate a maximum of six hats due to the limited number of hooks available.
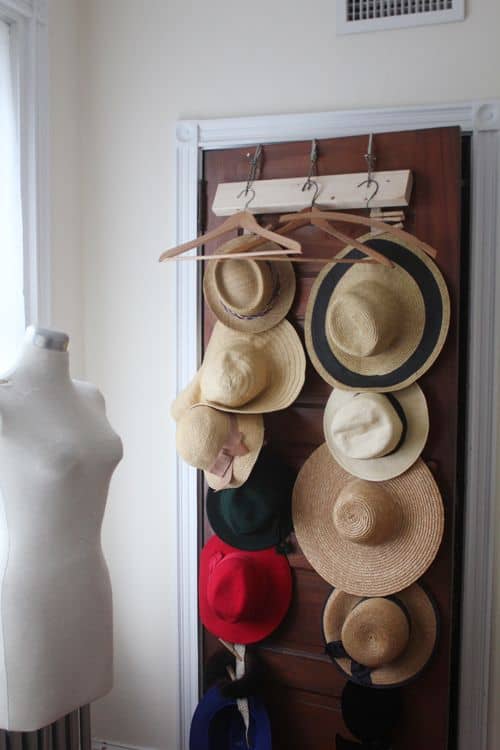
The Corner Mount Hat Rack
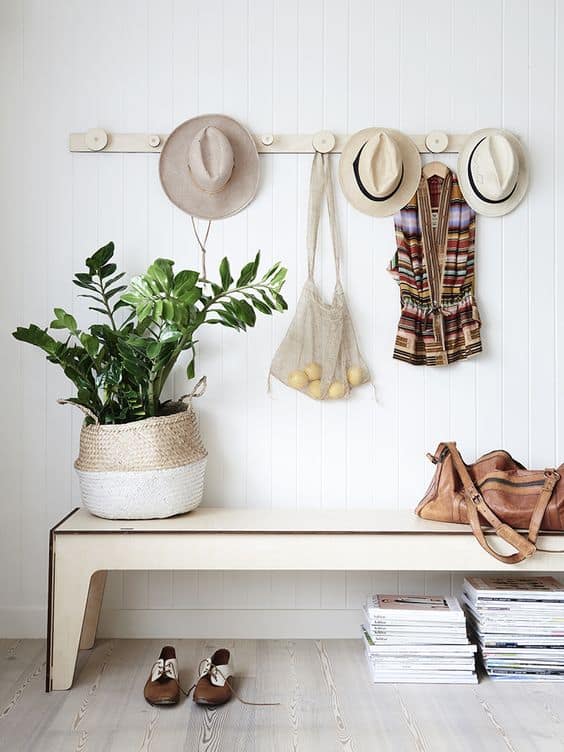
Simple White Horizontal Hat Hooks
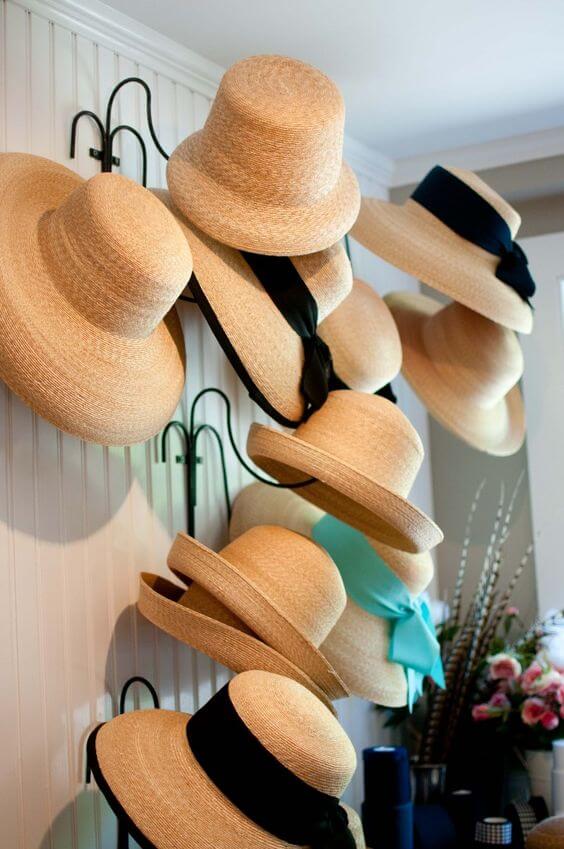
Old Rustic Vintage Iron Hat Rack
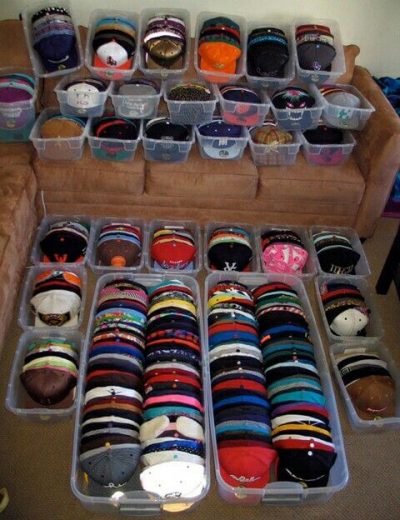
Tupperware Boxes Hat Storage
Hidden Hat Rack
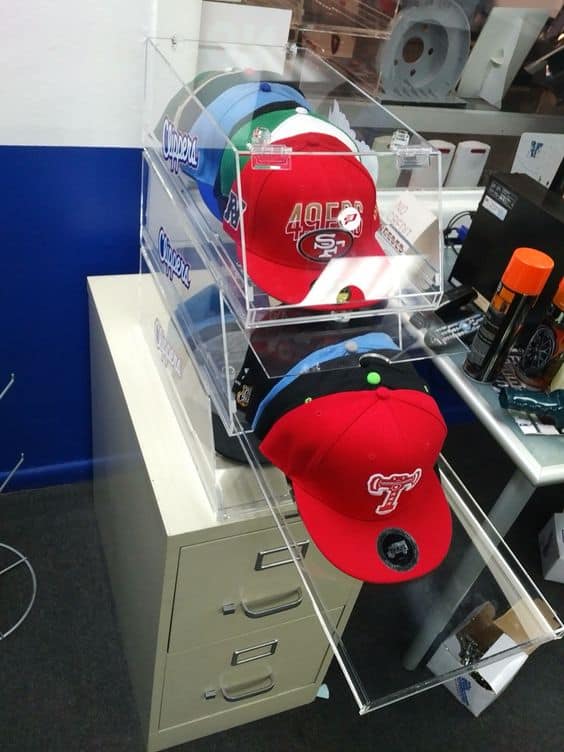
Glass Box Hat Storage Idea
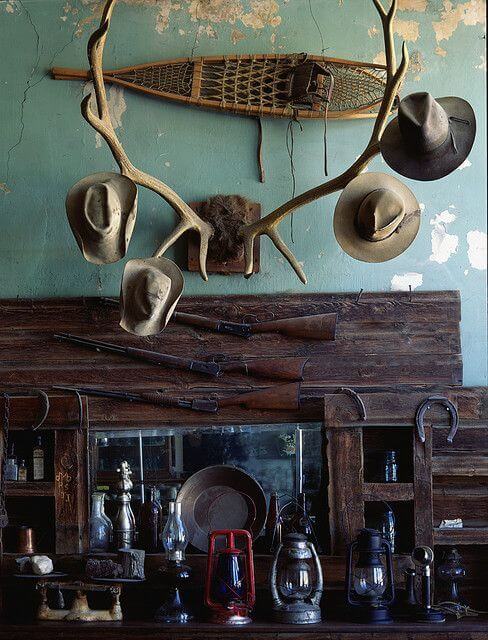
A Giant Elk Horn Hat Rack
Wall Mounted Branch Hat Racks

More Hat Rack Ideas