When giving our home a fresh coat of paint, it’s essential to pay attention to details like windows, baseboards, door casings, and crown moldings. The regular painting of these areas can make a significant difference, enhancing the overall appearance of your home by making it look tidier, fresher, and brighter.
Repainting the baseboards, in particular, is a smart remodeling project that can greatly improve the look of a room. The best part is that it doesn’t require a significant amount of time. With proper planning, the entire job can be completed within a day or, at most, two days. Once the task is carried out professionally and efficiently, you’ll be amazed at the results.
Painted baseboards add a touch of brilliance to the space, infusing a sense of newness throughout the room. To help you with the process, we’re delighted to share some valuable tips on how to paint baseboards effectively.
Things You Will Need
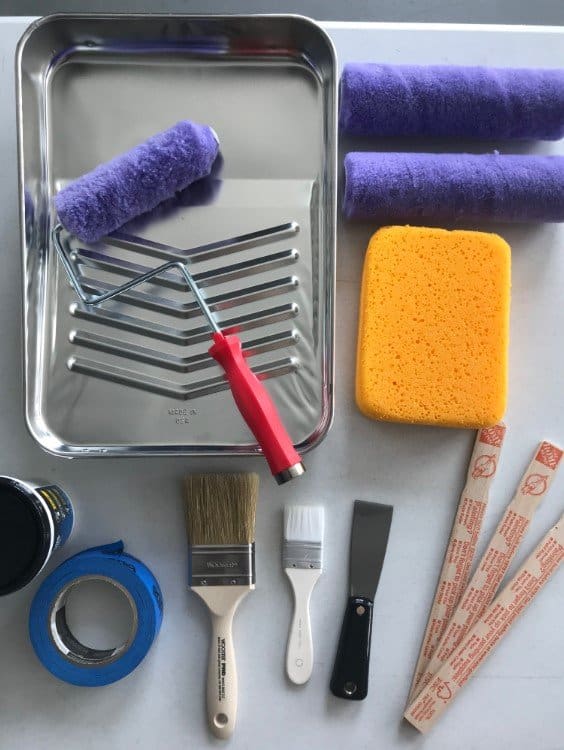
- Primer
- Paint (Choose between latex or oil-based, depending on your preference)
- Quality paintbrushes (Opt for angled brushes with a width of 1 to 2 inches)
- Painter’s tape for precise measurements
- TSP or Trisodium Phosphate
- Drop cloth
- Water bucket
- Utility knife (if available)
While some people prefer oil-based paints, latex paints are also a viable option. These water-based paints are easier to clean up, and they offer a variety of gloss levels to choose from. Ultimately, the decision between latex and oil-based paint should be based on your specific needs, preferences, and requirements.
Experts often recommend a glossy finish for baseboards, as it tends to be more resistant to scuffing and easier to wash compared to a flat paint finish. Consider using either high-gloss or semi-gloss paint when painting your baseboards for optimal results.
Some Basic Instructions
When it comes to painting baseboards, you’ll need to decide whether to paint them while they are fixed in place or remove them for painting. Each approach has its own benefits and challenges.
Painting the baseboards while they are fixed to the walls can be more complicated and time-consuming. You’ll need to spend time measuring, taping, and masking off areas to protect them from paint splatters. Drop cloths may also be necessary to safeguard the floor and surrounding surfaces. There is also a risk of accidentally getting paint onto the walls.
However, despite these challenges, many people still prefer to paint baseboards while they are fixed in place. This is especially true for existing homes where removing the baseboards may be more difficult or not desirable.
In certain cases, the baseboards can be easily removed, and in such instances, it may be more convenient to paint them in a different location. This is typically feasible in new homes or homes that haven’t undergone recent remodeling. Removing the baseboards can be done manually using bare hands or with the assistance of a thin pry tool. You should consider which option is best for your specific situation.
If you’re working with new and uninstalled baseboards, it’s recommended to paint them before installing them. While some minor touch-ups may be required after installation, it is easier to address any damages to the paint during the installation process.
Clean Your Baseboard from Dirt
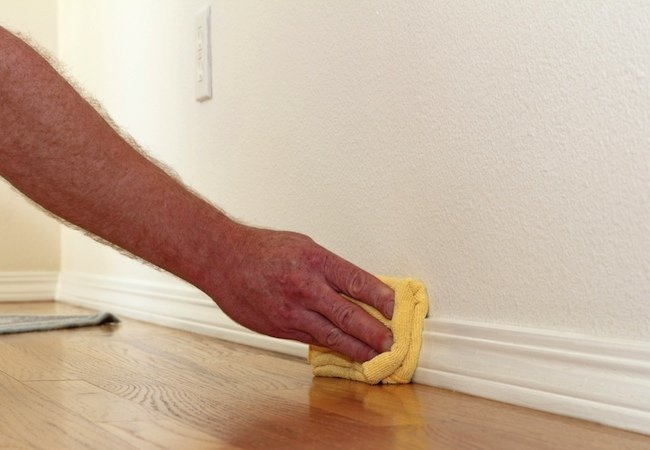
Over time, grime and dirt can accumulate, particularly at the lower sections of baseboards near doors and windows. Neglecting to clean the baseboards before painting can lead to unsatisfactory results and regret later on.
However, it’s important to note that if your baseboards are made of open-pore wood, you should avoid cleaning them with water. Instead, opt for cleaning methods suitable for such wood surfaces to prevent any potential damage.
Taking the time to clean your baseboards properly will ensure a smooth and successful painting process, resulting in a fresh and polished appearance for your baseboards.
Learn How to Use TSP
TSP is highly recommended due to its ability to provide a powerful yet gentle cleaning solution. However, it’s essential to handle TSP with care as it is a toxic powder. When using TSP, always wear safety glasses and waterproof gloves to protect yourself.
When cleaning the baseboards, pay close attention to the top surfaces as dust tends to settle easily on horizontal areas. By ensuring the top of the baseboards is thoroughly cleaned, you can achieve a cleaner and more polished surface for painting.
Mask The Walls & Floor
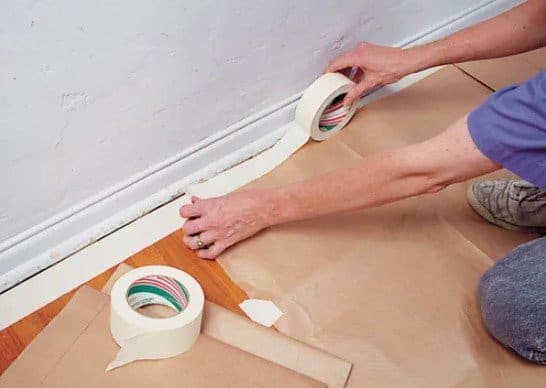
Ensure to use high-quality painter’s tape to effectively cover and mask the walls, particularly along the lower edges. Pay attention to the areas above the baseboards and at the junction between the baseboards and the floor.
Although masking can be time-consuming, it offers numerous benefits, including a more efficient, faster, and cleaner painting process for the baseboards. However, it’s important to note that masking alone doesn’t guarantee perfect results, so proceed with caution and take your time during the painting job.
To minimize excessive dripping onto the floor, be mindful of your brush or roller technique. Excessive dripping can make it challenging to remove the tape once the paint has dried. Additionally, you may consider using masking films on the walls to prevent paint splatters.
While some people choose to paint baseboards without masking, it can be a more difficult task due to their intricate location. Therefore, using masks, such as painter’s tape and masking films, is generally recommended for achieving cleaner and more precise results.
Take Care of Nail Depressions & Patch Gouges
Prior to starting the painting process, it’s crucial to address any significant holes and dings that may have formed on the baseboards over time. Utilizing wood fillers is the recommended solution for this task.
Additionally, make sure to fill in any large depressions caused by nails. However, small and minor depressions can be left as they are, as they generally do not significantly affect the overall appearance.
Importance of Priming The Baseboards
Most baseboards typically come without a factory-applied primer, leaving them with a raw wooden surface. Therefore, it is advisable to apply a primer before painting.
Even if baseboards have already been painted, applying a primer is still recommended, although some may argue it is not necessary. However, it is important to ensure that the surface is in good condition before proceeding.
When applying the primer, make sure it is well mixed and free from any lumps. Load your brush with primer, followed by paint.
To paint the baseboards, use horizontal strokes. Avoid overloading the brush, as it may result in runs and dips on the surface. Holding the brush between your forefinger and thumb is the best technique to employ, and remember to take slow and long strokes for a smooth finish.
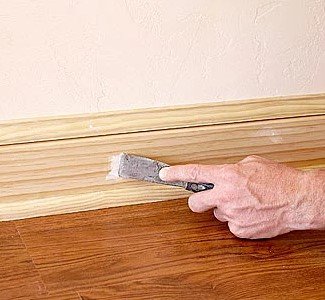
Painting The Baseboard
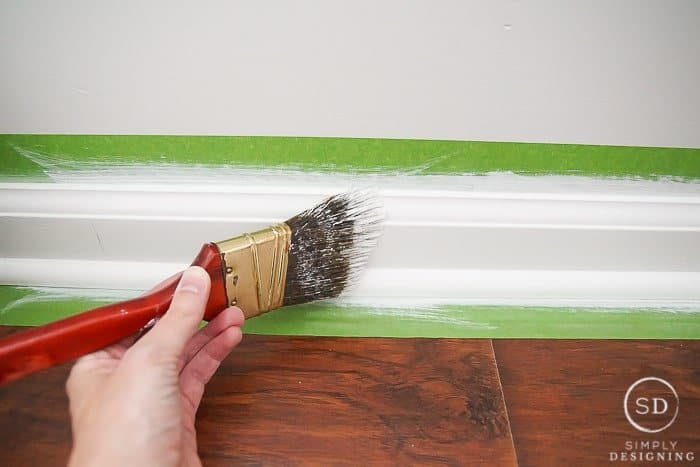
Dip only about one-third of the bristle length into the paint, as using less paint during the first coat is recommended. Although there may be a temptation to use more paint, it’s best to resist it.
Use slow, long strokes to cover the entire length of the baseboards. While overlapping strokes is sometimes unavoidable, ensure there is a wet edge to prevent lap marks when the painting is complete.
After finishing the first coat, allow the baseboards to dry for at least 24 hours. If the weather is cold or rainy, it’s advisable to give it a few extra hours for the paint to completely dry.
Once the paint has fully cured, proceed with applying the second coat. In the case of high gloss paints, you may consider lightly scuffing the painted surface with fine sandpaper before applying the second coat. This provides the glossy surface some texture, allowing the second coat to adhere better to the baseboard surface.
When To Remove The Painter’s Tape
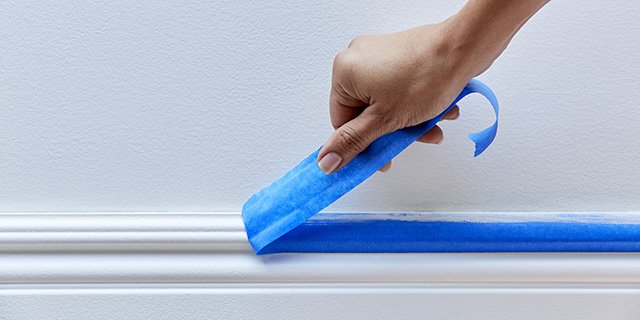
After finishing the two coats of painting, it’s important to allow the paint to dry completely. While the entire painting process typically takes two days, it’s crucial not to rush the removal of the painter’s tape.
Ensure that the paint has fully dried before slowly and carefully removing the painter’s tape. Take your time to avoid any accidental smudging or damage to the freshly painted surface.
Clean up your tools using water and soap. Thoroughly clean the brush, as it can be reused for future paint projects, whether in a few years or months. Properly caring for high-quality brushes can make them last for many years to come.
Conclusion
We believe that the information provided above offers valuable insights into the different aspects of painting baseboards. Our aim is to provide readers and those interested with a comprehensive answer to the question of how to paint baseboards thoroughly, effectively, efficiently, and in a timely manner.