Timing your emails perfectly can be crucial for various reasons, and fortunately, Outlook offers a simple solution with just a few clicks. Continue reading to discover how you can schedule emails in Outlook on both desktop and web versions, as well as from your phone.
Reasons to Schedule an Email in Outlook
Here are a few compelling reasons to utilize the “send later” feature in Outlook:

Time-Saving Advantage
Sending multiple emails to a single recipient can eat up a significant amount of time. By using the scheduled email option in Outlook, you can reduce the back-and-forth throughout the day. Instead of responding to emails as they arrive, you can create a reply and schedule it for later, allowing you to address all of them at once and avoid interruptions during your daily activities.
Boosts Productivity
The Outlook schedule email option has benefits for both individuals and groups. Implementing it across your office can enhance productivity. Encourage your employees to send internal emails at the same time each day to minimize back-and-forth exchanges. Additionally, restricting email checking to specific times can help your staff maintain focus on their tasks, as interruptions can lead to a significant loss of productivity.
Enhances Response Rates
Timing is crucial when it comes to email responses. By using the schedule send option in Outlook, you can motivate recipients to prioritize their emails. With an average office worker receiving around 120 emails daily, sending an email at the right time can make a difference. For instance, scheduling an email to arrive just when your boss gets to the office ensures it will be one of the first things they see.
Facilitates Comprehensive Emails
We often find ourselves sending emails and then recalling something we forgot to include. This leads to additional time spent writing and reading multiple emails. The Send Later feature in Outlook helps avoid this situation. Staff members can schedule emails to be sent a few moments later or by the end of the workday, allowing them to add any missed information before the final delivery.
How to Schedule Send in Outlook on Windows

To schedule an Outlook email to be sent later on Windows, follow these steps:
1. Open Outlook on your Windows device.
2. Select “New Email” or reply to an existing one.
3. Compose your email, add recipients and a subject line.
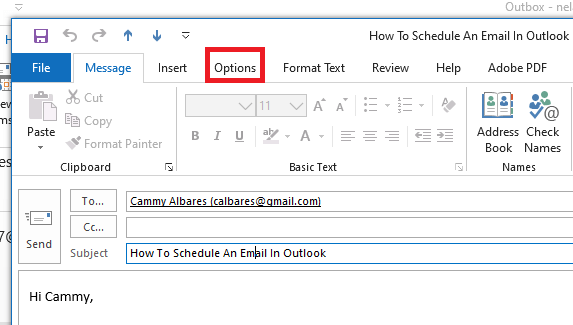
4. Click on “Options” in the message window.
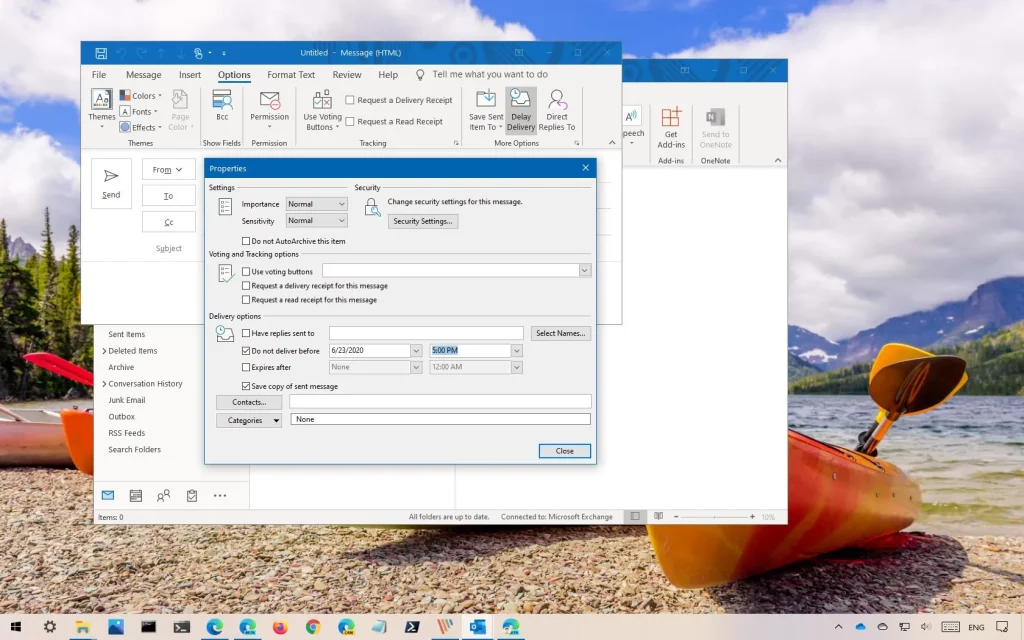
5. From the ribbon, choose “Delay Delivery.”
6. In the “Properties” window, navigate to the “Delivery options” tab.
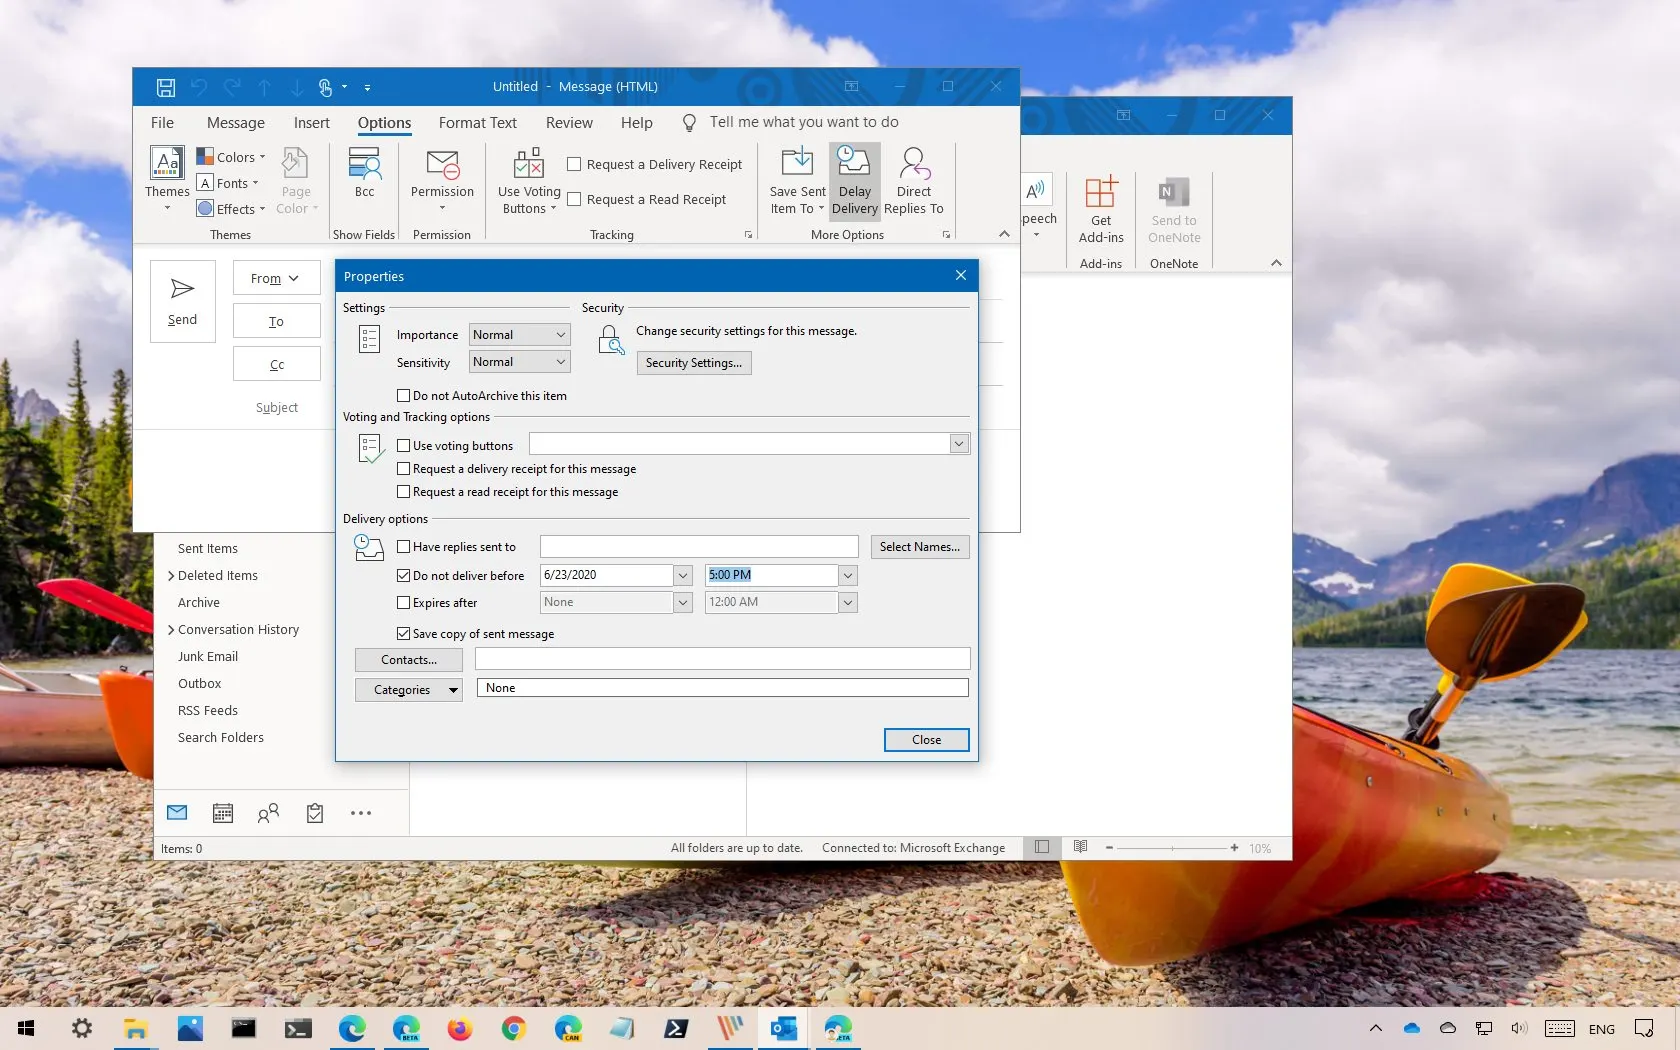
7. Check the “Do not deliver before” box and select the desired time and date for sending the email.
8. Click “Close” when done.
9. Finally, click “Send” in the email window to schedule the email for the specified time and date.
How to Schedule Emails in Outlook on Mac
To schedule an Outlook email on your Mac, follow these steps:
1. Open Outlook on your Mac.
2. Click on “New Email/Message” or reply to an existing email.
3. Compose the email, add recipients, and a subject line.
4. After composing the email, click the arrow at the top right of the “Send” button and select “Send later” to schedule the email.
5. Choose the desired time and date for sending the email.
6. Click “Send” to schedule the email.
How to Send a Delayed Email in Outlook for Web
To schedule an email in Outlook on the web version, follow these steps:
1. Sign in to your Outlook account on a web browser.
2. Click on “New mail” and compose your email, adding recipients and a subject line.
3. To schedule the email, click the arrow next to “Send” and select “Schedule send.”
4. Choose a predetermined time or select “Custom time” to specify the sending time.
5. Click the blue “Send” button to schedule the email.
How to Schedule an Email to Send Later in Outlook on Mobile
As of now, the Outlook app for mobile does not have an email scheduling feature. However, you can use the Outlook web version from your phone by accessing the desktop site on your mobile browser.
Alternatively, you can use third-party apps like Gmail or Apple Mail on the iPhone 16, both of which allow email scheduling. If you prefer to stick with Outlook, using the web version on your mobile browser is the best option. Here’s how you can schedule an email in Outlook on mobile:
1. Click on the “Ellipsis” (…) option at the bottom of the page.
2. Choose the “View Desktop site” option while using Microsoft Edge on iOS or Android, or use a similar function in other mobile browsers.
3. Sign in to your Outlook account on the web version.
4. Click on “New message” and compose your email, adding recipients and a subject line.
5. To schedule the email, choose the “Send later” option next to “Send.”
6. Select the desired time and date for sending the email.
7. Click “Send” to schedule the email.
Although using a desktop web browser on a mobile device might not be the most convenient option, it serves as an alternative if you don’t want to use third-party applications.
How to Add a Delay to All Emails in Outlook
You can add a delay to all emails in Outlook by following these steps:
1. Navigate to “File” > “Manage Rules and Alerts” > “New Rule.”
2. Under “Select a Template,” click “Apply to Messages I Send,” and click “Next.”
3. Select “Defer delivery by a number of minutes” and indicate the desired delay duration.
4. Follow the prompts in the wizard to complete the process.
Frequently Asked Questions
Can You Schedule an Email in Outlook?
While the mobile version of Outlook doesn’t offer the option to schedule an email, you can use the desktop site for this purpose.
To schedule an email in Outlook, sign in to your account, compose your new email, and choose the “Send later” option when scheduling it. Select the desired time and date for sending, and then click “Send.”
How to Send an Email at a Specific Time in Outlook?
You can send an email at a specific time using the schedule send option in Outlook. Compose your email, choose “Send later,” and specify the desired time and date for sending.
Wrapping Up
Although the Outlook phone app may add the scheduled emailing feature in the future, you now know how to schedule an email in Outlook from any device. If you encounter any issues, feel free to share them in the comments below.
