During your data handling tasks, you might occasionally find your existing arrangement a bit cumbersome. When your data is organized in rows, the navigation process can become quite frustrating.
Google Sheets offers numerous functionalities to assist you in structuring your spreadsheets, including text rotation. At times, you might need to transpose data within Google Sheets, yet manual efforts are unnecessary.
Within this instructional piece, I’ll also demonstrate two effective methods for transposing data in Google Sheets:
1. Utilizing the Paste Special command.
2. Harnessing the power of the Transpose function.
Guide to Transposing Data in Google Sheets – Simplified Steps

Here’s a straightforward procedure for transposing data within Google Sheets:
1. Select the data you wish to transpose.
2. Copy the chosen data (either right-click and choose Copy, or use the keyboard shortcut Ctrl + C).
3. Highlight the cell where you intend to place the transposed data.
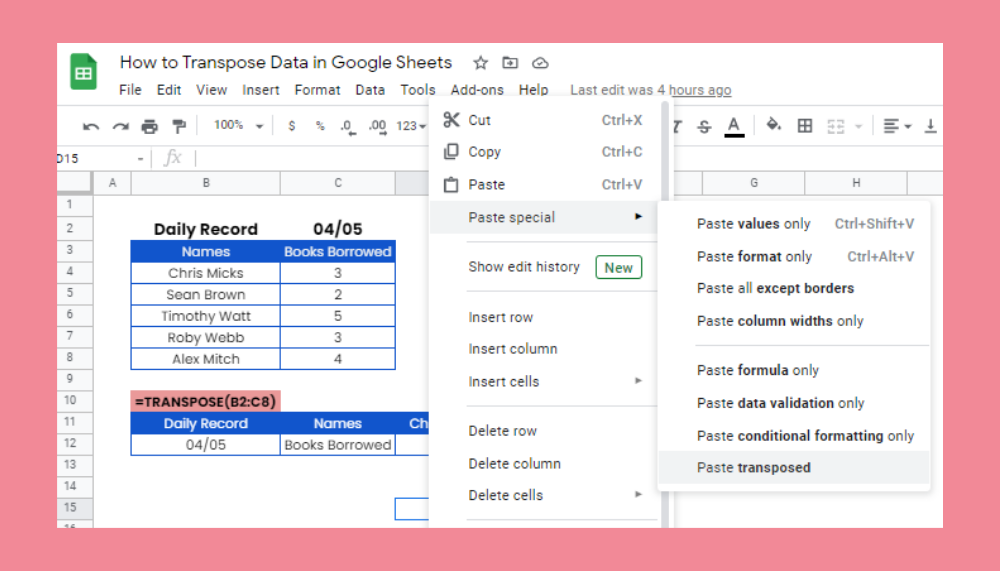
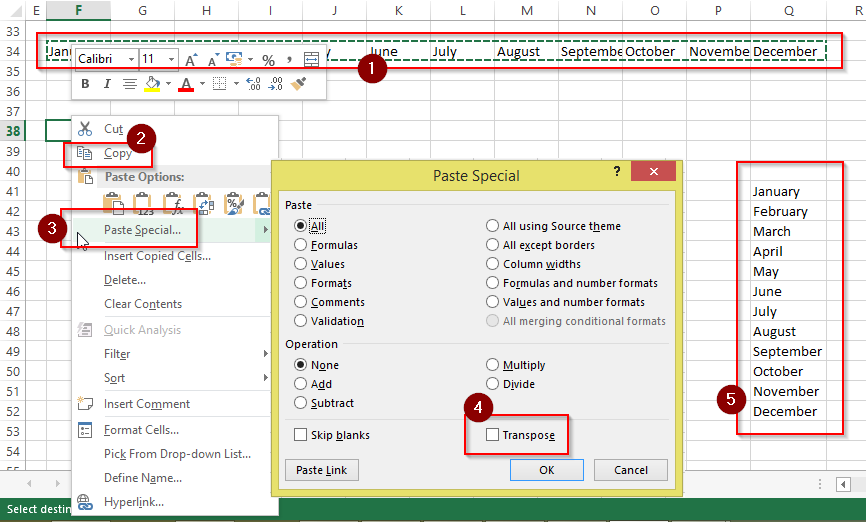
4. Right-click, navigate to Paste Special, and click on Transpose.
Understanding Transposing Data in Google Sheets

Transposing involves swapping columns and rows within Google Sheets, effectively rotating the data layout. For instance, if your data spans rows 1 and 2, the information in row 1, column A, would move to column B, and the data in row 2 would likewise shift.
This method eliminates the necessity of reentering or copying rows individually. Google Sheets empowers you to invert rows and columns either through copy-paste actions or by utilizing the TRANSPOSE function.
The function’s structure is as follows:
=TRANSPOSE(array_or_range)
Where array_or_range pertains to the array or range of cells subject to transposition.
To acquire insights on utilizing this function, you can skip ahead to the “Using the TRANSPOSE Function to Transpose Data” section in this guide.
Let’s explore some instances demonstrating the process of flipping rows and columns within Google Sheets.
Transpose Data through Paste Special

Imagine having a dataset illustrated below:
Transposing this data signifies arranging the names within one row and the corresponding scores in a subsequent row.
Follow these steps to transpose data in Google Sheets:
Step 1: Select the data for transposition.
Step 2: Copy the data (right-click and select Copy, or use the keyboard shortcut Ctrl + C).
Step 3: Choose the cell for receiving the transposed data.
Step 4: Right-click, go to Paste Special, and opt for Transposed.
Voila! The dataset is now transposed. This represents only a single technique among the many useful features Google Sheets offers to streamline your tasks.
Do note that employing these steps solely transposes the data, excluding formatting. For carrying over formatting, a separate copying action is necessary.
Furthermore, the transposed data remains static. Any alterations in the data mandate a repetition of the aforementioned steps to obtain fresh transposed information.
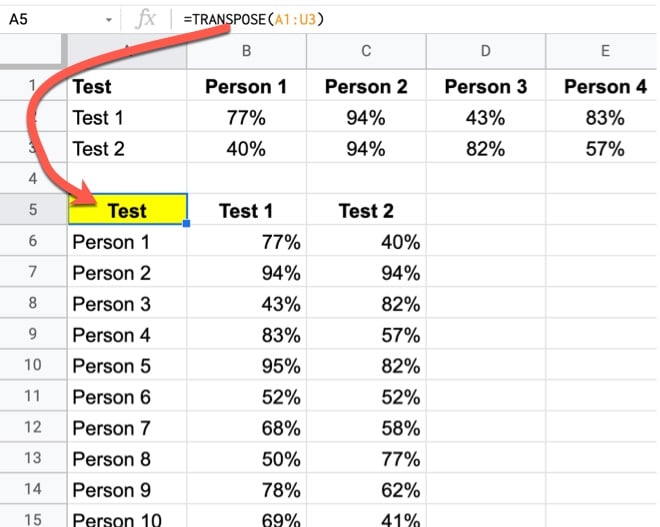
For dynamic transposition, implement the TRANSPOSE function as depicted below.
Transposing Data through the TRANSPOSE Function
Once again, envision possessing the same data (as illustrated earlier):
To transpose data using the TRANSPOSE function in Google Sheets, follow these steps:
Step 1: Select the cell where the transposed data should appear.
Step 2: Input the formula:
=TRANSPOSE(A1:B11)
Step 3: Press Enter.
The data instantly undergoes transposition.
Google Sheets autonomously identifies the data set’s row/column count, adapting the transposed data’s dimensions correspondingly. If cells designated for the TRANSPOSE function contain existing data, a #REF! error will surface.
Note, you cannot delete segments of the transposed array; complete removal of the data set is necessary.
Transposition via the Insert Menu
Google Sheets harbors a clever trick that allows accessing functions via the Insert menu on the toolbar.
The procedure unfolds as follows:
1. Click on the desired cell for row initiation.
2. Visit Insert > Function.
3. Opt for Array and select Transpose.
4. Highlight the desired range for transposition.
5. Press Enter.
The columns will morph into rows, commencing from the formula’s designated cell.
Transposing Rows to Columns Between Google Sheets

Leveraging the transpose function in Google Sheets, it’s feasible to switch rows to columns between different sheets.
Here’s how it’s done:
Step 1: Add a new sheet.
Step 2: On the new sheet, type in =TRANSPOSE.
Step 3: Return to the previous sheet and select the range for transposition.
Step 4: Complete the formula by closing brackets and hitting Enter.
The formula employed in this instance is:
=TRANSPOSE(Sheet1!A1:K2)
Notice how the formula incorporates the sheet name to reference the data from the first sheet. This approach transfers data from the initial sheet to the second one.
Common Queries Clarified
How to Transpose Data Every n Rows in Google Sheets?
For transposing data in batches, suppose you have a column (e.g., column A) and wish to transpose every n rows to n columns at once. Utilize the formula below:
=INDEX($A:$A,ROW(A1)*N-N+COLUMN(A1))
Replace “N” in the formula with your desired number of rows per batch. For instance, if you want to transpose every 3 rows, replace “N” with 3:
=INDEX($A:$A,ROW(A1)*3-3+COLUMN(A1))
Apply this formula to the initial cell of the transposed table and extend it to fill the remaining cells.
Exploring the Role of the TRANSPOSE Function in Google Sheets
The TRANSPOSE function performs a straightforward task: it swaps rows and columns within an array or cell range. Essentially, it changes a vertical orientation to horizontal or vice versa, effectively inverting rows and columns. This action is known as inverting rows and columns in Google Sheets.
Troubleshooting Transpose Issues in Google Sheets
If transposition isn’t functioning as expected in your Google spreadsheet, a few potential reasons are:
1. Insufficient editing permission.
2. Locked cells.
3. Limited space, as Google Sheets typically imposes cell limitations.
Wrapping Up
This manual delves into two methods for transposing data within Google Sheets: the Paste Special technique and the TRANSPOSE function. With these tools, you can efficiently switch between rows and columns. This newfound knowledge can greatly enhance your Google Sheets experience.
If you found this guide helpful, you might also be interested in learning how to split text into columns or exploring the broader functionalities of the G Suite beyond Google Sheets. In the latter case, consider delving into a comprehensive G Suite course for a comprehensive understanding.